KW Homestead

Pasture Raised Poultry & Edible Landscaping Plants Since 2013

Tag: ducks (page 2 of 5)

Pekin Ducks: Pasture Raised and Having Fun!

We started raising animals for our family, and have since expanded to be able to offer meats to your family, too! But you can be confident that we still raise our animals the same way we did in the beginning; with our family and the highest health and nutrition standards in mind. When you eat one of our Pekin ducks, you should know that your product is the best of each batch! We eat our duck, chicken, turkey, and eggs right along side you, and we keep the funny looking (pin feathers or a funny packaging job) for ourselves. We feed ourselves and our most beloved family the meat we raise, and name you part of our farm family! Thanks for supporting our poultry-raising endeavors… We’ll be proud to offer you meat for many years to come!

This video shows you how we raise our Pekin ducks. Raised the right way, on pasture and in the free air (with a couple guard geese as allies!).

.:.

Video Tour: Checking In On the Chicks, Turkeys, Ducks, and Piglets!

We have a lot of exciting things happening here at the homestead, with babies being born and gardens growing!

Check out this brief video tour to see what’s happening:

.:.

How To: Rendering Your Own Duck Fat

First of all, let me start by saying that cooking with duck fat is about the best choice you can make for your health and your taste buds. Duck fat is versatile and flavorful, it stores for long periods of time in your fridge, and a super long time in your freezer! Fantastically, it can be reused over and over (unlike butter or olive oil) and it has a high smoke point. What’s not to love?!

Duck fat has a rich, creaminess to it that rivals pork fat in “yum factor” and lends a subtle umami to any dish!

We recently rendered our own duck fat from our very own pasture-raised, non-GMO Pekin ducks. The process is simple (really) and since we also sell our unrendered duck fat, you too can make cooking with duck fat a reality!

All you need for rendering duck fat:

  • large pot
  • a few cups of water
  • long-handled, metal, slotted spoon
  • duck skin/fat pieces
  • time (a few hours)

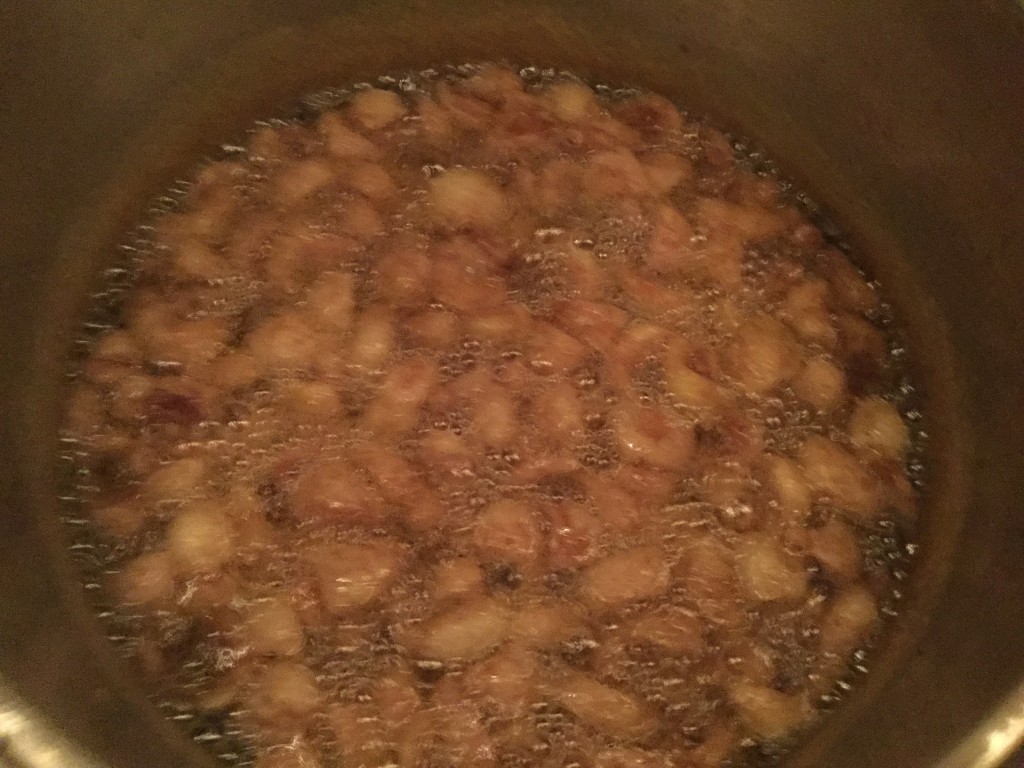
We began with 6 pounds of leftover, trimmed skin pieces from our butchering/portioning process. We placed all of this in a large pot and added some water (a cup or two) to the pot to ensure that the fat and skin wouldn’t burn. Then we turned the pot on low.
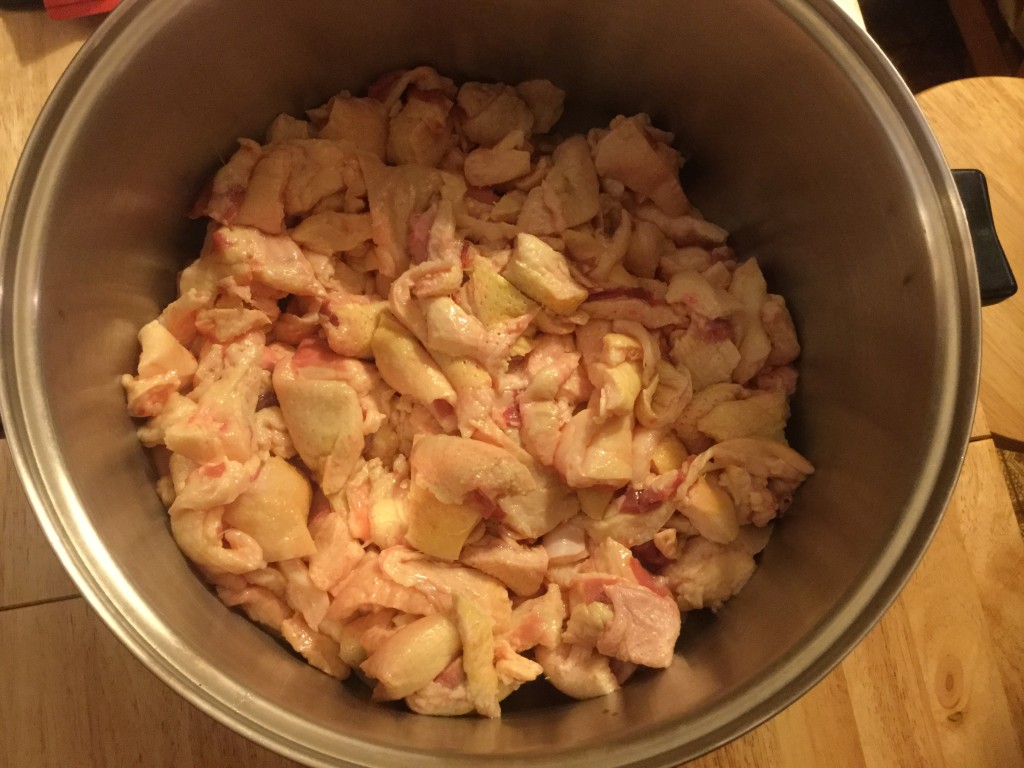
image

Once you get to this stage, you’re done with the hard part!

All you need to do now is keep an eye on your fat. Over time, you’ll see the fat start to cook out of the skin and the water will begin to evaporate (leaving just the delicious fat).
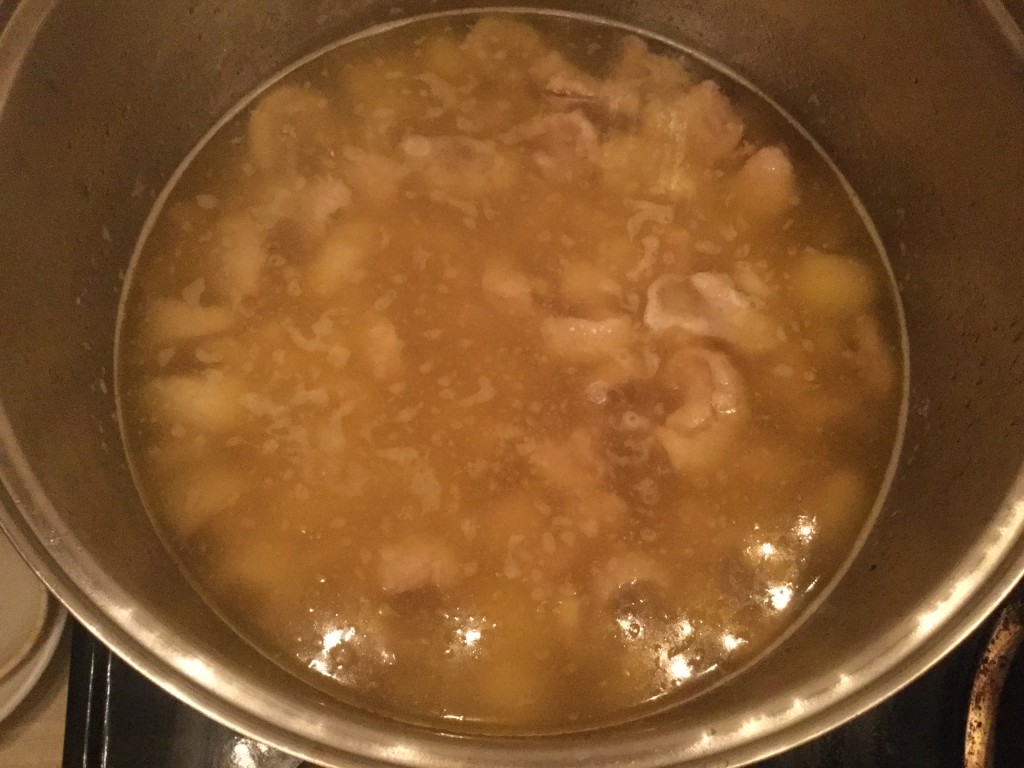
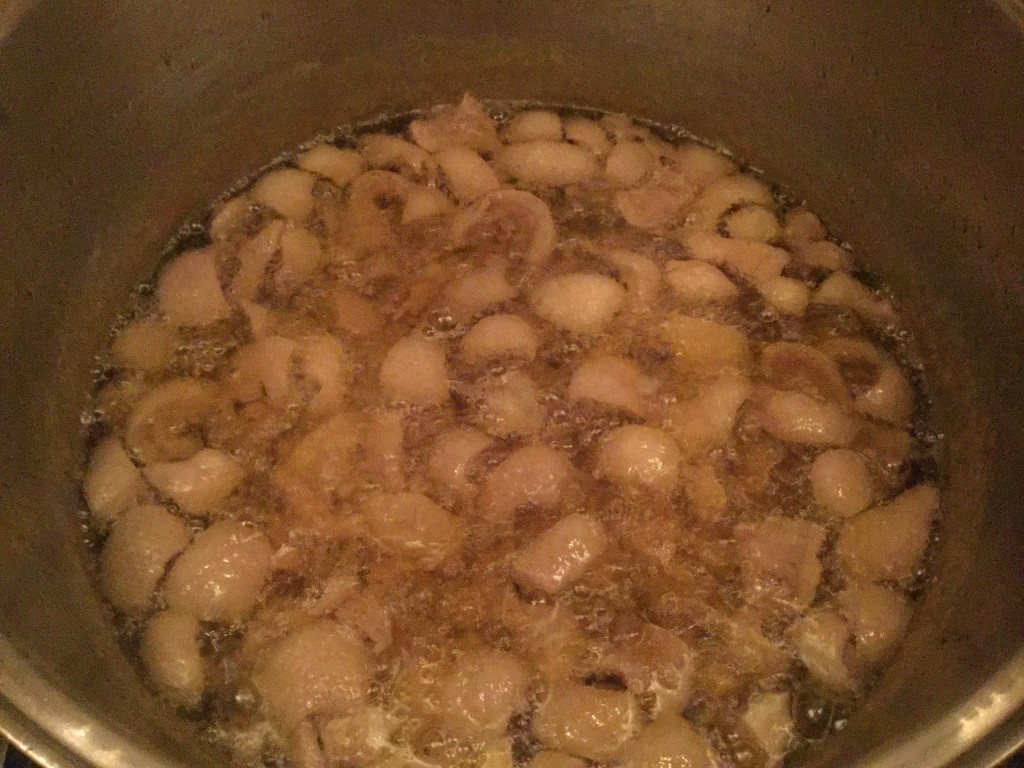
image

image

image

In the last stage, the skin with shrink and brown up. This is a sign that your fat is almost ready. Be sure to keep an eye on your fat, especially at this stage, since your little skin-bits are closer to burning, as well.
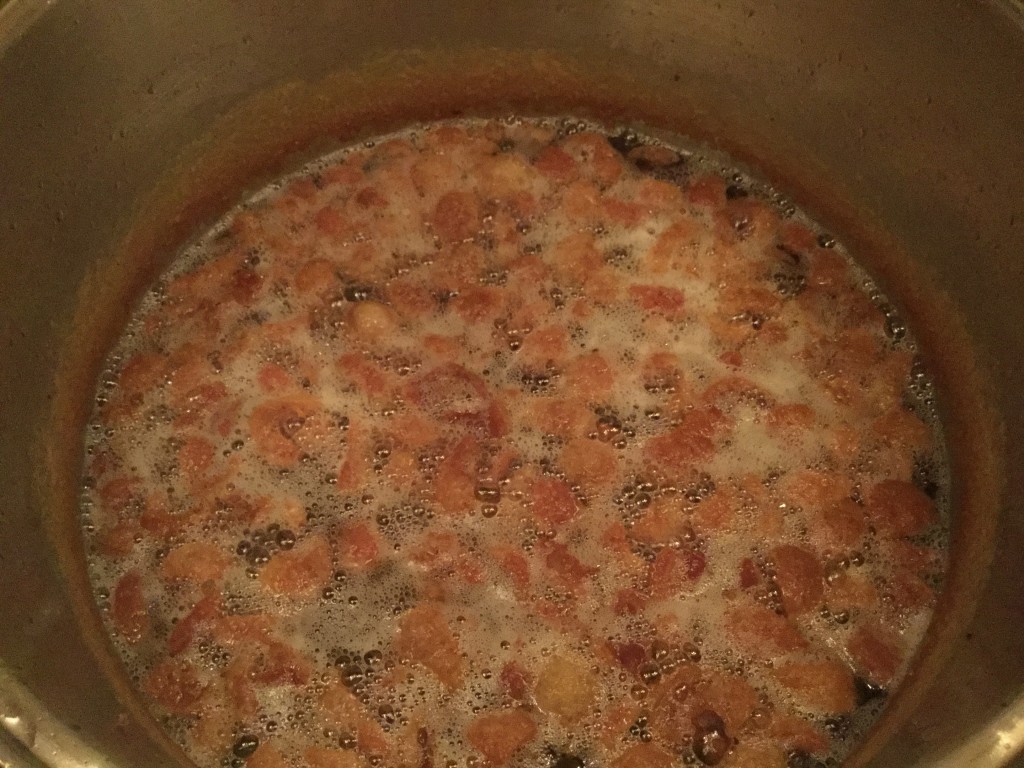
image

Once your skin bits are fully browned, your fat is ready! Remove your pot from the heat and let it cool for A LONG TIME. Keep in mind that fat is way hotter than water. Even though your fat will never reach its boiling point (this is intentional… Don’t let it smoke or boil!) it is going to be roughly TWICE AS HOT as boiling water. So be very safe when handling.

You can use a long-handled, slotted, metal spoon to scoop out your skin-bits, or cracklings. Let them drain over the pot before moving them to a place to dry and cool. Congratulations! As a by product of rendering your fat, you’ve creating the most delicious snack known to mankind: duck skin cracklings. Salt and consume with great decadence!
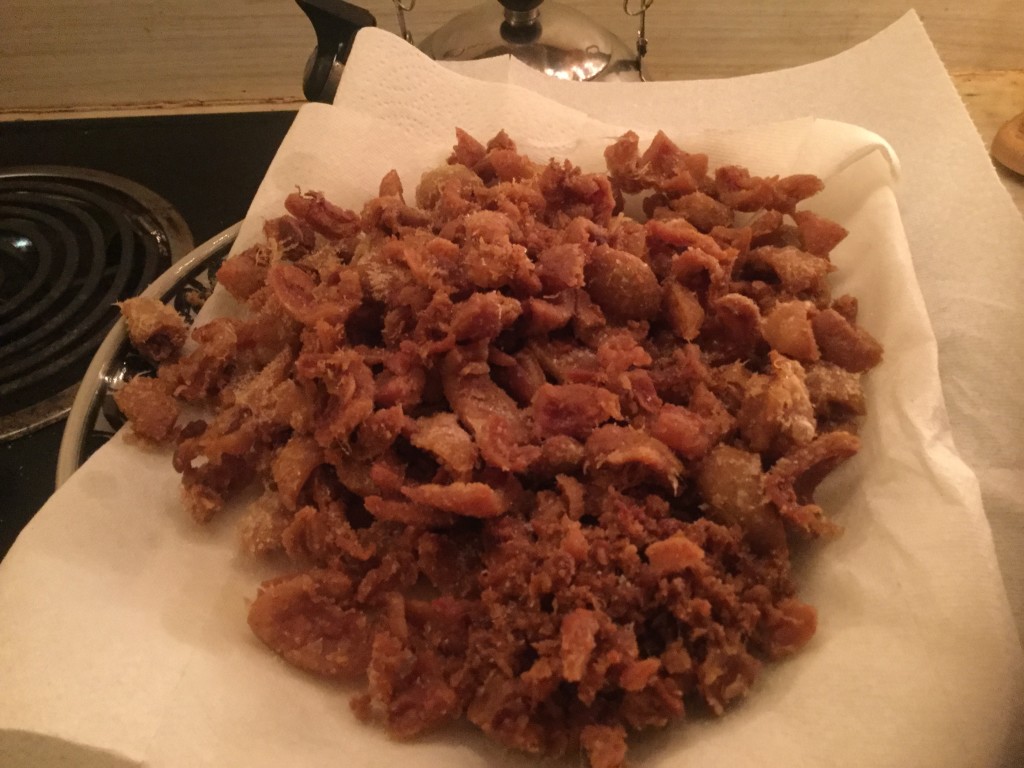
image

In the meantime, continue to let your pot of fat cool. We let our fat cool off for many hours before pouring it into containers for storage. Always be safe!
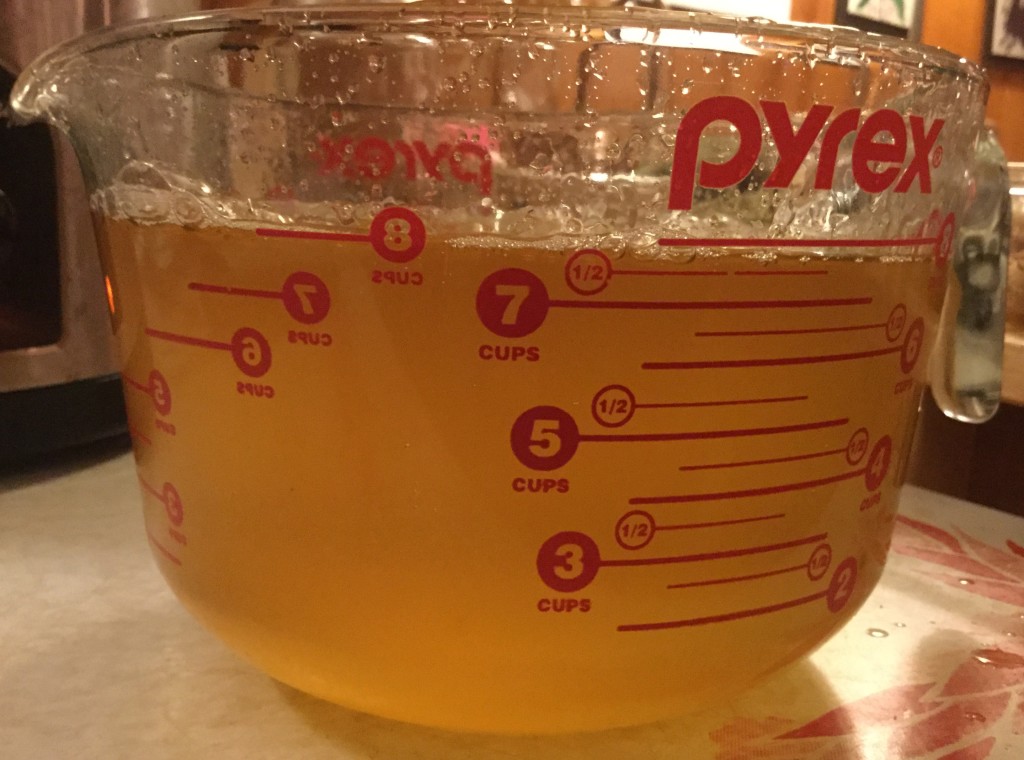
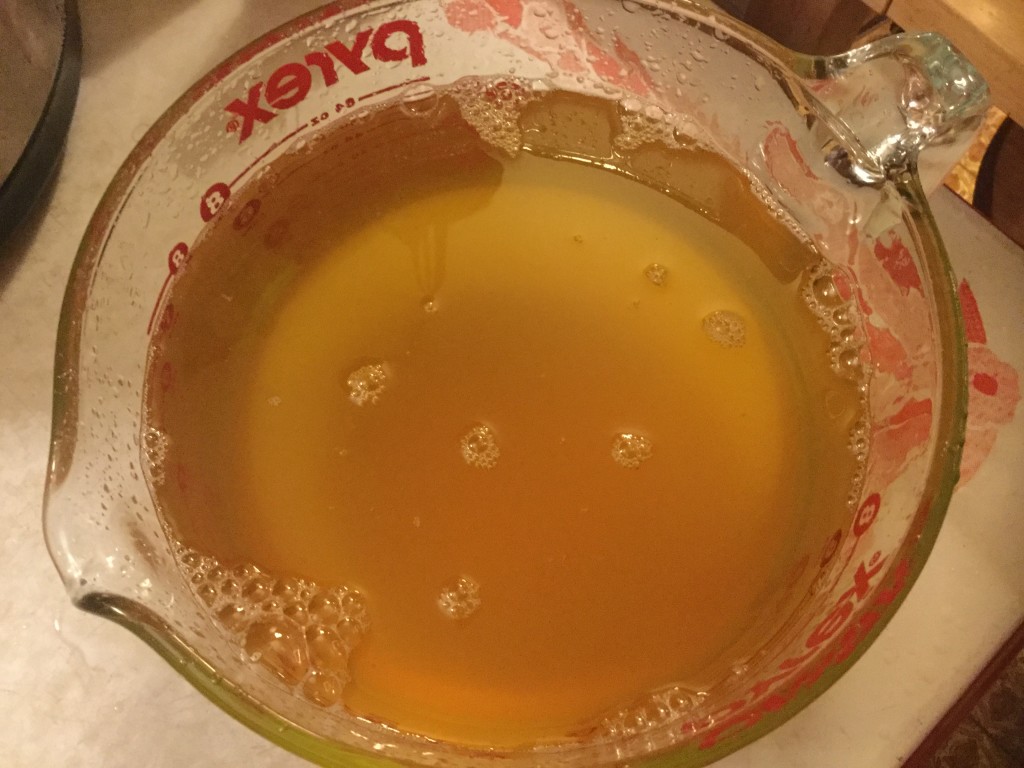
image

image

6 pounds of skin/fat pieces makes approximately 8 cups of rendered fat. We store ours in a huge container in the fridge and scoop out of it every time we fry eggs, sauté veggies, etc.

And sometimes, when no one else is looking, we sneak a small spoonful of just plain fat. We think of it as “duck fat ice cream.”

.:.

Cayuga Ducks for Sale: Your Own Backyard Duck Eggs!

We currently have a small flock of Cayuga ducks for sale. About 15 ducks (females) and 3 drakes are available for your family!

The Cayuga duck is a heritage breed that has been recognized by the American Poultry Association since 1874. The breed is an American breed, originating in New York state. They are prized for their plumage… They have black feathers that are iridescent green, purple, and blue! Such beautiful birds!

They are a duck unlike other ducks. As they age (even during their first year) and they loose feathers and grow new ones, their feathers grow back white (like an aging human!). Often by the end of their life span, they are all white, with black beaks and feet. Males are a little larger than females, and they have a curly tail feather that females do not have. Males are also much quieter (sometimes voiceless), and the females are thought to be less noisy than other common breeds of ducks like the Pekin.

Cayuga ducks

A Cayuga drake (back) and duck (front). Photo courtesy of www.purelypoultry.com

Their eggs are black or gray, and the pigment generally fades as the laying season continues. By the end of the laying season and as the years go on, your Cayuga duck might be laying eggs that only look off-white in color.

With all this information, you may be wondering…

Why Should I Raise a Few Back Yard Ducks for My Family?

  • Duck eggs are more nutritious than chicken eggs.
  • Ducks are easy to keep in a fenced backyard. They can only fly a few feet high, unlike chickens. They are also super easy to herd from place to place, like sheep. They often think as a unit and like to hang out with other duck buddies.
  • They are great for gardens because they do not scratch up your ground or yard. They simply mat the grasses down as they walk around.
  • They are great for pest control. They love slugs, bugs, and even larger critters!
  • Males are not aggressive, like roosters. You can have a small breeding flock of ducks without worrying about a rooster attacking you or making tons of noise!

So, now you’re interested in having some ducks of your own. Fantastic! But now you might be wondering…

What Do I Need to Care for My Ducks?

  • A space to close them in at night to keep predators away. Preferably not a house, since they much prefer to be under the open sky with a small rain cover. The rain doesn’t bother a duck, of course!
  • Duck food! We sell the Non-GMO Feed that we use for our laying flock. Ask us about it!
  • Lots of water! Ducks not only drink a lot of water, but they also love to play in it. We recommend a nipple water system for drinking (so they don’t get it dirty) and a baby pool for playing in!
  • A place to lay eggs. Some cozy straw laid out in their enclosure should suffice. Ducks tend to lay in the early hours of the morning so you should find your eggs when you go to let them out each day!

Who wouldn’t want some family ducks, am I right?

If you’re interested in purchasing Cayuga ducks from our homestead, email us (ourochreway@gmail.com) or give us a call (336.419.0724)! Cayuga heritage ducks are $30/bird.

.:.


Black and Gray Duck Eggs: What EGGactly Do You Mean?

As you know, we raise a variety of duck breeds. Some of our ducks are raised for meat and others are raised for egg production. When you look out over our land, you see white ducks (our meat ducks, called Pekins), dark brown ducks (egg ducks, called Khaki Campbells), light brown and multi-colored ducks (egg ducks, called Golden Layers) and black and green iridescent ducks (a multi-purpose breed, called Cayugas).

I was drawn to the Cayugas immediately. Seeing their beautiful green feathers and learning more about their breed, intrigued me! The most amazing thing about them is their eggs! They lay dark colored eggs but the color of their eggs change over time.

Cayuga eggs

Black and gray Cayuga duck eggs. Photo courtesy of https://www.pinterest.com/cmwannabe/

Their first eggs are generally black but they can also be dark gray. The more they lay eggs, the lighter their eggs become. And the very interesting thing about the pigment of their eggs is that the pigment isn’t as permanent as colored chicken eggs (like the green egg laying Americauna birds). With chicken eggs, the pigment stays on the shell even after eggs are cleaned. The pigment on Cayuga eggs, on the other hand, can be partially wiped off during the egg washing process, leaving you with an egg that has gray smears on the outside, rather than an all-black egg.

The end result looks funny, but the inside of the egg looks just like any other duck egg and tastes delicious, just the same!

Now that our Cayuga ducks have started laying eggs more regularly, we are offering our Cayuga eggs for $8.50/dozen and $5.50/half-dozen. These eggs are a novelty to cook with, and kids love looking at the crazy shades of gray that appear in their dozen! Don’t forget to try dying these multicolored, gray eggs for Easter… Your end result might just look tie-dyed!

.:.

Introducing Duck Portions: Breasts, Legs, Liver, Hearts, Fat, and More!

We’re so excited to introduce a new poultry product.

Well… Not really a new product, but a new package and portion-size!

We’re offering the same delicious and nutritious Pasture-Raised, non-GMO Pekin Duck as before, but now you can get it in any portion or cut that works for you and your family!

Sometimes you really just want some sizzling, crispy-skinned, pan-seared duck breast. Other times, duck leg confit will do! And what about duck soups? Our duck necks and carcasses are perfect for making a warm and cozy soup or broth to get you through the rest of the chilly winter. And duck liver pate? Don’t even get me started… Yum!

Our pricing for our duck portions is as follows:

Duck Breast — $19/lb.

Duck Legs — $13/lb.

Duck Wings — $4/lb.

Duck Hearts — $15/lb.

Duck Liver — $20/lb.

Duck Fat (Unrendered) — $7/lb.

Duck Carcass — $4/lb.

Duck Meat Trimmings —$8/lb.

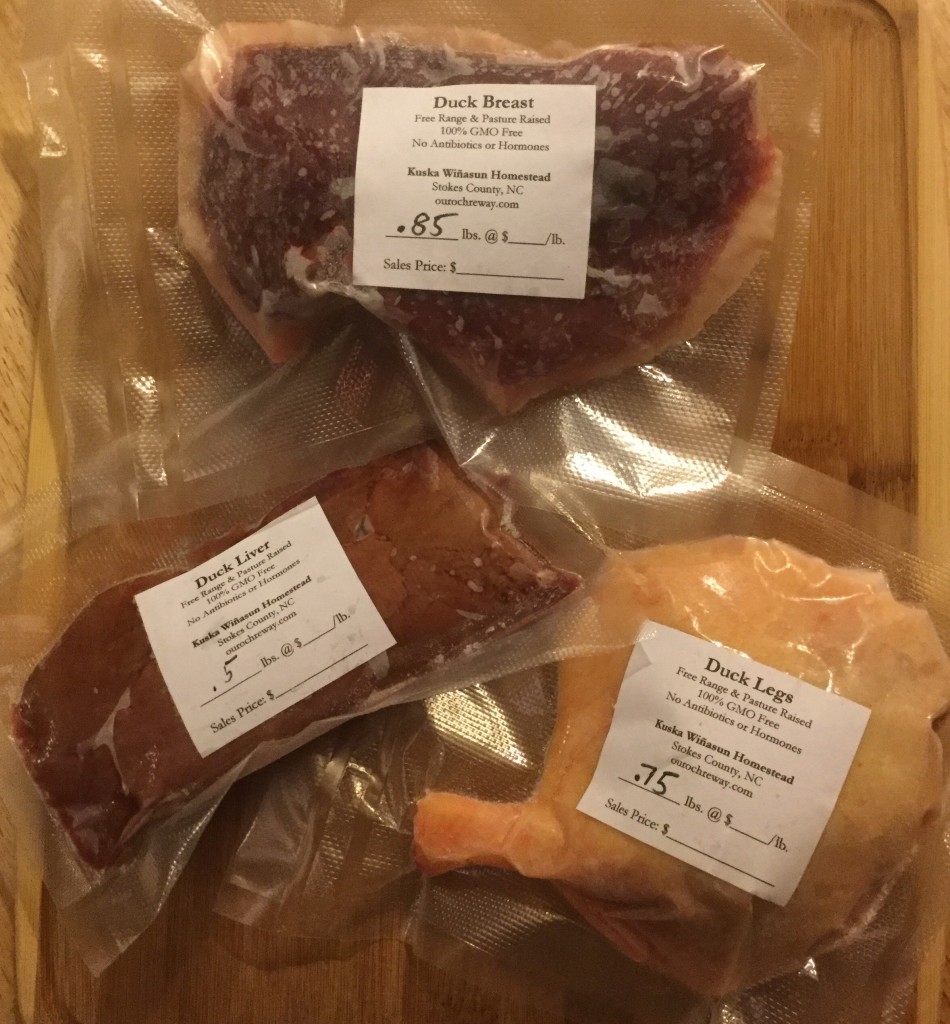
Duck

Duck portions: leg, breast, and liver.

If you’re interested in ordering or reserving our products, email us at ourochreway@gmail.com and ask!

.:.


Whole Pekin Ducks for Winter!

The New Year is coming your way, and we all know that with the onset of Winter also comes the chill. What better way to celebrate the colder weather than with one of our whole Pekin ducks?

Our next batch of Pekin ducks will be the last batch for sale until Spring rolls around. So, now is the time to reserve your bird to ensure that you not only get one, but that you get the special rate that we are offering through December 6!

That’s right! If you reserve your whole Pekin duck BEFORE December 7, you will only pay $6/pound. If you reserve on December 7 or later, our standard rate applies to your duck ($8/pound).

We sold our first batch of Pekin ducks last month and since then we’ve gotten some pretty fantastic feedback. The phrases “best duck ever,” “fantastic,” and “delicious” have been used… So don’t miss out!

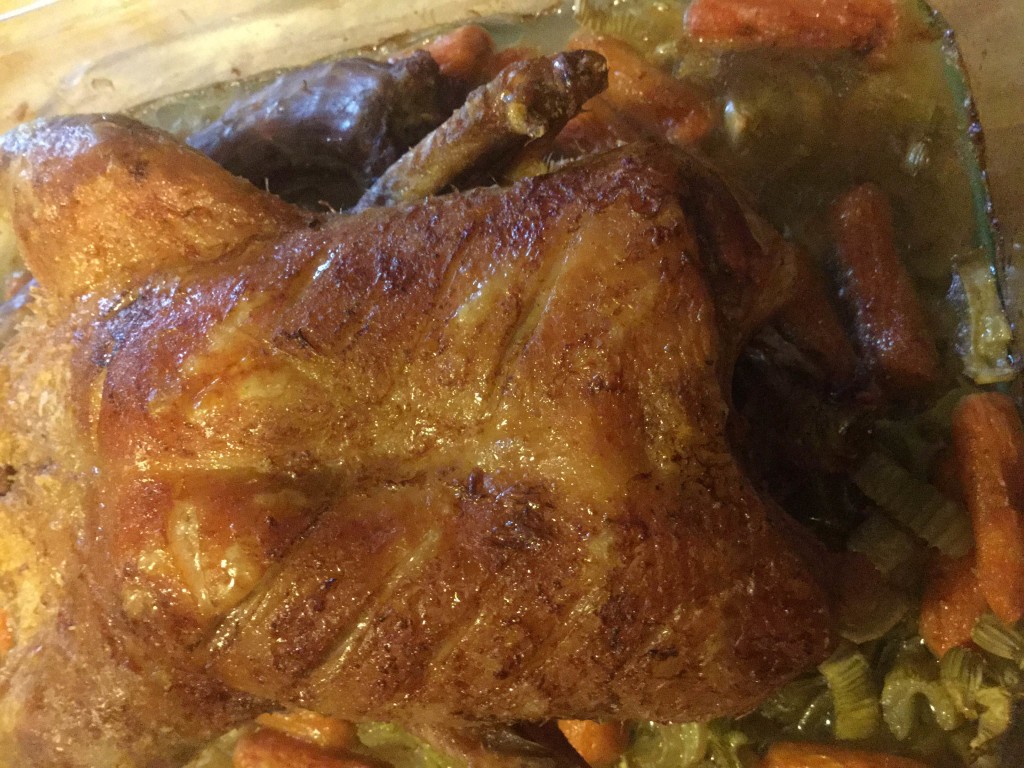
duck

An oven-roasted Pekin

Our Pekin ducks are raised outside on pasture over the course of their life spans, and are fed non-GMO grain. They are humanely raised and harvested, spending their lives breathing fresh air, eating bugs, lounging in the grass, and swimming in their pool.

Check out our Pekin Ducks page for more information or email us at ourochreway@gmail.com to reserve your delicious ducks!

.:.

Pekin Duck Recipe 4: Lower Heat, Longer Time

We’ve been experimenting with Pekin duck recipes over the last few weeks, learning about the best ways to cook our new favorite meal! We want to offer you some of our thoughts about our simple recipes, in case you are new to cooking duck and wonder how it should be done. So far we’ve cooked 4 ducks in 4 different ways, and we do have our favorite techniques! The exciting thing that we’ve learned from all this cooking, is that it’s really hard to ruin duck, short of burning it. There is so much fat that the meat never dries out the way chicken or turkey does when overcooked. Knowing this should help quell your fear about cooking duck… Just go for it!

Here is the fourth recipe we tried!

Lower Heat, Longer Time (and a Pan Seared Breast): 250 degrees for 3 hours, 350 for 45 minutes, and a quick broil

First, cut out the breast! When you remove the breast before you cook the meat for any length of time, it allows you to choose your desired meat temperature/color when you cook it. This is our favorite way of dealing with the bird, since the skin gets all crispy in the pan! Yummy!

Then, score the skin on both sides so that the fat will cook out of the bird and pool in the bottom of the dish. This allows the meat to stay moist but the skin to get crispy!

Cover the duck liberally with salt and garlic powder.

Place the duck, breast down, in a dish and cook for 3 hours at 250 degrees. Then continue cooking the duck at 350 degrees for 45 minutes longer. If you desire even crispier skin, finish off the bird in the oven for a few minutes on broil.

At any point in time, cook the breast in a skillet on the stove. Cook it on medium heat, skin side down so the skin becomes crispy and the fat runs out into the pan! Cook it to the desired color (we think pink is the best)!

IMG_1403.PNG

Taste Test:

The breast was moist and delicious, with crispy skin! It tasted like a tender cut of beef and was very pink and juicy. This was our favorite breast, since we didn’t cook it in the oven before pan searing it!

The legs were moist and falling off of the bone! These were our favorite thighs to date. Also, the rest of the bird stayed moist and didn’t dry out even though it was cooked for almost 4 hours!!

The skin was super crispy, Jason’s favorite!

Yum!

Through all of this taste testing, we learned that duck can withstand a lot of weirdness and still be great! So don’t be afraid to try out your own recipes. And if you do… Let us know about them here!

.:.

Pekin Duck Recipe 3: Medium Heat, Pan-Seared Breast

We’ve been experimenting with Pekin duck recipes over the last few weeks, learning about the best ways to cook our new favorite meal! We want to offer you some of our thoughts about our simple recipes, in case you are new to cooking duck and wonder how it should be done. So far we’ve cooked 4 ducks in 4 different ways, and we do have our favorite techniques! The exciting thing that we’ve learned from all this cooking, is that it’s really hard to ruin duck, short of burning it. There is so much fat that the meat never dries out the way chicken or turkey does when overcooked. Knowing this should help quell your fear about cooking duck… Just go for it!

Here is the third recipe we tried!

Medium Heat, Pan-Seared Breast: 325 degrees for 1.75 hours

Score the skin on both sides so that the fat will cook out of the bird and pool in the bottom of the dish. This allows the meat to stay moist but the skin to get crispy! Do not score the skin over the breast!

Cover the duck liberally with salt and garlic powder.

Place the duck in a dish and cook for 1 hour. At the end of the hour, remove duck from oven and cut out the breast. Return the rest of the bird to the oven and continue cooking 45 minutes longer. Be sure to flip the bird a few times during the total cooking period.

Now, finish off the breast in a skillet on the stove. Cook it on medium heat, skin side down so the skin becomes crispy and the fat runs out into the pan! Cook it to the desired color (pink is the best)!

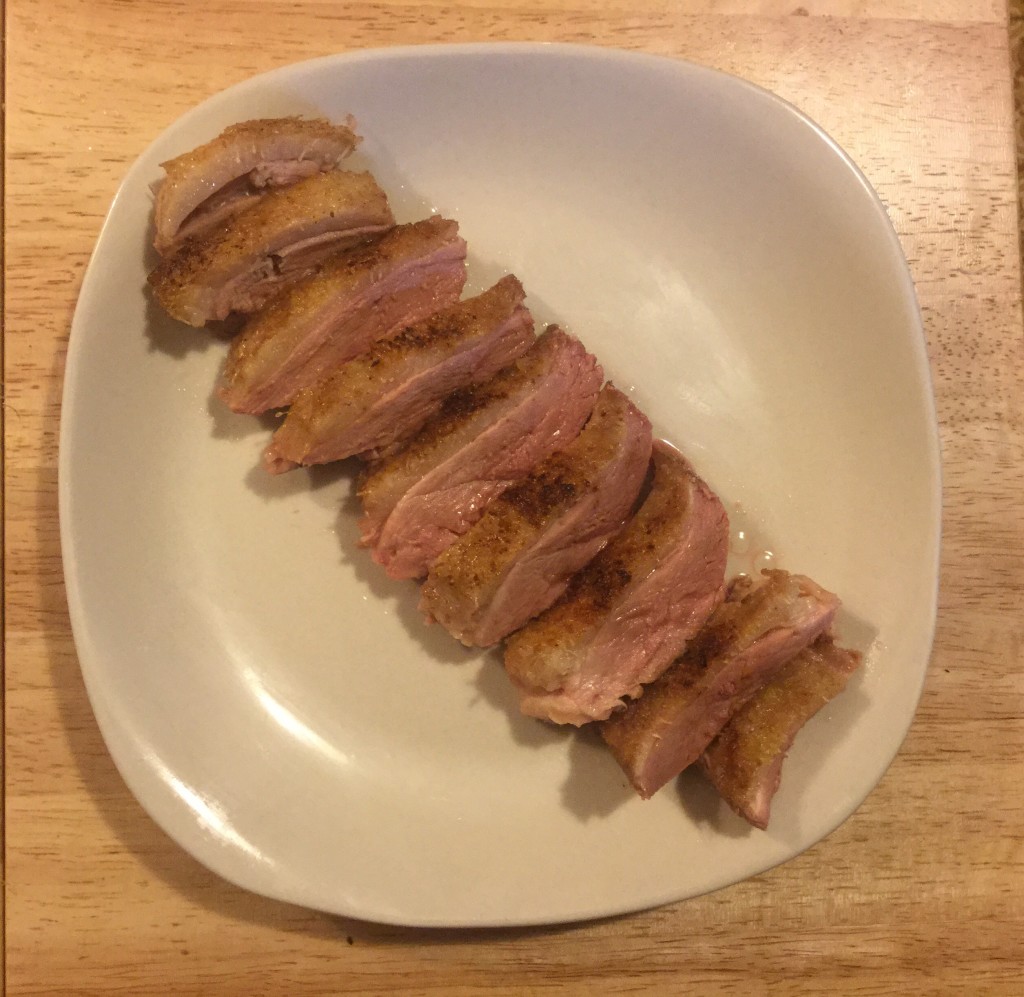
duck breast

Pan-seared duck breast!

Taste Test:

The breast was moist and delicious, with crispy skin! It tasted like a tender cut of beef, and was best served pink. Our second favorite breast, since we thought that we could have cut it out of the bird earlier, around 30 minutes…. Then pan-seared it.

The legs were moist and very good, but not our favorite thighs to date. In fact, the entire bird remained moist (just like with the second recipe)!

The skin was crispy–perfect for me! Jason thought that we could have cooked the bird maybe 30 minutes longer for even crispier skin.

Stay tuned for the fourth recipe we tried!


.:.


Pekin Duck Recipe 2: Medium Heat, Roasted Breast

We’ve been experimenting with Pekin duck recipes over the last few weeks, learning about the best ways to cook our new favorite meal!We want to offer you some of our thoughts about our simple recipes, in case you are new to cooking duck and wonder how it should be done. So far we’ve cooked 4 ducks in 4 different ways, and we do have our favorite techniques! The exciting thing that we’ve learned from all this cooking, is that it’s really hard to ruin duck, short of burning it. There is so much fat that the meat never dries out the way chicken or turkey does when overcooked. Knowing this should help quell your fear about cooking duck… Just go for it!

Here is the second recipe we tried!

Medium Heat, Roasted Breast: 325 degrees for 2.5 hours with veggies

Score the skin on both sides so that the fat will cook out of the bird and pool in the bottom of the dish. This allows the meat to stay moist but the skin to get crispy!

Cover the duck liberally with salt and garlic powder.

Place the duck, breast up, in a dish filled with your favorite veggies (we used carrots, celery, and onion). The great thing about this is that the veggies will soak up the duck fat and become the most delicious veggies you’ve ever tasted! Add as many veggies as you’d like… There is plenty of duck fat to go around!

duck

The finished product!

Taste Test:

The breast was moist and delicious, but it wasn’t our favorite technique to date!

The legs were a moist and very good, but not our favorite thighs to date.

The skin on the top of the bird was crispy, and my favorite skin overall! But, since the bird was not flipped during the cooking time, the skin adjacent to the veggies was not crispy!

Stay tuned for the third recipe we tried!

.:.


Older posts Newer posts

© 2024 KW Homestead

Theme by Anders NorenUp ↑