KW Homestead

Pasture Raised Poultry & Edible Landscaping Plants Since 2013

Page 46 of 50

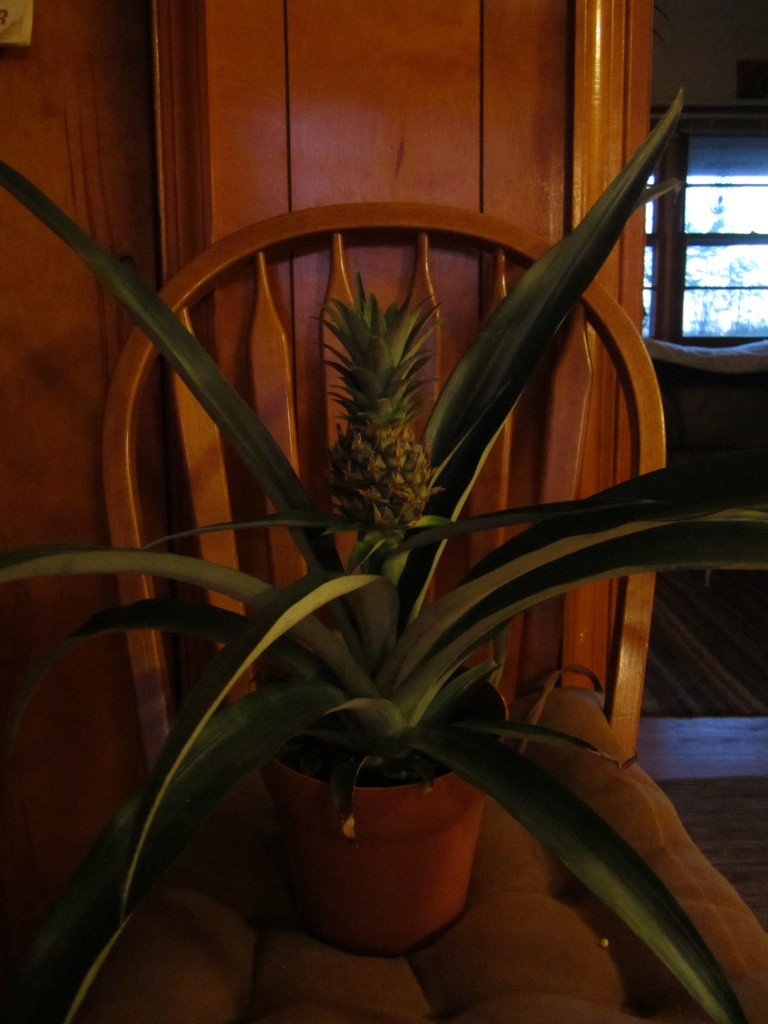
pineapple plant: a delicious gift!

my birthday was last week and one of my co-workers, who i admire very much, gave me a pineapple plant! amazing!

this might make me sound ridiculous, but i really had no idea that another pineapple (Ananas comosus) could grow from the top of your old pineapple! my parents and i did do interesting growing experiments when i was a kid; with avocado, celery, or potatoes, but never with tropical fruits. we live in zone 7 (while the pineapple plant likes zone 9) and so i suppose my parents never thought that they would be able to keep a living pineapple plant alive. so, i was excited to learn more about this super cool (and sharp) bromeliad!

IMG_1522

my new pineapple plant!

first of all, the pineapple plant needs warm weather and should never be allowed to be exposed to temperatures less than 20 degrees. this means that to grow it in our area, we will need to keep it inside or in a greenhouse. my plan is to keep it inside near a very sunny window until true spring and summer hit and then give it some time outside in the bright sun. it also likes soil that is somewhat moist so i expect i’ll need to water it at least once a week while inside and every few days while it’s outside basking in the sun.

it is great to have this plant as an addition to our homestead; pineapple is rich in manganese and vitamin c, and the juice can help breakdown and digest protein. my mother always says that some pineapple for dessert is a great thing for aiding in digestion! also, the fruit and the root can be eaten or applied to the skin to act as an anti-inflammatory.

a last fun fact about pineapple: a pineapple will never become any riper that when it is picked! unlike other fruits, a pineapple does not ripen once removed from its plant. instead of “ripening,” the pineapple gets soft once an enzyme inside of it gets activated. this enzyme works to break down the structural material inside the plant. cool, huh?

cool… just like the smoothie that my yummy pineapple will end up in sometime in the future!

.:.

Giving Dogs Bones: The How and Why

With the recent scares, recalls, and revelations of questionable ingredients in commercial dog food, it’s no wonder that many pet owners are looking for a better way to feed their canine companions. Homemade dog food is one, noble option that many, including us, have turned to.

Because dogs have co-evolved with humans for so long they can eat, digest, and derive nutrition from many of the foods that humans eat (check out NOVA’s Dogs Decoded Documentary, here on youtube, for more on the bond between dogs and us). That is, many of the foods humans used to eat. Hunter/gathers didn’t frequent McDonald’s, and your dog shouldn’t either.

One thing that is a great supplement to your dog’s diet are bones. Dogs love to chew on and eat bones. They have been doing it for thousands of years, both in the form of leftovers from humans, and from wild game they took down themselves.

Bones supply calcium, an essential mineral and nutrient for healthy canine growth, development, and well being. Without a healthy dose of bones, you must supply this calcium in other ways, either in the form of supplements or in egg shells. But the most natural way for dogs to obtain calcium is by eating bones.

Chewing on bones also helps to keep a dog’s teeth and gums healthy. If a dog doesn’t have bones to gnaw on, they may turn to other sources, such as your furniture, shoes, or tool handles. A nice bone session also lets a dog focus his energy, and is good mental stimulation. These kind of activities, like a long walk, can do wonders to improve poor behavior and help calm stressed or nervous dogs.

Our number one resource for all things pet health has been Dr. Pitcairn’s Complete Guide to Natural Health for Dogs and Cats, and in it Dr. Pitcairn lays out a few guidelines to consider when giving your dog bones. First, avoid chicken bones as they easily splinter and can hurt your pet. Try to focus on bones larger than your dogs head, so that they won’t be able to swallow it whole.

Don’t feed cooked bones, only raw ones. Cooked bones also tend to splinter and could be dangerous. Also, avoid feeding frozen bones because your dog may chip or break a tooth. Let them thaw out a bit first.

Dr. Pitcairn also recommends giving your dog a “bone fast” where he eats nothing but bones and has access to plenty of clean water all day. This simulates the natural conditions of predators, and can help clean out your dog’s system and keep him healthy and strong.

Here are some of the things we have learned while feeding bones to our young dog Bolt:

Always watch them carefully; Bolt can chew through a bone in almost no time, especially the epiphyses, or ends of the bone. These smaller pieces can become choking hazards.

Watch out for food aggression issues when feeding bones, especially with dogs that have shown this behavior before. When Bolt was little, he had some food aggression issues–we solved them–but a nice meaty bone can be sooo delicious that your dog may forget himself a bit, and get defensive over it. I try to make sure that he sits, and drops the bone before I take it, and I like to “trade” a piece of meat or other snack for the bone.

I wouldn’t give a dog a bone when other dogs are around. Again, such a treat could lead to a fight and some hurt feelings. If you have two dogs, separate them and give them each a bone to chew on.

As long as you follow a few simple guidelines, feeding your dogs bones is a great way to improve their nutrition, health, and behavior. Introduce bones slowly to their diet, and always watch keep an eye on them.

If you can’t or don’t want to feed raw bones to your dog, try making bone broth. Basically a super charged stock, where bones are cooked down in water (with a touch of vinegar or lemon juice) for hours until they turn to mush. When you can smush the bones between your fingers, it’s done. Add a scoop to the top of your homemade dog food for an extra jolt of calcium and other micronutrients that are present in the bones. Your dog will love it.

low budget, homemade save-the-dates for our (ochre) wedding

last week we designed and completed our save the dates for our wedding. we really wanted the design to be simple and we decided that making/printing them ourselves would be cheaper and more fun!

i bought a multi-colored pack of card stock, which included 50 sheets of each color: yellow, cream, green, blue, and gray, and i also bought small, cream-colored envelopes designed to fit 1/4 of a regular sheet of paper.

i designed the save-the-dates so that 4 of them would fit on each page, landscape style. this allowed them to fit perfectly in the envelopes and also meant that we only had to print 15 pages (since we only needed about 60 or so save-the-dates). we chose the blue card stock for our save-the-dates and will likely use the other 4 colors in some form when we design the official invitations in the next few months.

the overall design for the save-the-dates is not very complicated. the card is one-sided and on the left we chose a simple clip art image of a black and white farm (house, field, and silo). on the right half of the page we included the special event, our names, and the general location (our city).

even though the design and printing did not take very long, there were other details that did take some time: when i bought the card stock and envelopes i also bought a do-it-yourself stamp kit and decided that the old-fashioned look of the stamp would be a nice addition to the cards!

it took forever to properly place the letters in the stamp for each of the 3 designs i wanted to use, but in the end i loved how the cards and envelopes looked!

cards

the back of our save-the-date cards, stamped and ready to be mailed!

i used the stamp for:

  • our return address on the front of the envelope
  • the words kuska wiñasun homestead on the back of the save-the-dates cards
  • a design i put over the flap of the envelop once it was sealed, that included our initials (with a little house symbol in between) and our wedding date (see the picture above)!

i also added a little bit of color to the black-and-white image of the farm, using a silver sharpie for some shine!

and that was it, really!

i’ve also made a spreadsheet which includes all households and has columns for the number of people invited for each household, if their save-the-date has been mailed, if their official invitation has been mailed, how many people are confirmed as coming, etc. although i won’t be looking at most of the columns in this spreadsheet until months from now, making it was very helpful in making sure that i didn’t skip anyone or address two envelopes to the same household! it makes me feel very on top of the whole thing–which is key for weddings, as i understand it!

almost 6 months until the wedding, now! wow!

.:.


farm food friday: savory venison stew recipe

we have another snow day on our hands and what better way to spend the day than slurping up a delicious and nutritious venison stew?! this recipe is jason’s newest specialty, who fearlessly makes soups without written recipes, and due to his copious adding of spices, they always turn out to be excellent!

jason has made this stew twice so far, and included different vegetables in the pot based on what we had in the house at the time. i’ve asked him what exactly he added to these soups, and his response has been: “you know what i do, you know, earthy spices.”

in order to make this stew more manageable for those of you at home, i’ve put his description of just how he does it into my own words:

in an ideal situation, which means having all of the ingredients around that we want to use, this is what goes in our savory venison stew…

the ingredients:

  • venison butt/rump roast (or any roast of beef that you would like to use, preferably with the bone or with any stew meat)
  • one large onion
  • 4 large carrots
  • 3 large shafts of celery
  • 5 or 6 medium-sized potatoes
  • salt & pepper
  • 5-10 garlic cloves and/or garlic powder, oregano, basil, paprika, 1-2 bay leaves
  • red wine
  • olive oil
  • beef broth, chicken broth, venison bone broth (if you’ve made some in advance), or just plain water if you don’t have any broths in the house.

keep in mind that if you are missing any of these ingredients, you need not abandon ship yet! any other earthy spices that you have (such as rosemary, etc.) can be added/substituted and other vegetables can be included. for example, the second time jason made the stew, we did not have potatoes or onions. he instead added more celery and included our own sweet potatoes, which turned out to make a different and interesting soup!

some things to have prepared first:

  • have your crock pot out and ready to go! if you do not have a crock pot, i recommend getting one, as it can be left on all day while you are at work without any risks associated. but, if you do not have one currently, you can certainly use a large pot and cook the recipe on your electric/gas stove on low/medium.
  • set your meat out of the fridge for about an hour so it has time to warm up.
IMG_1486

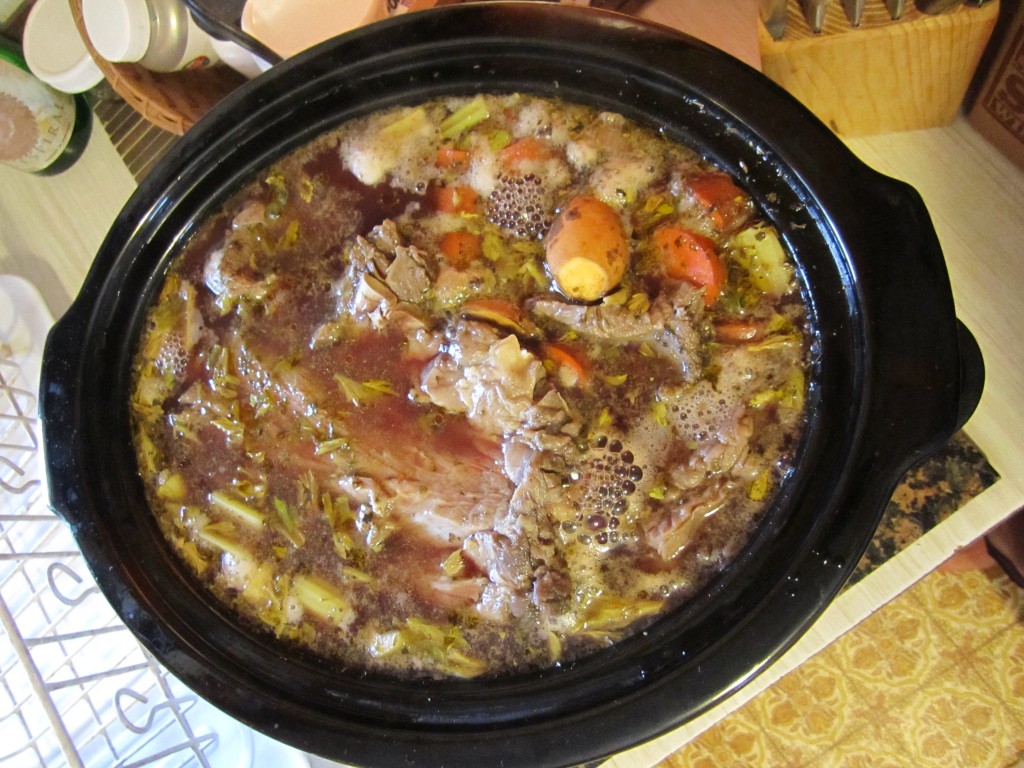
savory venison stew, 4 hours into cooking. yum!

and the directions:

  1. cut onions, carrots, celery, and potatoes into medium-sized pieces.
  2. rub a seasoning of salt, pepper, garlic powder, paprika, oregano, basil, and olive oil over the meat. pre-heat the oven to 400 degrees.
  3. place cut vegetables (as well as whole garlic cloves, if you are using some) into a deep, large, casserole dish.
  4. douse the vegetables with olive oil and generous amounts of all of the above-mentioned spices. add 1/4 cup of red wine over the spread.
  5. place the meat on top of the vegetables and put in the oven for 10 minutes or until the meat is braised and brown and the vegetables have a roasted look.
  6. once dish is removed from oven, transfer the meat and veggies to the crock pot and add 1/4 cup of red wine to the casserole dish and stir while scraping the bottom. this ensures that you get all of the little, roasted pieces of food and spices! add this mixture to the crock pot.
  7. add 1 or 2 bay leaves. decide now if you want more spices added, based on your personal tastes and add them!
  8. fill up your pot/crock pot with your choice of broth!
  9. cook the stew in your crock pot on low for about 8 hours (longer wouldn’t hurt) or on your stove on medium or low until the meat can be easily shredded but before your vegetables are reduced to a pulp!
  10. serve and enjoy!

.:.

Random Farm Stuff: Spreading Seeds, Mulch, and a Garlic Update

Kuska Wiñasun Homestead is ready for spring. It’s been nice enjoying the winter weather and the change of the seasons, but I personally can’t wait to see those first dandelions and clover blossoms. The maples are budding out, but it’s still cold. We got more snow, ice, and sleet today, and it should continue into the morning.

This constant cycle of freezing and thawing should help the seed mix I broadcast this weekend by improving soil contact and moisture. I sowed a nice mix of perennial herbs, annual grains, and a few random vegetables thrown in for fun. The base of the mix was dutch white clover, a low lying leguminous perennial that fixes nitrogen and feeds the bees and chickens. To that I added a good bit of chicory, some plantain, alfalfa, vetch, and lambsquarter. I also mixed in some oats and wheat, as well as a packet of daikon radish, lettuce, spinach, chamomile, broccoli, cilantro, and old packet of yellow squash.

We’ll see what takes and what doesn’t, but there should be more than enough vegetation in the old chicken pens where I over-seeded the mix. If there are any blank spaces, we can follow up with some amaranth, chia, buckwheat, and some  more lambsquarter after the soil warms up a bit.

seeds homestead

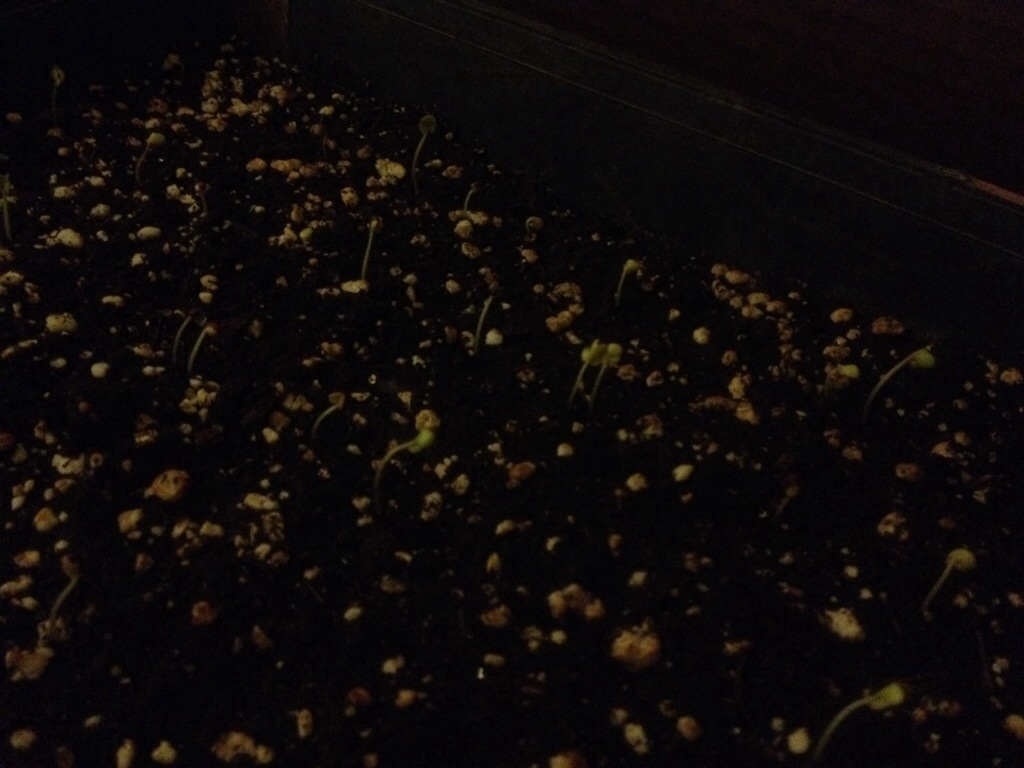
Broccoli and cabbage seedlings starting to germinate.

There’s also been some vegetable seed starting. We have a flat of De Cicco broccoli and White Acre cabbage that has begun to germinate. After they gain some true leaves, and some strength, we’ll transplant them out in the garden for a nice early spring crop, and hopefully get the chance to make some lacto-fermented sauerkraut.

There haven’t been anymore hawk attacks on the chickens but they seem a bit more skittish than usual. We bought a bale of straw today from the feed mill, and they scratched it around all afternoon while they picked out seeds, weeds, and bugs. They’re great mulch spreaders, and a nice layer of manured straw should protect the soil from spring rains, lock up some of the extra nitrogen from the chicken poop, and slowly decompose into wonderful topsoil.

I pruned our dwarf apple trees a few weeks ago and am trying to get some of the cuttings to take root. Apples are normally propagated by grafting, but they can also be grown from cuttings under good conditions. I’m doing a mini experiment, and I have different sizes of cuttings from different trees, some cut below buds, some above buds, and some just tips of growth.

apple cuttings willow

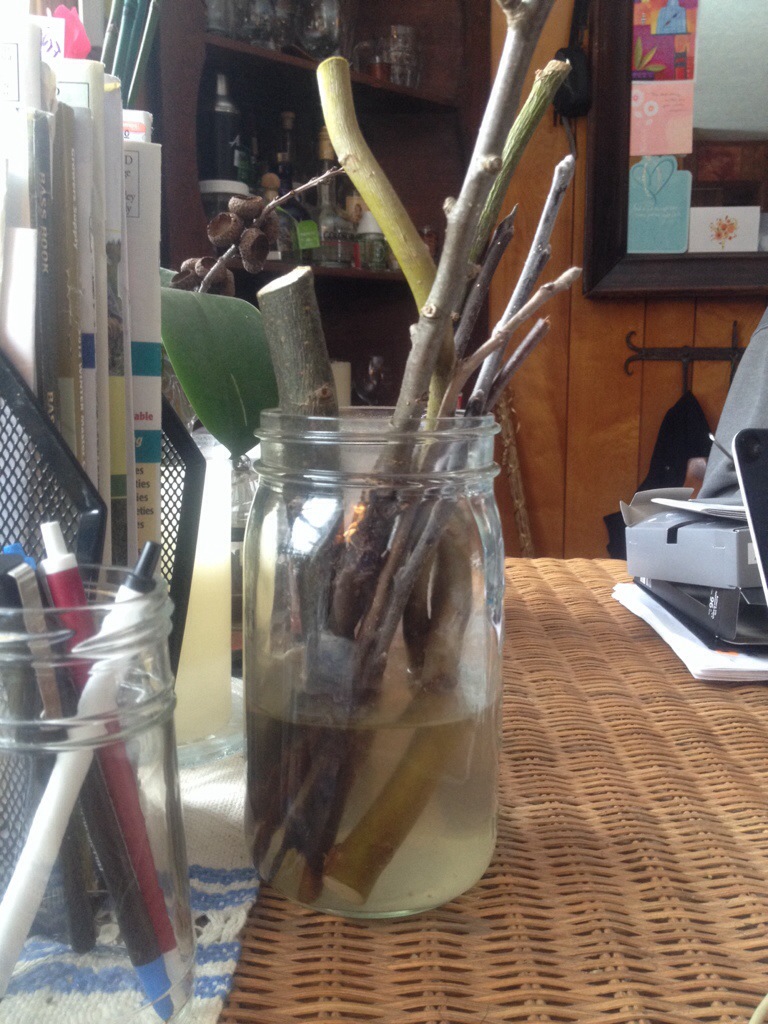
Apple cuttings in water with pieces of willow.

The majority of the cuttings are simply jammed into either our raised garden beds, or into the sides of our garden swales. The rest are on our kitchen table inside the house in a Mason jar filled with water and pieces of willow. The willow contains natural rooting hormones that encourage the growth of root.

The garlic has really perked up the last few weeks. We were worried for a while there that it had gotten too cold too soon for our garlic crop, but that doesn’t seem to be the case. I’ll try to get a picture up soon.

almost completed chicken tractor in the snow

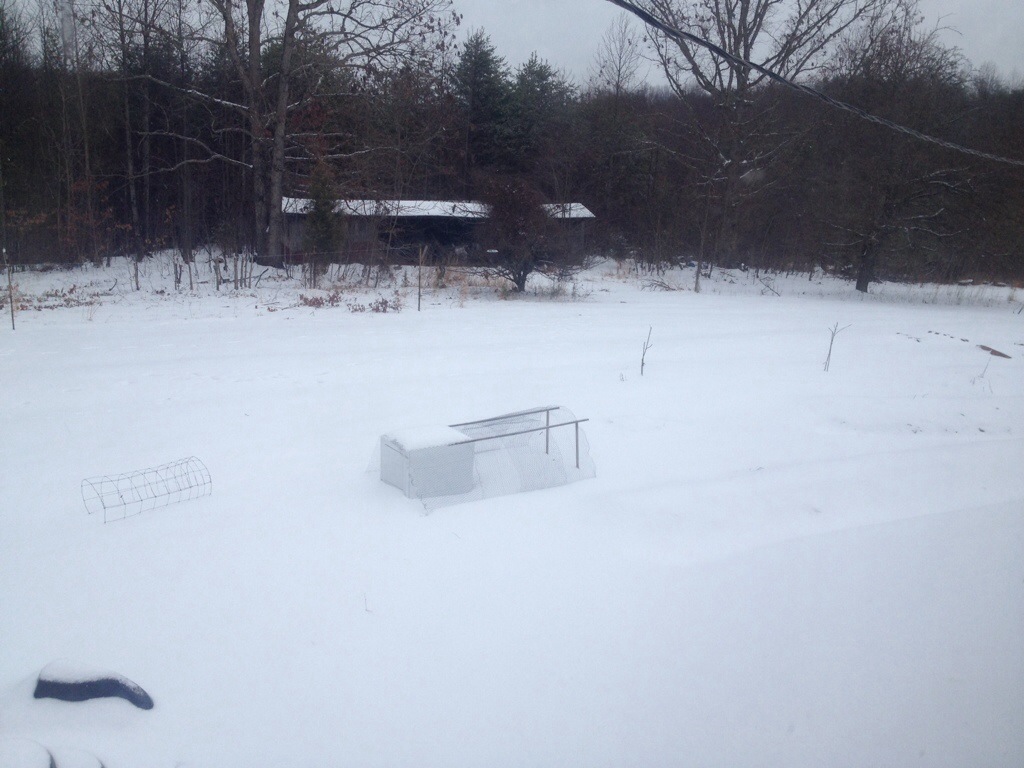
Almost completed chicken tractor in the snow. Those 2 sticks to the right are the dwarf apple trees after a serious pruning.

I’m also almost finished with a new chicken tractor for the bantys. Just a few finishing touches; roost bars, nest boxes, some more chicken wire, and Roosty and his girls will be ready to move in! The timing couldn’t be better, because one of the little hens has gone broody, and wants to sit on eggs and hatch out some chicks! We’ll see, and we’ll keep you updated!

creating new space for great things: cutting down a big oak tree

as jason mentioned in his post yesterday, this weekend we enlisted my father’s help to clear a dying oak tree in our yard. i’m hoping that we’ll decide to use most of the new-found space for garden beds and a small orchard! we both really love the idea of cutting the stumps (there were 4 large “fingers” that made up this tree) to make them into seats, a table, and perhaps even a foot rest! we’re also thinking about somehow incorporating the space into our wedding… perhaps where the ceremony itself takes place… but we’re not sure yet.

starting to work in this area around the tree, we weren’t totally sure what the final product would be. we had originally thought to start cleaning up around the barn by clearing and pruning, thereby opening up that spot for wedding antics–but jason and i couldn’t agree on how to approach it.

sometimes we have similar visions of what we’d like to do with our land/yard and other times we can’t agree at all–this was one of those times. that’s just the nature of love and partnership! we did both agree, however, that we wanted to clear the barn area but we couldn’t come to a consensus about what to do with the cut trees and the empty space we would end up with afterwards…

and so we dropped that idea and dove head first into working on the area around the oak!
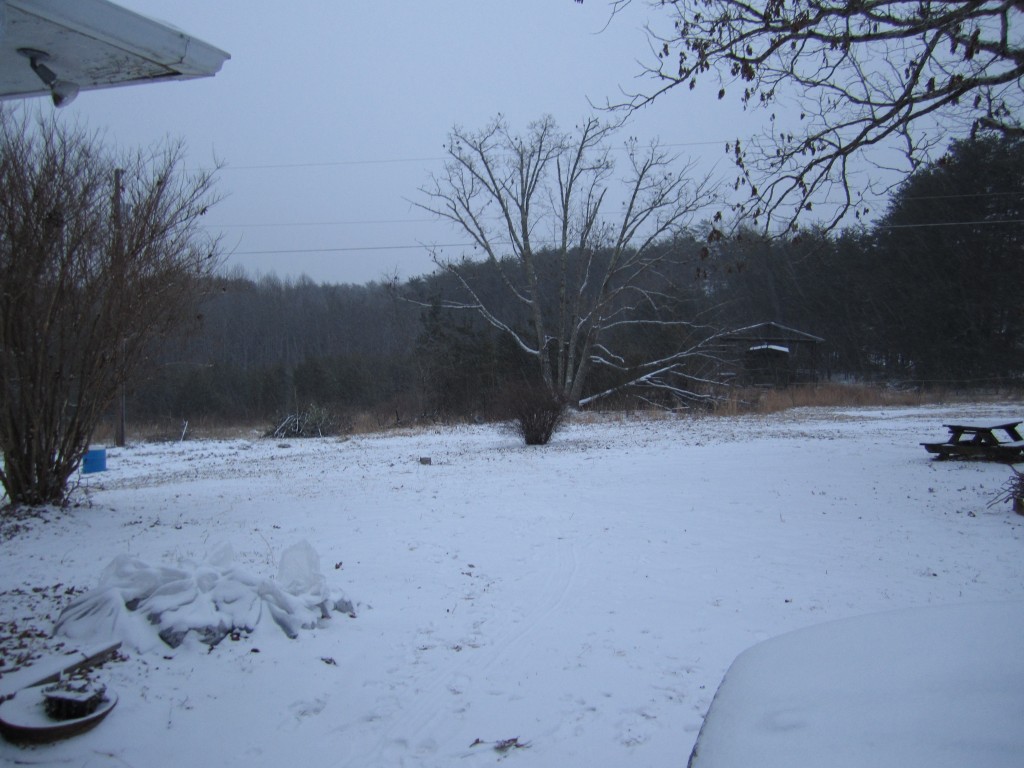
tree

before: the many trunks of the oak tree (back and center, covered in snow)

there were a lot of pines and scrubby trees to cut and tons of green briar to rip out. as jason mentioned, poison oak abounds in that area, and although we killed a lot of it, we’ll certainly have to weed eat (or pig eat) in the near future.

we also found broken glass, tires, decaying lumber, metal (grates, tool boxes, cans, screws), plastic, and even a truck’s large tool rack. most items were trash but some were treasure!

after clearing all of the junk and the smaller growths under the large oak “fingers,” the chainsawing began. jason and i do not own our own chainsaw yet, and it is a big help to have a trusted family member willing to help! my dad has also helped out by cutting oak logs for this year’s mushroom crop. even though chainsaws are super useful, they still make me somewhat nervous (even though i’ve been around them my whole life) so i’m glad to have my dad help. he cut all four trunks of the tree about 4 feet off the ground, notching each of the trunks first so they would fall the way we wanted… except one of them. as soon as this one trunk (that he didn’t notch) started to go down, we could tell that the not-notching approach was not the best idea. the tree did fall the way we had hoped, but it bent upon itself and stayed partly attached to the stump. just looking at the result made me nervous!
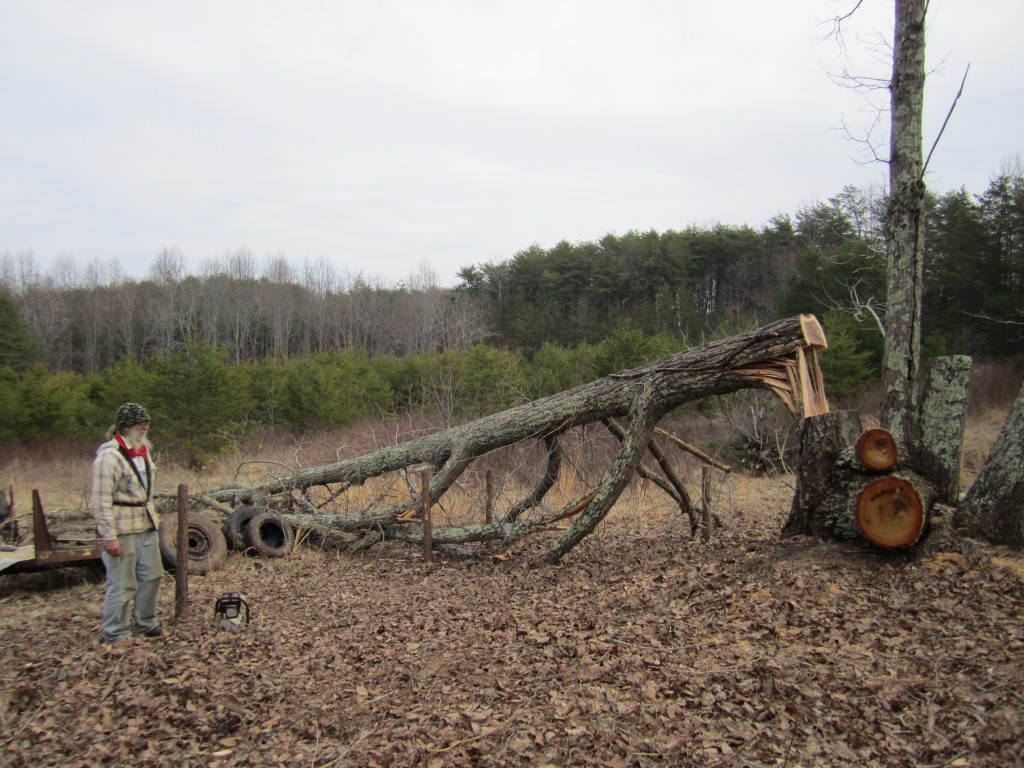
tree

the aftermath of felling the oak trunk without the pre-cut notch. note the size of the tree and how much pressure is sure to be on the bent pieces.

jason and i stayed far away while my dad slowly tried out a couple options for bringing the tree the rest of the way down. first he cut off some larger limbs that appeared to be holding up the trunk. that made the tree shift but did not bring it down. then he tried to cut at the taught pieces of wood that were still attached at the location of the cut (keep in mind that all of the weight of the tree was bowing down these pieces, and it was a surprise that they had not already snapped when the tree fell). needless to say, during this time i yelled at my dad not to make the cuts into the taught, flexed, “wooden slingshots,” but he only grinned at me and went for it anyway. uggghhh… fathers! they can be such punks!

despite my anxiety, his cuts to this part of the tree did not result in injury, and he stopped cutting in that area once the tree shifted a little bit more. then he cut the rest of the limbs off that might have been holding the trunk in the air and we discovered that the tree was actually balancing on a single pine pole coming out of the ground. annoyingly, my dad decided that kicking the pine pole would knock the heavy trunk off and make the tree finally hit the ground. he did this, and in my mind, barely got his leg out of the way before the heavy trunk hit the dirt.

i was horrified by what i perceived to be an exercise in idiotic risk-taking, but he simply laughed at me and said “i knew what the tree was going to do… and my leg was out from under it well before it hit the ground. it didn’t even come near me!” yeah, right!

anyway, we all escaped without injury (which is not surprising for jason and i since we were well away from the action the entire time).

this video shows my father notching one of the trunks and then sawing through it… a much safer tree-cutting practice than the other!

once the portions of the tree were laying on the ground, my dad cut them into manageable rounds and jason and i stacked them “tipi style” so that they would dry better… and now we have two great mounds of firewood that we will need to process, split, and store in the near future.
tree

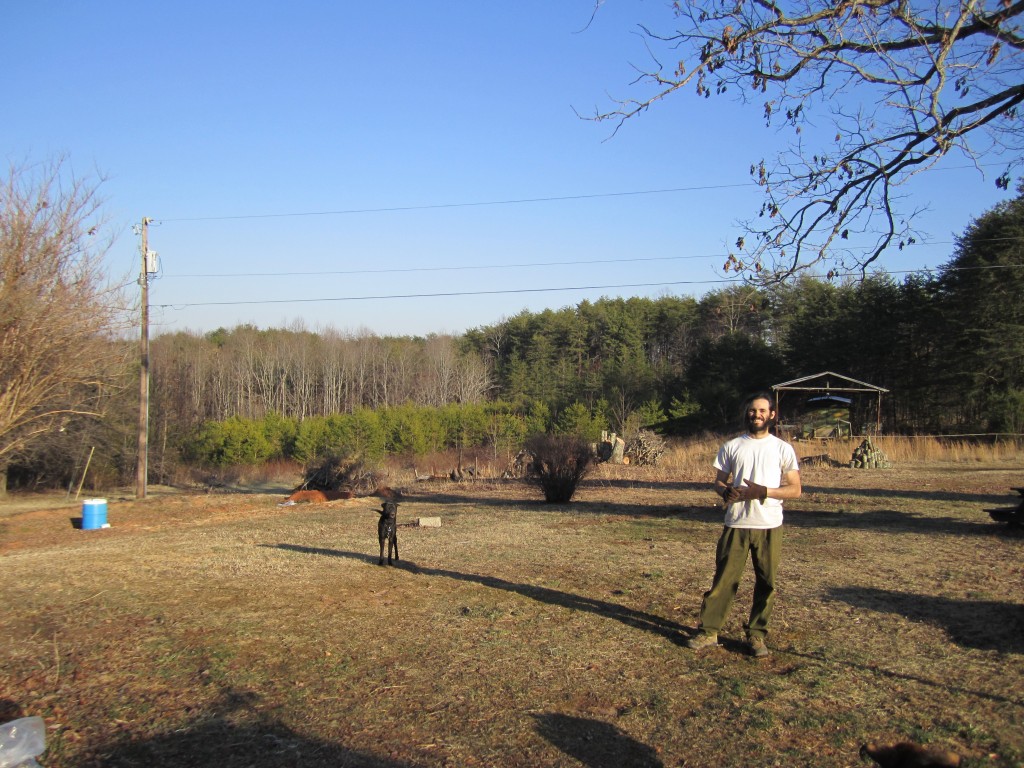
after: jason and bolt posing with the oak stumps n the background. what a changed view of our land!

so, not only did we clear the area of a dying tree and make way for future gardening and livestock practices, we also gained a lot of wood for next winter’s woodstove heating adventure! and although i hate to admit it, sometimes it is ridiculously fun to watch my dad act like a stupid teenager!

.:.
Pig Tractors?

We cleared some land this weekend, opening up a large area under an old, probably coppiced oak that was dying. We cleared out the underbrush of pines, black cherry, small oaks and briars, and cleaned up some old trash that had accumulated over the years. Were not sure what we’d like to do with this spot, maybe some combination of extending the garden, terracing the bottom slope, and adding some nice fruit trees and shrubs to stabilize the upper slope while provided a nice treat to enjoy while savoring the view from the oak stump seats.

Whatever we decide to do, the area needs some work first. There is a patch of poison oak nearby, and I don’t know if opening up the area will discourage or encourage its growth. Also, by removing the big oak and letting in all that sun, I’m sure we will see some interesting things popping up this spring/summer. Most likely, if left to it’s devices, this area would success to blackberry, pine, and Bradford Pear seedlings like the big field across Bridey’s Run. By planting productive species early, we should be able to stay 1 step ahead of this pioneer stage, and not have to deal with a tangled up thorny mess.

This brings us back to pigs. Pot bellied pigs to be exact. These little rooters could be a huge asset to the farm by rooting out undesirable species, clearing brush, and adding copious amounts of fertile manure to the land. I can envision sitting a Joel Salatinstyle pig tractor, similar to a chicken tractor, right over our patches of poison oak and ivy and letting them go to town. Then, after a week or so, we can plant fast growing shrubs and trees, or lay down mulch and transplant tomatoes into the freshly prepared soil.

So that’s what I’m thinking right now. About getting a few pot bellied pigs to raise as breeding stock, and eventually bacon, in a movable pasture/woods based forage system. A pig tractor. Details to come on its design, size, and construction.


hawks and moles and mice, oh my!

we’ve had some amazing animal adventures over the past few days. this is to be expected at the beginning of spring (or at least what appeared to be spring until it dropped from 50 degrees to 20 degrees over the course of 5 hours today and then started to snow and sleet!). this means the school system where i work is closed tomorrow… and i get to spend my birthday at home! fantastic!

the other day bolt unearthed a mole while digging in the yard (now we know what he’s been digging for!) and played with it a little bit but wasn’t sure what he was supposed to do with it since it wasn’t fighting back or running–just laying there and squeaking. bolt’s problem was solved when he encountered an escaped chicken (6 of them sneaked out of the small crack in the gate during feeding time a few minutes before bolt found the mole). the chicken ran from jason and i and flew towards bolt, who forgot all about the mole and tried to pluck the bird out of thin air. luckily, the chicken never got close enough, seeing the big black monster that bolt has become, and turned back toward us. when bolt returned to the mole it was gone, having waited for the opportune time to make his escape!

after this adventure we also noticed that dodger had caught a few prizes: field mice. we saw him catch 2 from afar, and later jason confirmed that dodger had eaten the head off of at least one of them. a little bit of a waste, dodger… we wish you would eat the whole thing!

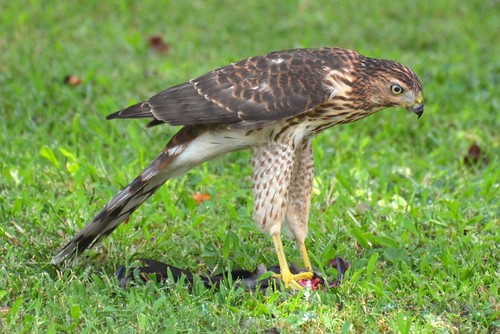
also… about a week ago, jason saw a small, white-speckled, brown hawk fly in twice to smack up against the bird net above our chicken yard. after seeing this he sent me a text message that said: bird net: 2, hawk: 0.

unfortunately, this same hawk got smart and found a small hole in our bird netting a few days ago. the holes were torn in the netting a few weeks ago when we got 8 inches of snow. the wet, thick snow on the netting weighed it down too much and ripped out some of the zip ties that we had used to attach strips of netting together. we had noticed the holes but didn’t think too much of it, considering that up to that point we hadn’t detected any animal attacks at all.

anyway, this crafty hawk (which we are pretty sure is a cooper’s hawk) spent a few days looking at the netting and plotting his entry (or so we can assume). the first signs we found of his success came on friday.

i usually open up the chicken house and let them out into their yard every morning around 6am. jason found a dead bantam in the corner of the chicken yard around 7:30am. she was ripped open with many of her feathers missing and half of her breast was eaten. it was clearly a hawk attack.

hawk

a cooper’s hawk, photo courtesy Tobeyotter

the circumstances are still a bit of a mystery considering that the hawk was sitting outside the bird netting when jason came outside and flew away. did he kill and eat the bantam the night before and come back for more the next day? did he hear jason coming outside and somehow escape the netting in time (but stay around to actually see jason appear?). also, why was he able to catch bantams but not our standard hens who are much slower? after thinking on it, we’ve realized that the hawk probably didn’t even try to get the larger hens, since a cooper’s hawk is about the size of a crow. but, we just aren’t sure!

so, long story short: we lost a bantam from the hawk attack. then… late in the day on saturday once jason and i went inside after being outside all day, the hawk came back and went for another bantam! he got inside the netting again and pulled the feathers from another bird but did not wound her. jason and i chased him away and we have since patched all the holes in the net. once we move our chicken yard later this week, we’ll re-patch it again just to be sure.

overall… very frustrating. but also, admittedly, very exciting. and we suppose that this is the way it is: we’re learning firsthand that raising animals and plants comes with some failures and some successes. some living and some dying. you witness birth; you witness death, and the cycle goes on…

.:.

Restoration Agriculture: A Great Talk by Mark Shepard

Yesterday, while doing the dishes, I listened to/watched an awesome presentation by Mark Shepard of New Forest Farms. It was a long talk, over 2 1/2 hours, given at an Acres USA conference, but it was solid permaculture gold.

He begins with a look at the unsustainability of our modern agricultural system that relies on annual crops (corn, soy, wheat, etc.) and finishes with a description of his farm in Wisconsin that uses agroforestry techniques and permaculture principles to produce an abundance of perennial staples and livestock. Mark is a history buff, and he talks about the roles of annual agriculture and soil loss in the collapse of civilizations throughout time.

He draws much of the inspiration for his farm from the naturally occurring oak savannah biome, where large mast bearing oak, beech, and chestnut trees tower over scattered shrubs (hazelnut, apple, cherry etc.) and grasslands. This ecosystem captures much more solar energy than a corn field, and has the ability to sustain more pounds of mammal flesh than any other biome in the world. By grazing hogs, cattle, sheep, geese, turkeys, and chickens through his contour based, polyculture hedges, Mark Shepard has built, and continues to build a system with the potential to change farming history.

This talk was particularly exciting because Mark is actually doing it. He is producing food at the level necessary to supply grocery stores and urban centers. His entire point is that his method of farming, called Restoration Agriculture, is one that increases in yields and fertility over time, indefinitely, while decreasing in expenses. He argues that this is the only way to sustainably feed the world, and shows that permaculture can be profitable on a large scale commercial farm.

Check out the video if you have time and are into this kind of thing. The images are just stills of either Mark or his slides from the presentation, but he’s an engaging and funny speaker, and won’t disappoint.

wedding on the homestead: doing it our (ochre) way

we are getting married!

well, not yet. not until september 27!

and yet, of course, it is time to start brainstorming and setting some wedding plans in motion. plans, plans, plans!

first of all, i would like to say as the future bride/legal life partner that this is an exciting time! we might not be celebrating our wedding in the classic way, but we are celebrating it with style (our own!) and love!

us

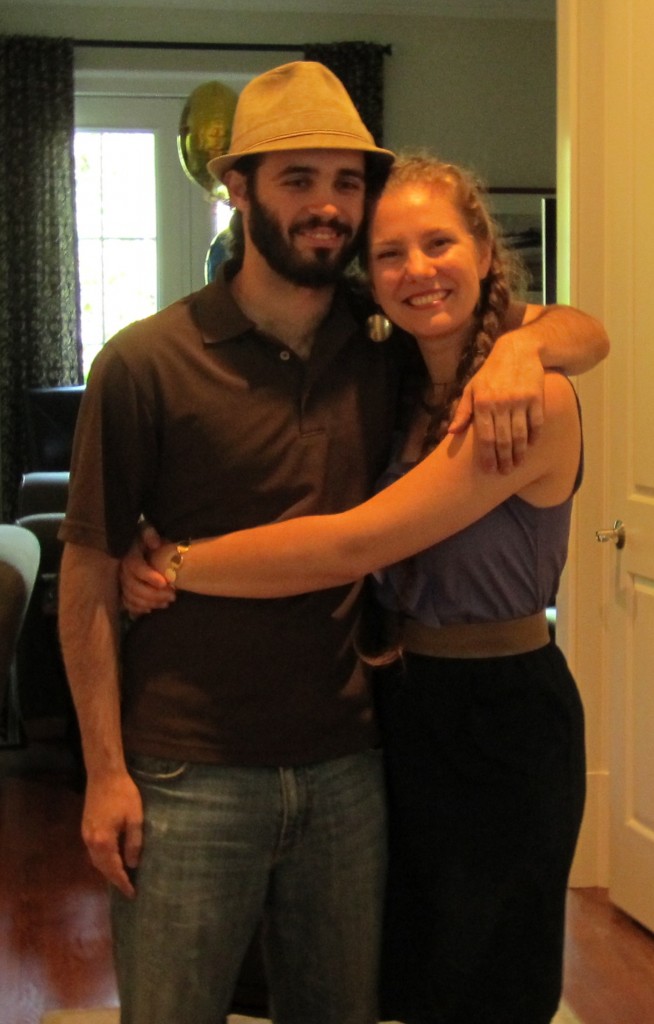
it’s us: jason and emma!

as jason and i discussed what we wanted the ceremony/big-fun-time-party to be like, we quickly realized that we wanted to give as much or more as we were getting. now considering that we aren’t wealthy folks, we can’t give expensive things or pay for the hotel rooms of our loved ones. but, we can give of ourselves in as comprehensive a way as possible! we realized that we want our loved ones to know that we are grateful that they have chosen to share our big event and our lives with us, and we can do that by sharing with them our way of life, with many of our philosophies embedded within.

here are a few things that we are doing our ochre way style:

  • wedding location: it will be here, on our homestead. we will be celebrating in our backyard and we’ll have the barn, paths through the woods, and the pond for people to explore!
  • family roles throughout the ceremony: we plan to include family members in the ceremony, either as speakers or as “officiants” of some sort–we’re not exactly sure in what manner but we know it will include our moms and dads in more meaningful ways than in a traditional wedding.
  • decorations: the wedding is going to be informal but with certain style elements! i’ve got a wide color scheme–basically all fall leaf colors (any shade of red, yellow-orange, green, and brown) and we plan on asking all family and friends to wear some fall colors so that we can be a sea of fall leaves together. everyone is really part of this wedding and i want everyone to be constantly aware of our shared identities and family community! my entourage (a joke–since i am not calling them my “bridesmaids”) will each wear one of the fall colors (in whatever shade or style they decide!). decorations will be things like wooden vases, wild flowers, etc.
us

us visiting arches national park (we’re the two goofy looking ones in the front!)

  • an extended timeline: most of jason’s family live outside the state and we definitely want to enjoy them as much as we can while they are visiting. partially for this reason, and partially because i have always found weddings to be way to whirlwindishly short when they start in the evening, we’ve chosen to begin our wedding celebrations in the early afternoon. this way, jason and i will have hours of time to spend time with loved ones, building our excitement together as one big extended family, and doing what all families do best: eating, drinking, and dancing.
  • the food: we decided that outsourcing the food production and the meal wasn’t going to work for us. so, we’ve decided to prepare most of the meal ourselves with some help from close family members. we’ve included favorite family recipes, delicious homegrown crops, and even a version of an earth oven for baking meat and vegetables that i learned how to make and use in peru, where jason and i met.
  • the music: it will be dance, dance, dance music! dancing is one of my favorite things on the planet and i’m sure almost all of our family and friends will shake some booty with us. and i’m really excited about the songs we’ll be playing and how we will build our playlist… my next step in wedding planning is to email everybody (and their momma) and ask them to send me a list of some of their favorite songs. i can’t wait to see everyone jump up for their chosen songs during the night!
  • party favors: i can’t say what they will be (i don’t want to give the secret away just yet), but i can say that they will be homegrown and homemade items!

i intended for this to be a short list of our plans for our lifelong partnership ceremony/wedding, but as you can see, i got carried away! i will leave you with this and move on to printing our save-the-date cards we just finished designing last night (another thing we wanted to make/do ourselves!). 7 months to go…

.:.

« Older posts Newer posts »

© 2025 KW Homestead

Theme by Anders NorenUp ↑