It’s almost Thanksgiving!!!
Perhaps you are wondering more about tom turkeys and how exactly they show off for the ladies… This video explains it!
Also, don’t forget to order your heritage Thanksgiving bird today!
.:.
It’s almost Thanksgiving!!!
Perhaps you are wondering more about tom turkeys and how exactly they show off for the ladies… This video explains it!
Also, don’t forget to order your heritage Thanksgiving bird today!
.:.
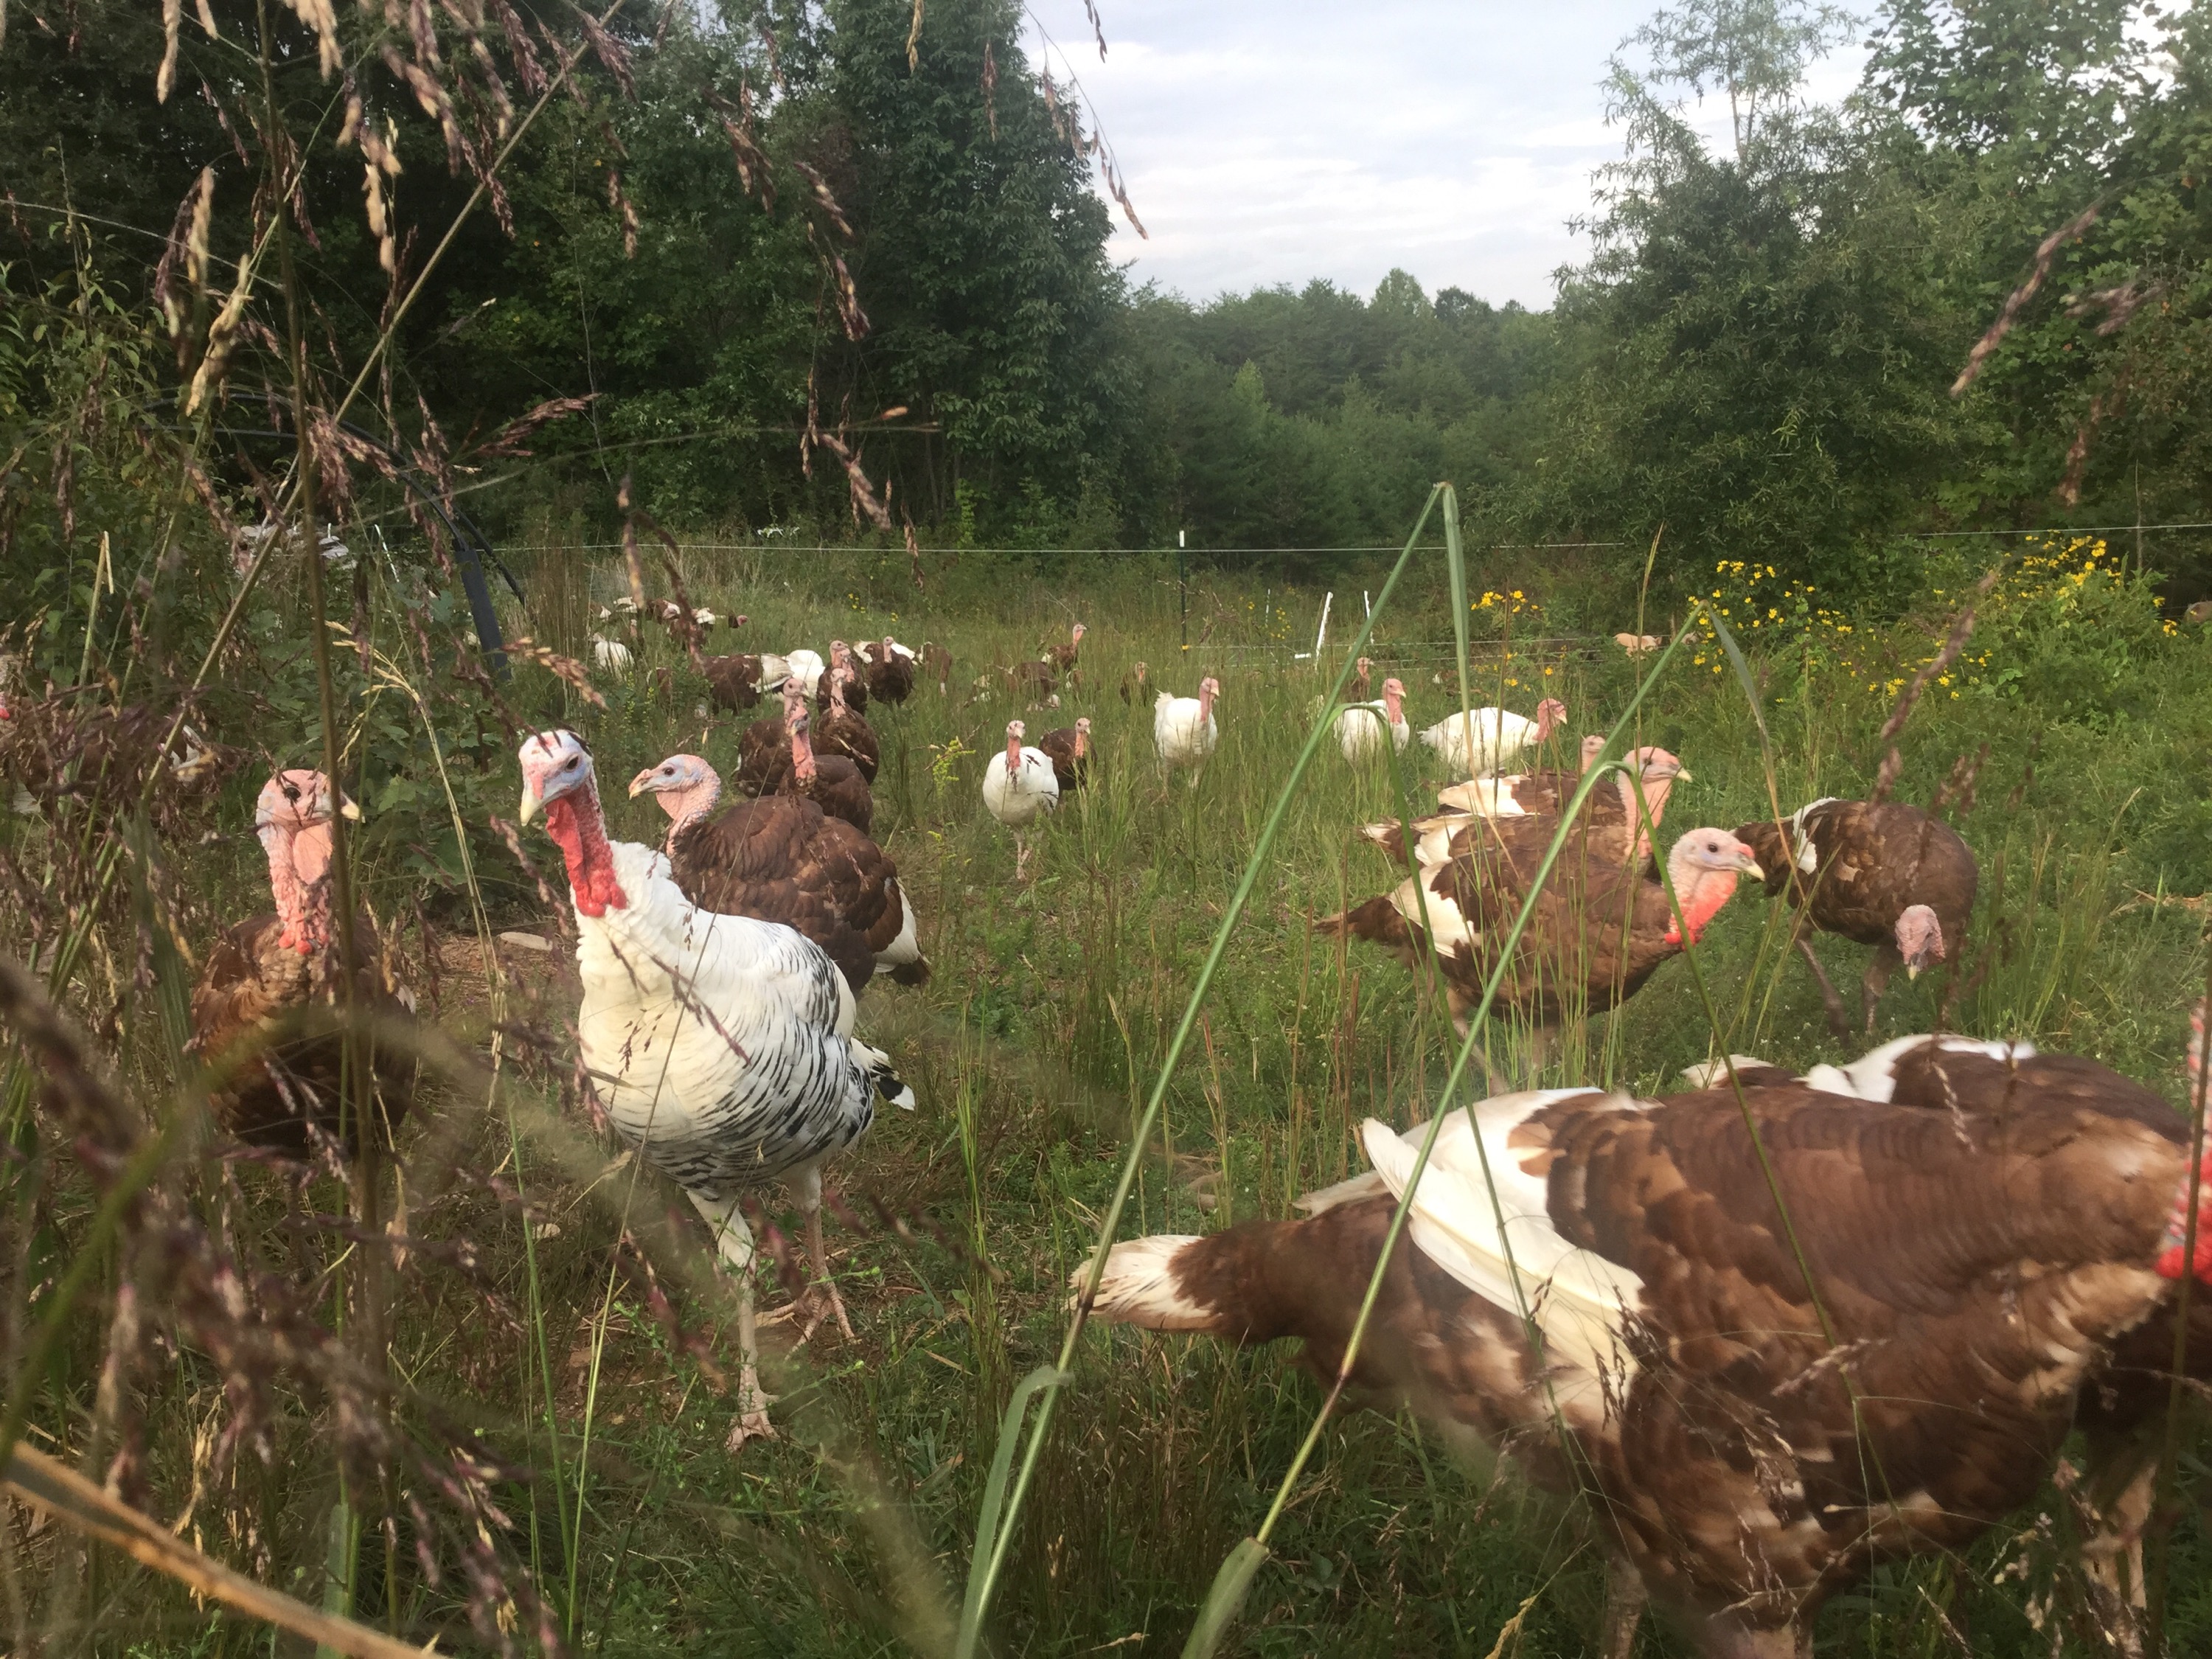
Our flock of heritage turkeys are getting bigger everyday and will be nice and plump when Thanksgiving rolls around. They spend their days free ranging and foraging the fields, pastures and woods of our farm, but what do they actually eat?
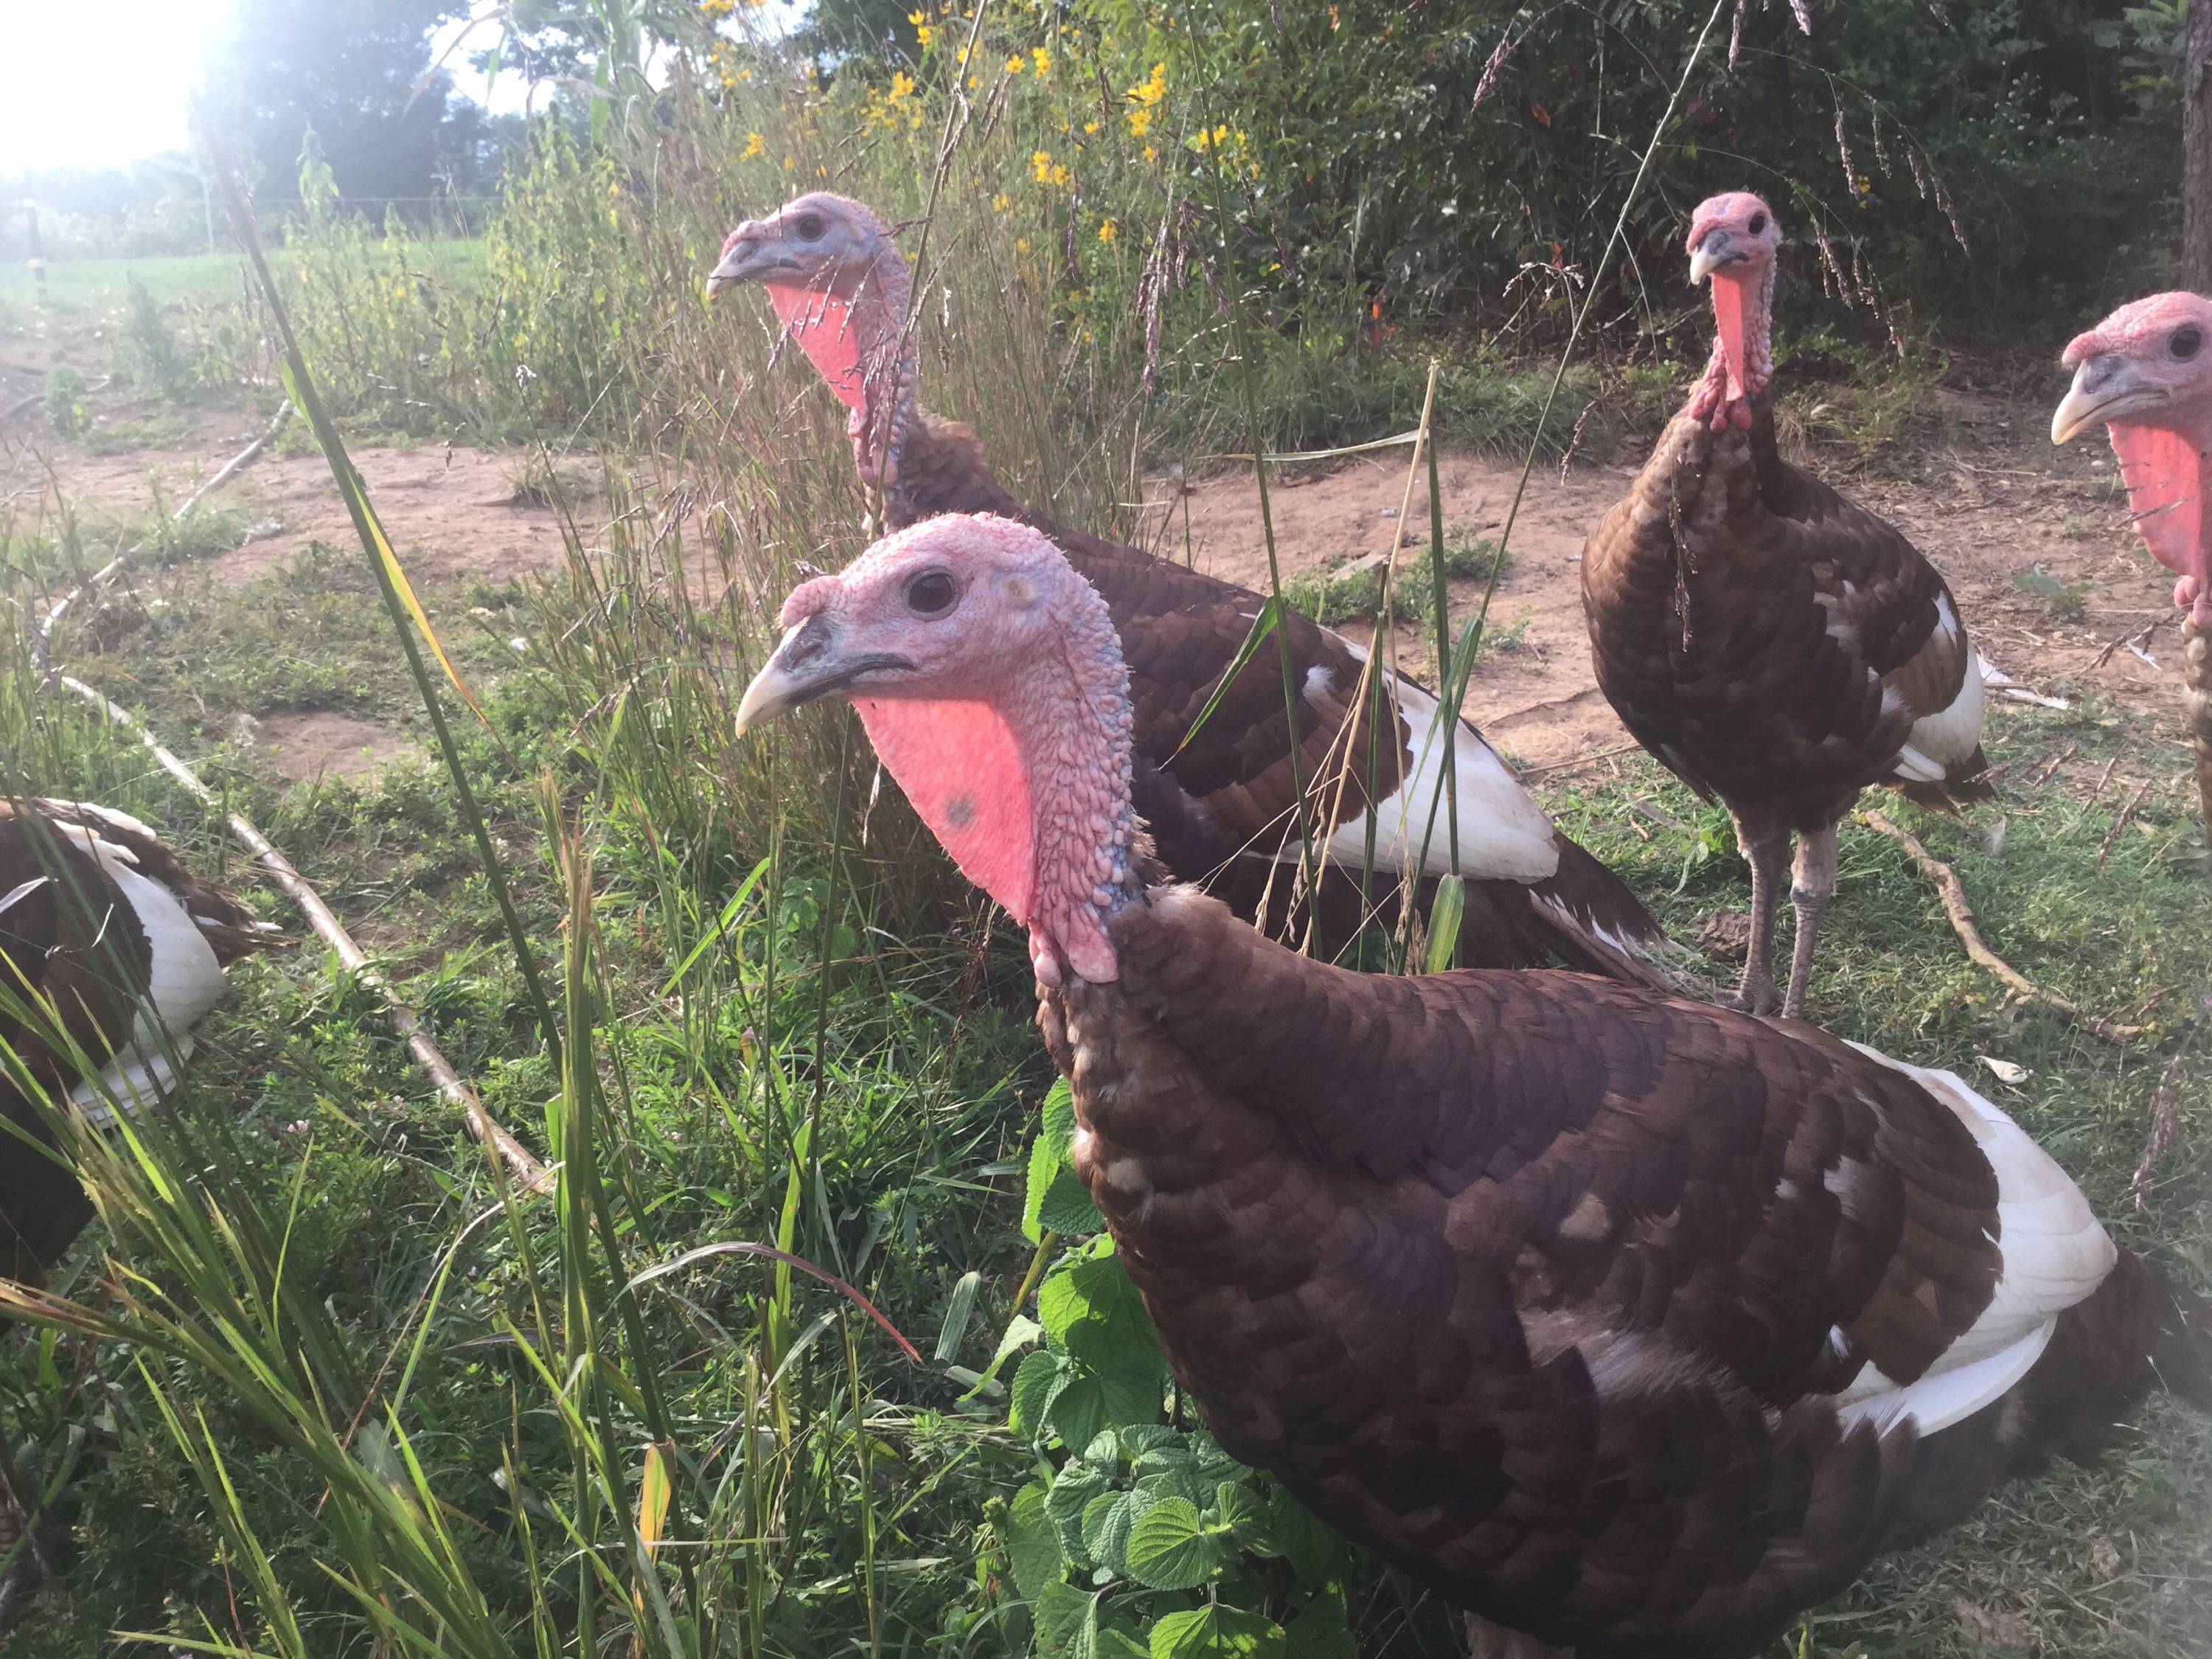
Free range turkeys enjoying the sun.
First off, we supplement them with the highest quality non-GMO feed available. They get a small amount in the morning, and a bigger ration when the sun starts to set to entice them back to the safety of their coop. Because we raise the slower growing, heritage Bourbon Reds, they aren’t as interested in the feed as a modern factory raised bird. They seem to prefer to forage for their food.
Our turkeys graze on green grass, clover, and other broad leaved plants. I have seen them devour a thick stand of pasture, and jump up to grab a midair bite out of 6 foot tall amaranth plants. They eat anything green, from chicory to plantain, and this helps to produce that wonderful rich flavor and the amazing health benefits of pastured poultry.
Because our heritage turkeys are out on pasture for their entire life, they develop flavor that can’t be found in a supermarket.
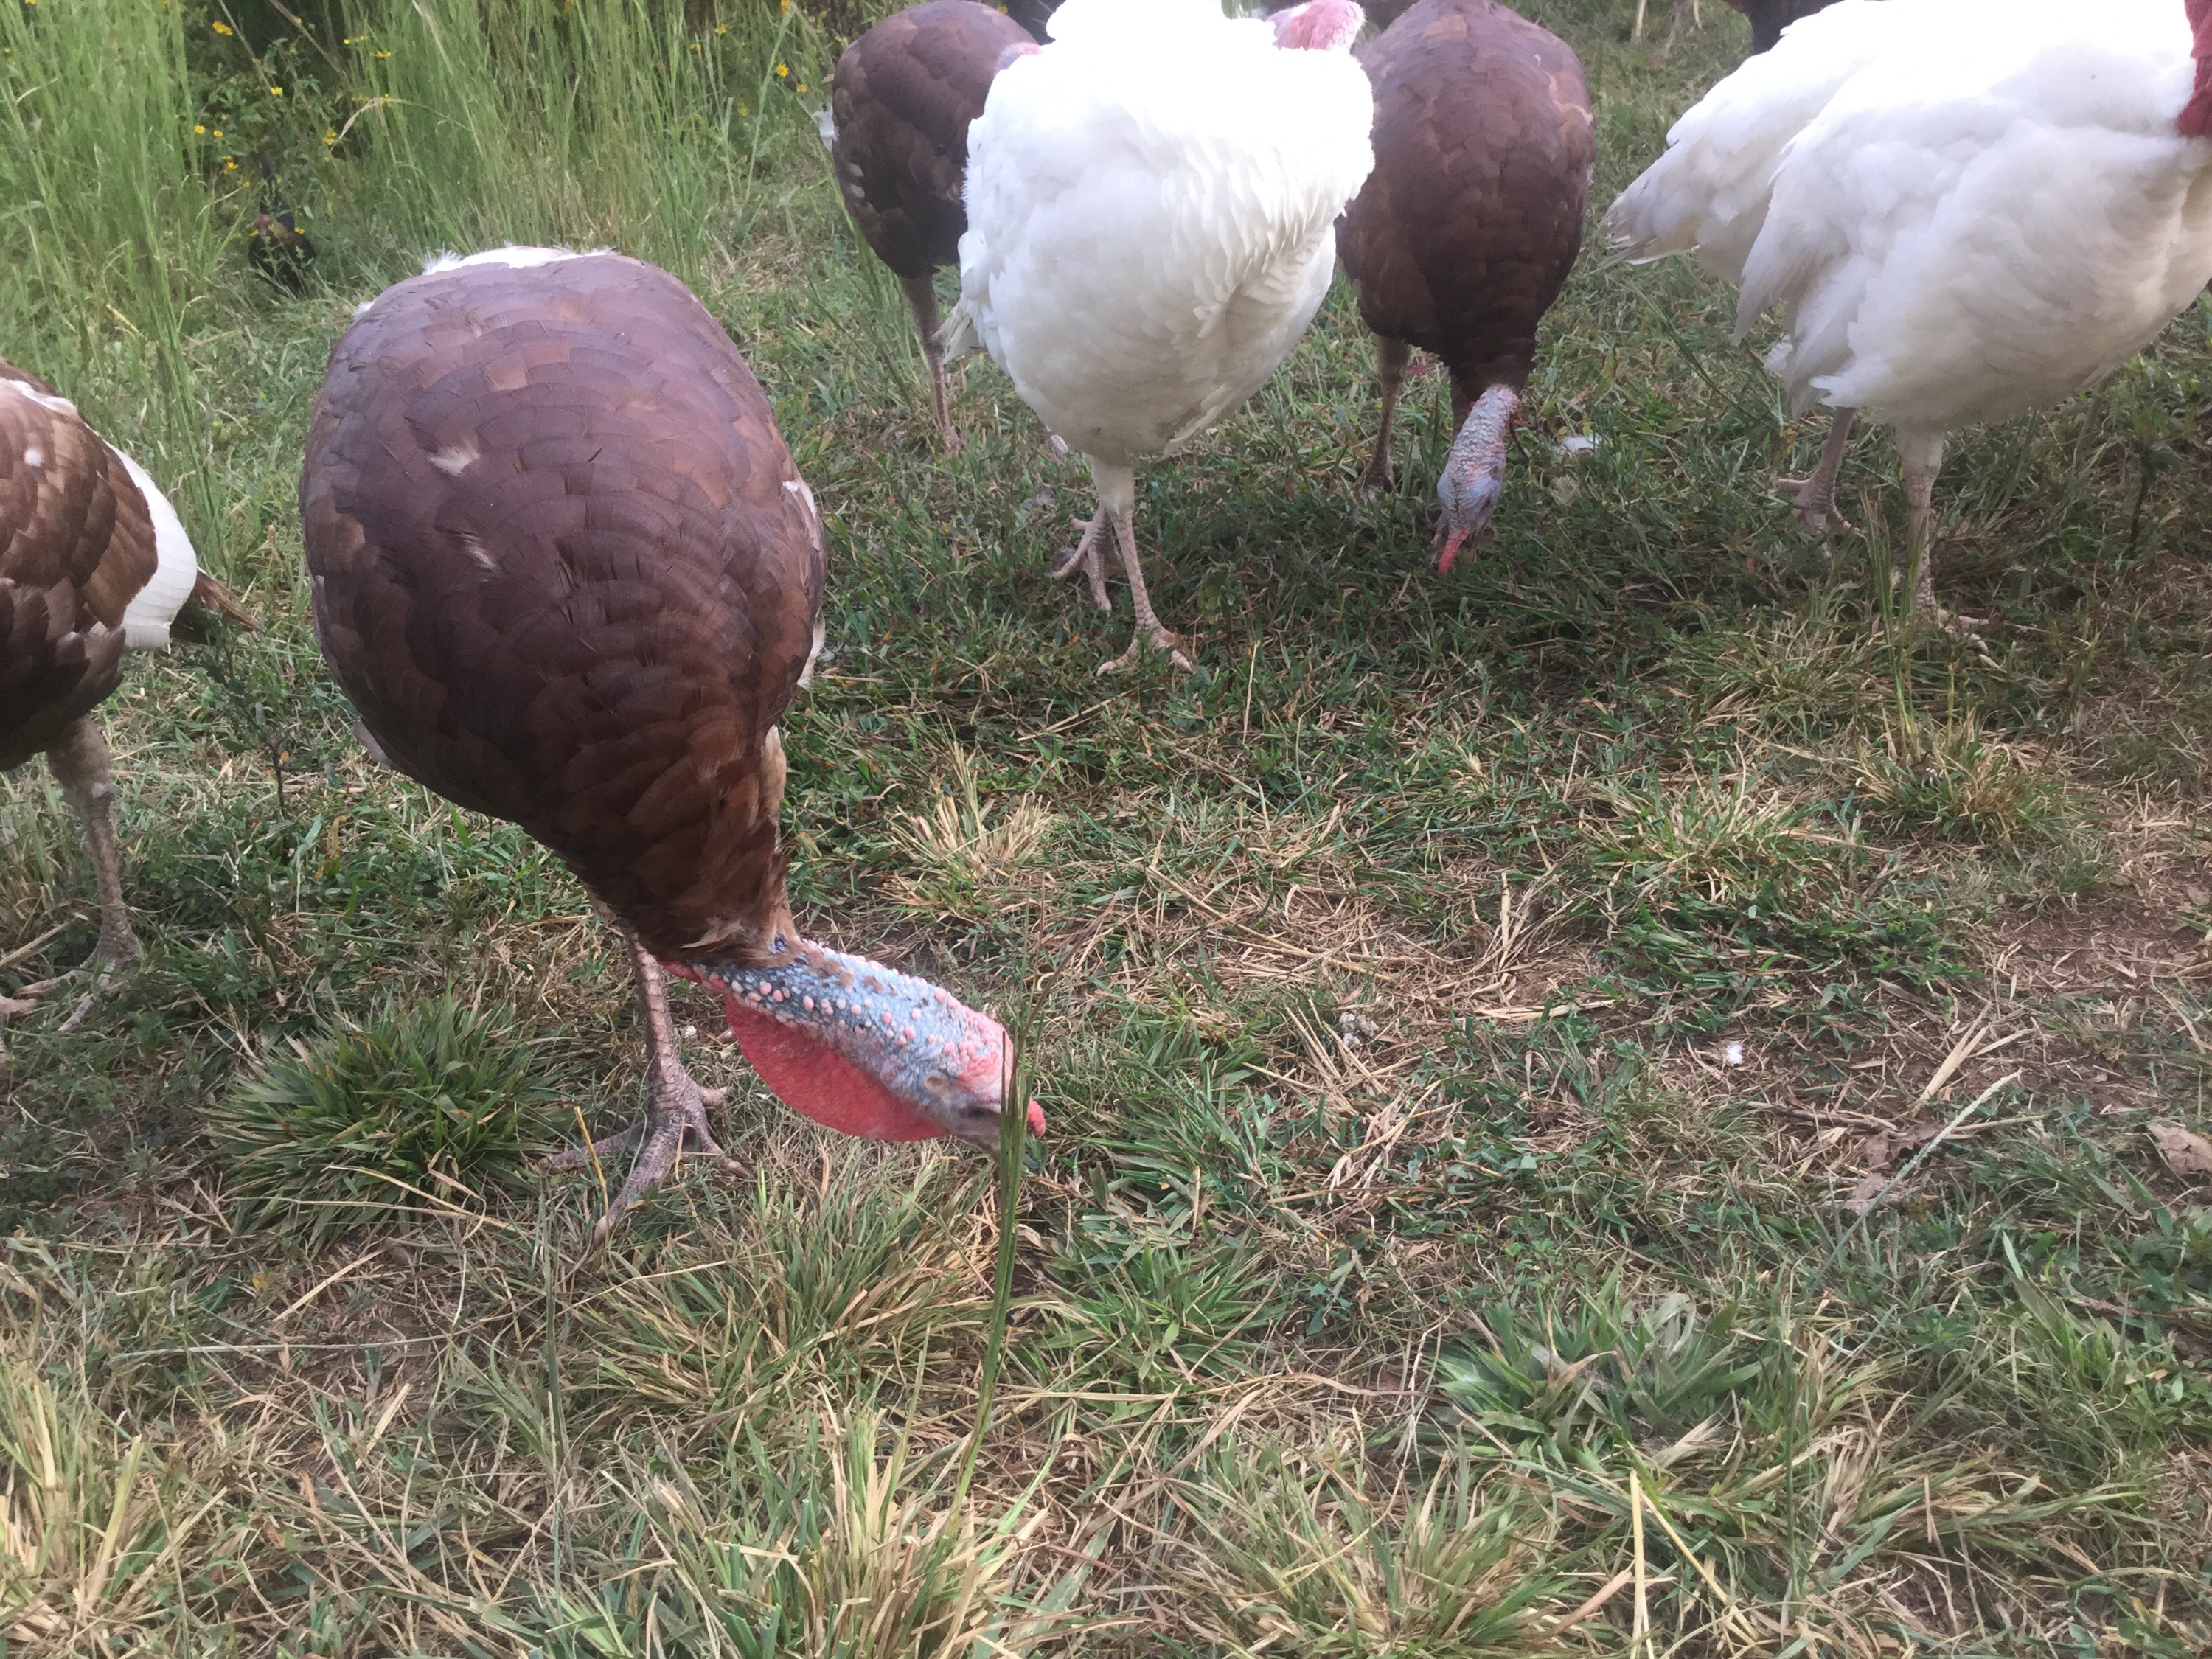
In addition to the green portions of plants, they also eat a fair amount of seeds. Some they pick off the ground, and others the harvest directly from the plant. We have stands of lambsquarter, grain amaranth, sorghum, and chia, and I have seen the turkeys eat them all.
One thing they love are surplus vegetables from our organic garden. They seem to favor heirloom tomatoes above all else.
Searching for seeds and bugs.
But they don’t eat just plants while out on pasture. They also hunt and chase all sorts of insects and bugs. Grasshoppers are a rare sight on our farm now that the turkeys roam the fields.
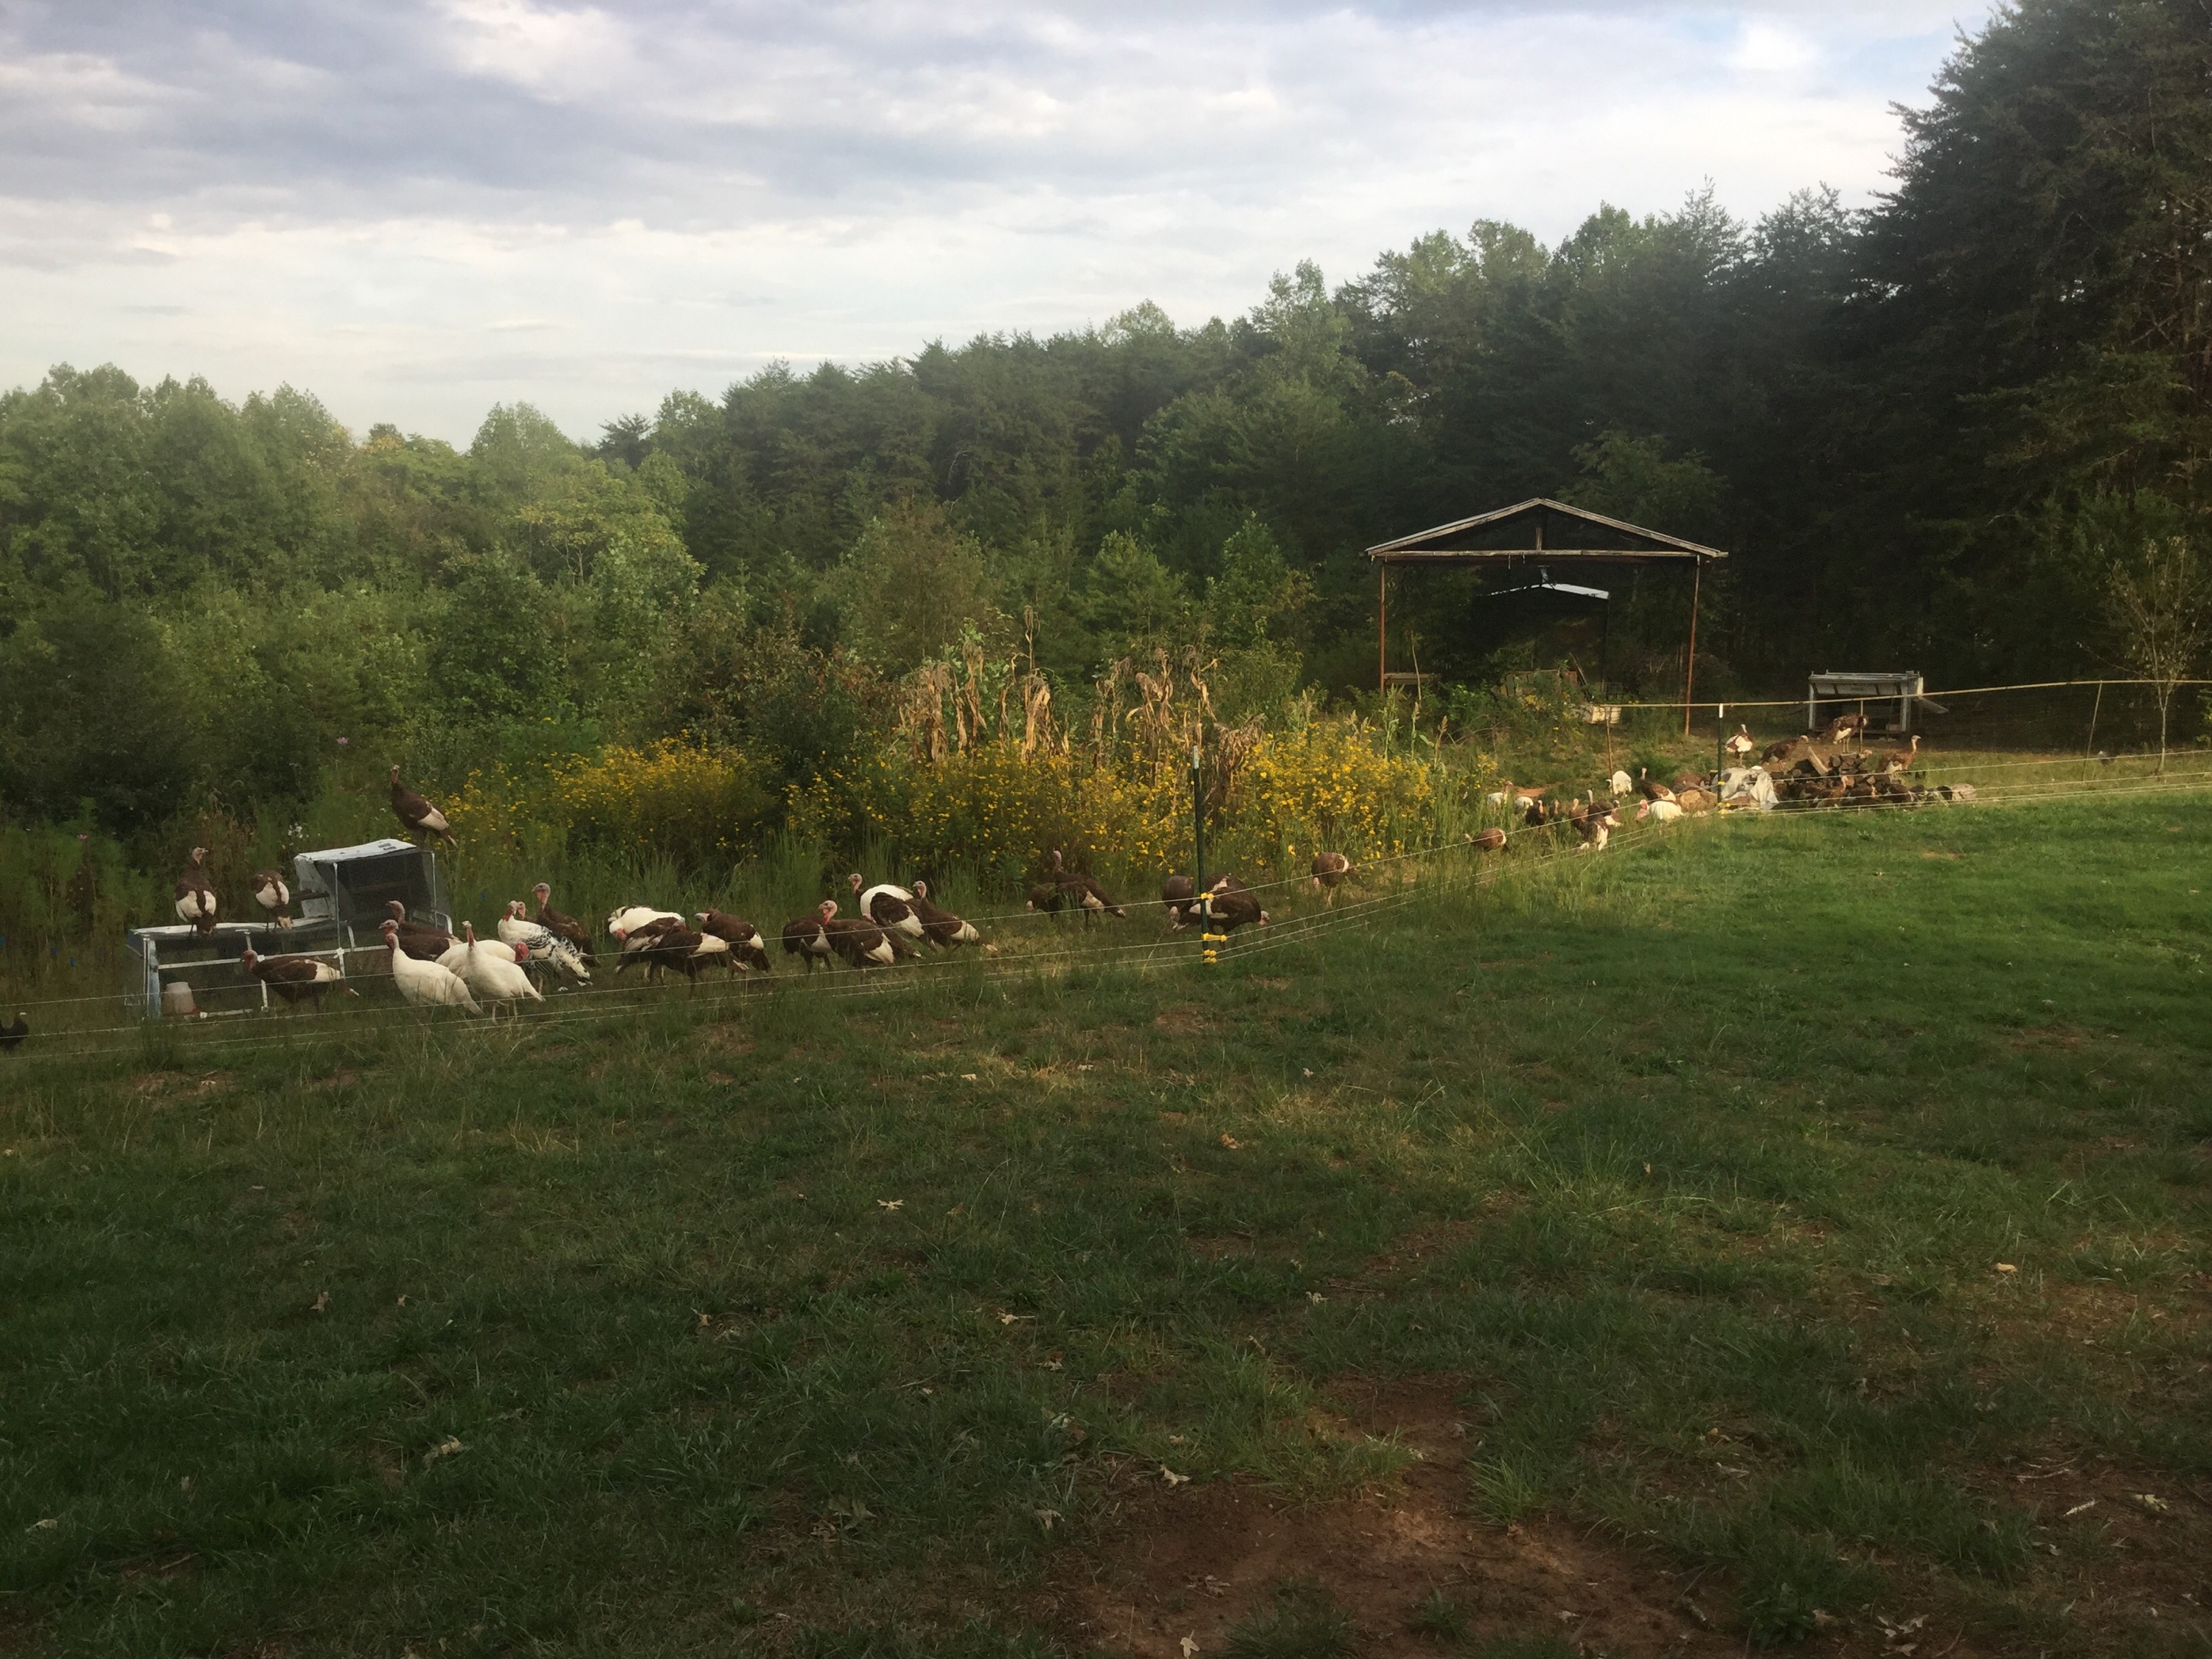
And boy do they roam. While they spend a lot of time in the open pastures, they also range the wooded acreage too. Mature oak and hickory trees provide a hearty mast crop of acorns and nuts that the turkeys strong beaks and gizzards make short work of. This is another important aspect of their flavor development, and contributes to the terroir of all the animals raised on our property.
Reserve your free range bird today!
As you can see, your heritage thanksgiving turkey has been busy free ranging for both its food and it’s flavor. There’s still time to reserve your bird this year and lock in the special $7/lb. price. Please check out our heritage turkey page for more information on how to order.
Our pigs have been the source of so much laughter and enjoyment over the last year. In addition to their piglet antics and the lovely birth experiences I’ve been able to witness, they do more for us than provide enjoyment!
They work for us…
And they don’t even have to try!
A few months ago we set them up in an old tobacco field on our land, that has been growing intense, thick pine trees and blackberry bushes for the better part of a decade. They have slowly moved through that field in electric fence paddocks, clearing and eating bushes and trees and opening up the earth for grass and other pasture loving plants to grow. They have successfully cleared a large enough area for us to have a new garden space next year. Exciting!
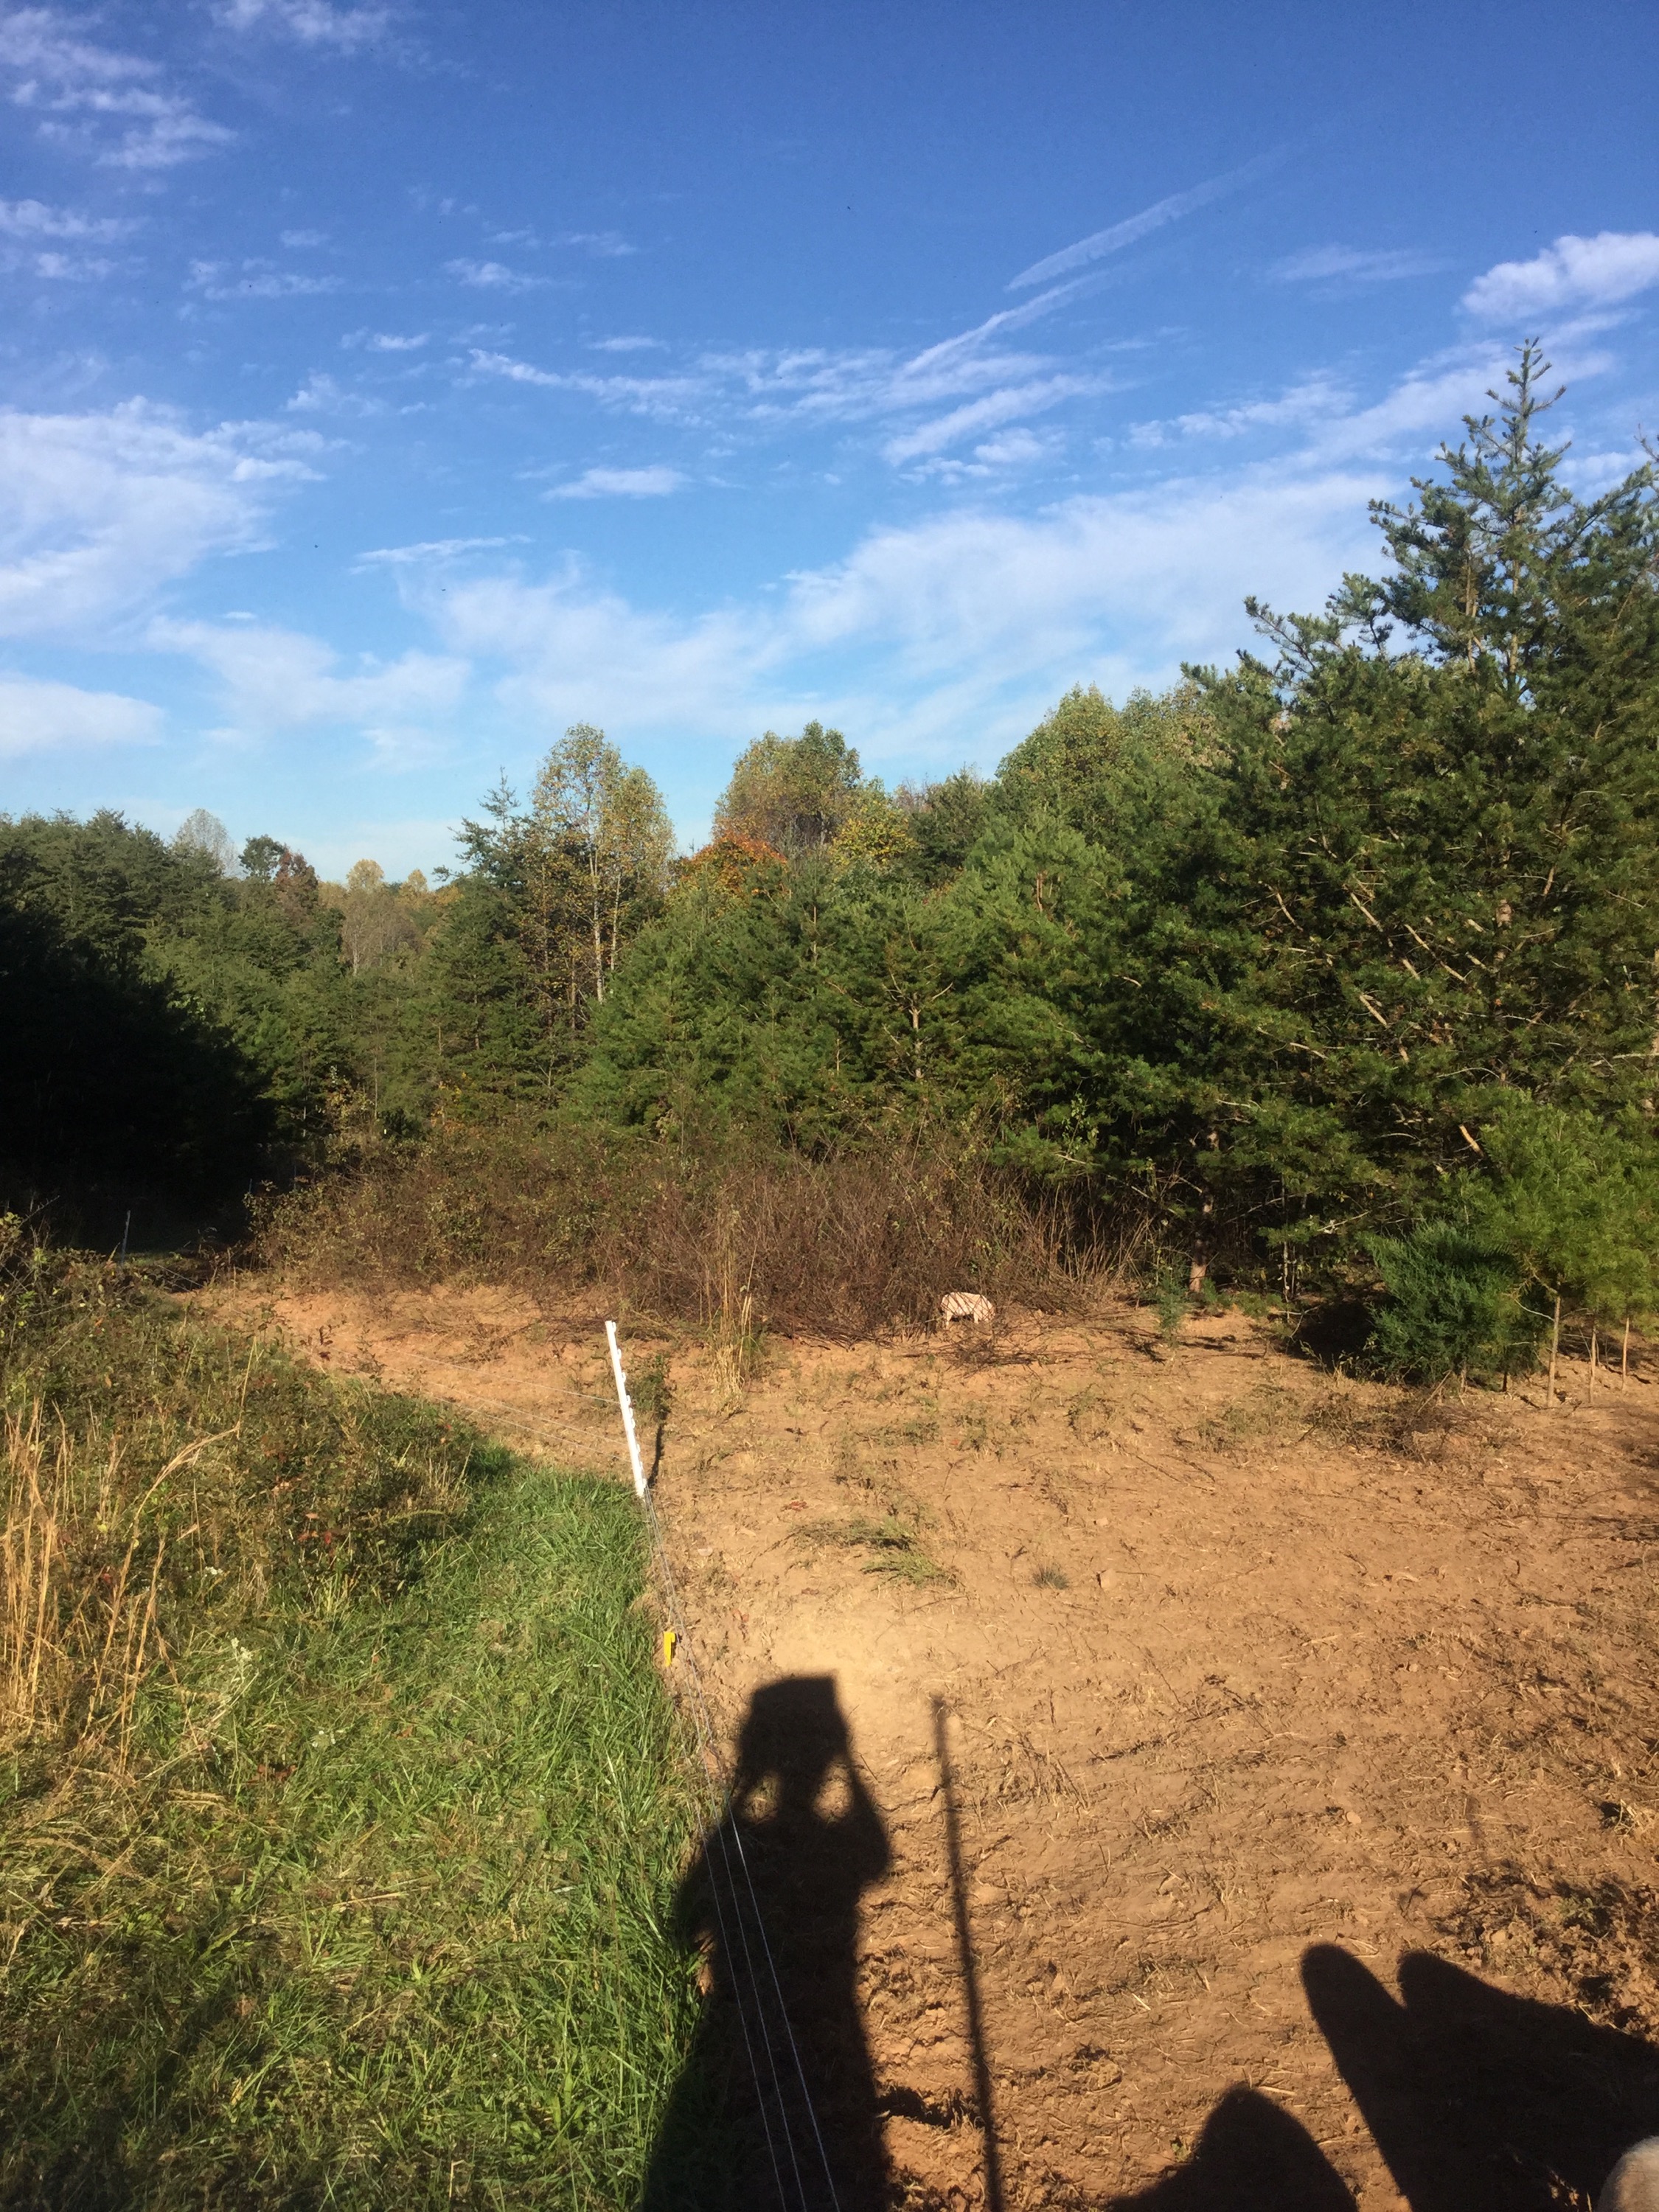
Pig-cleared land.
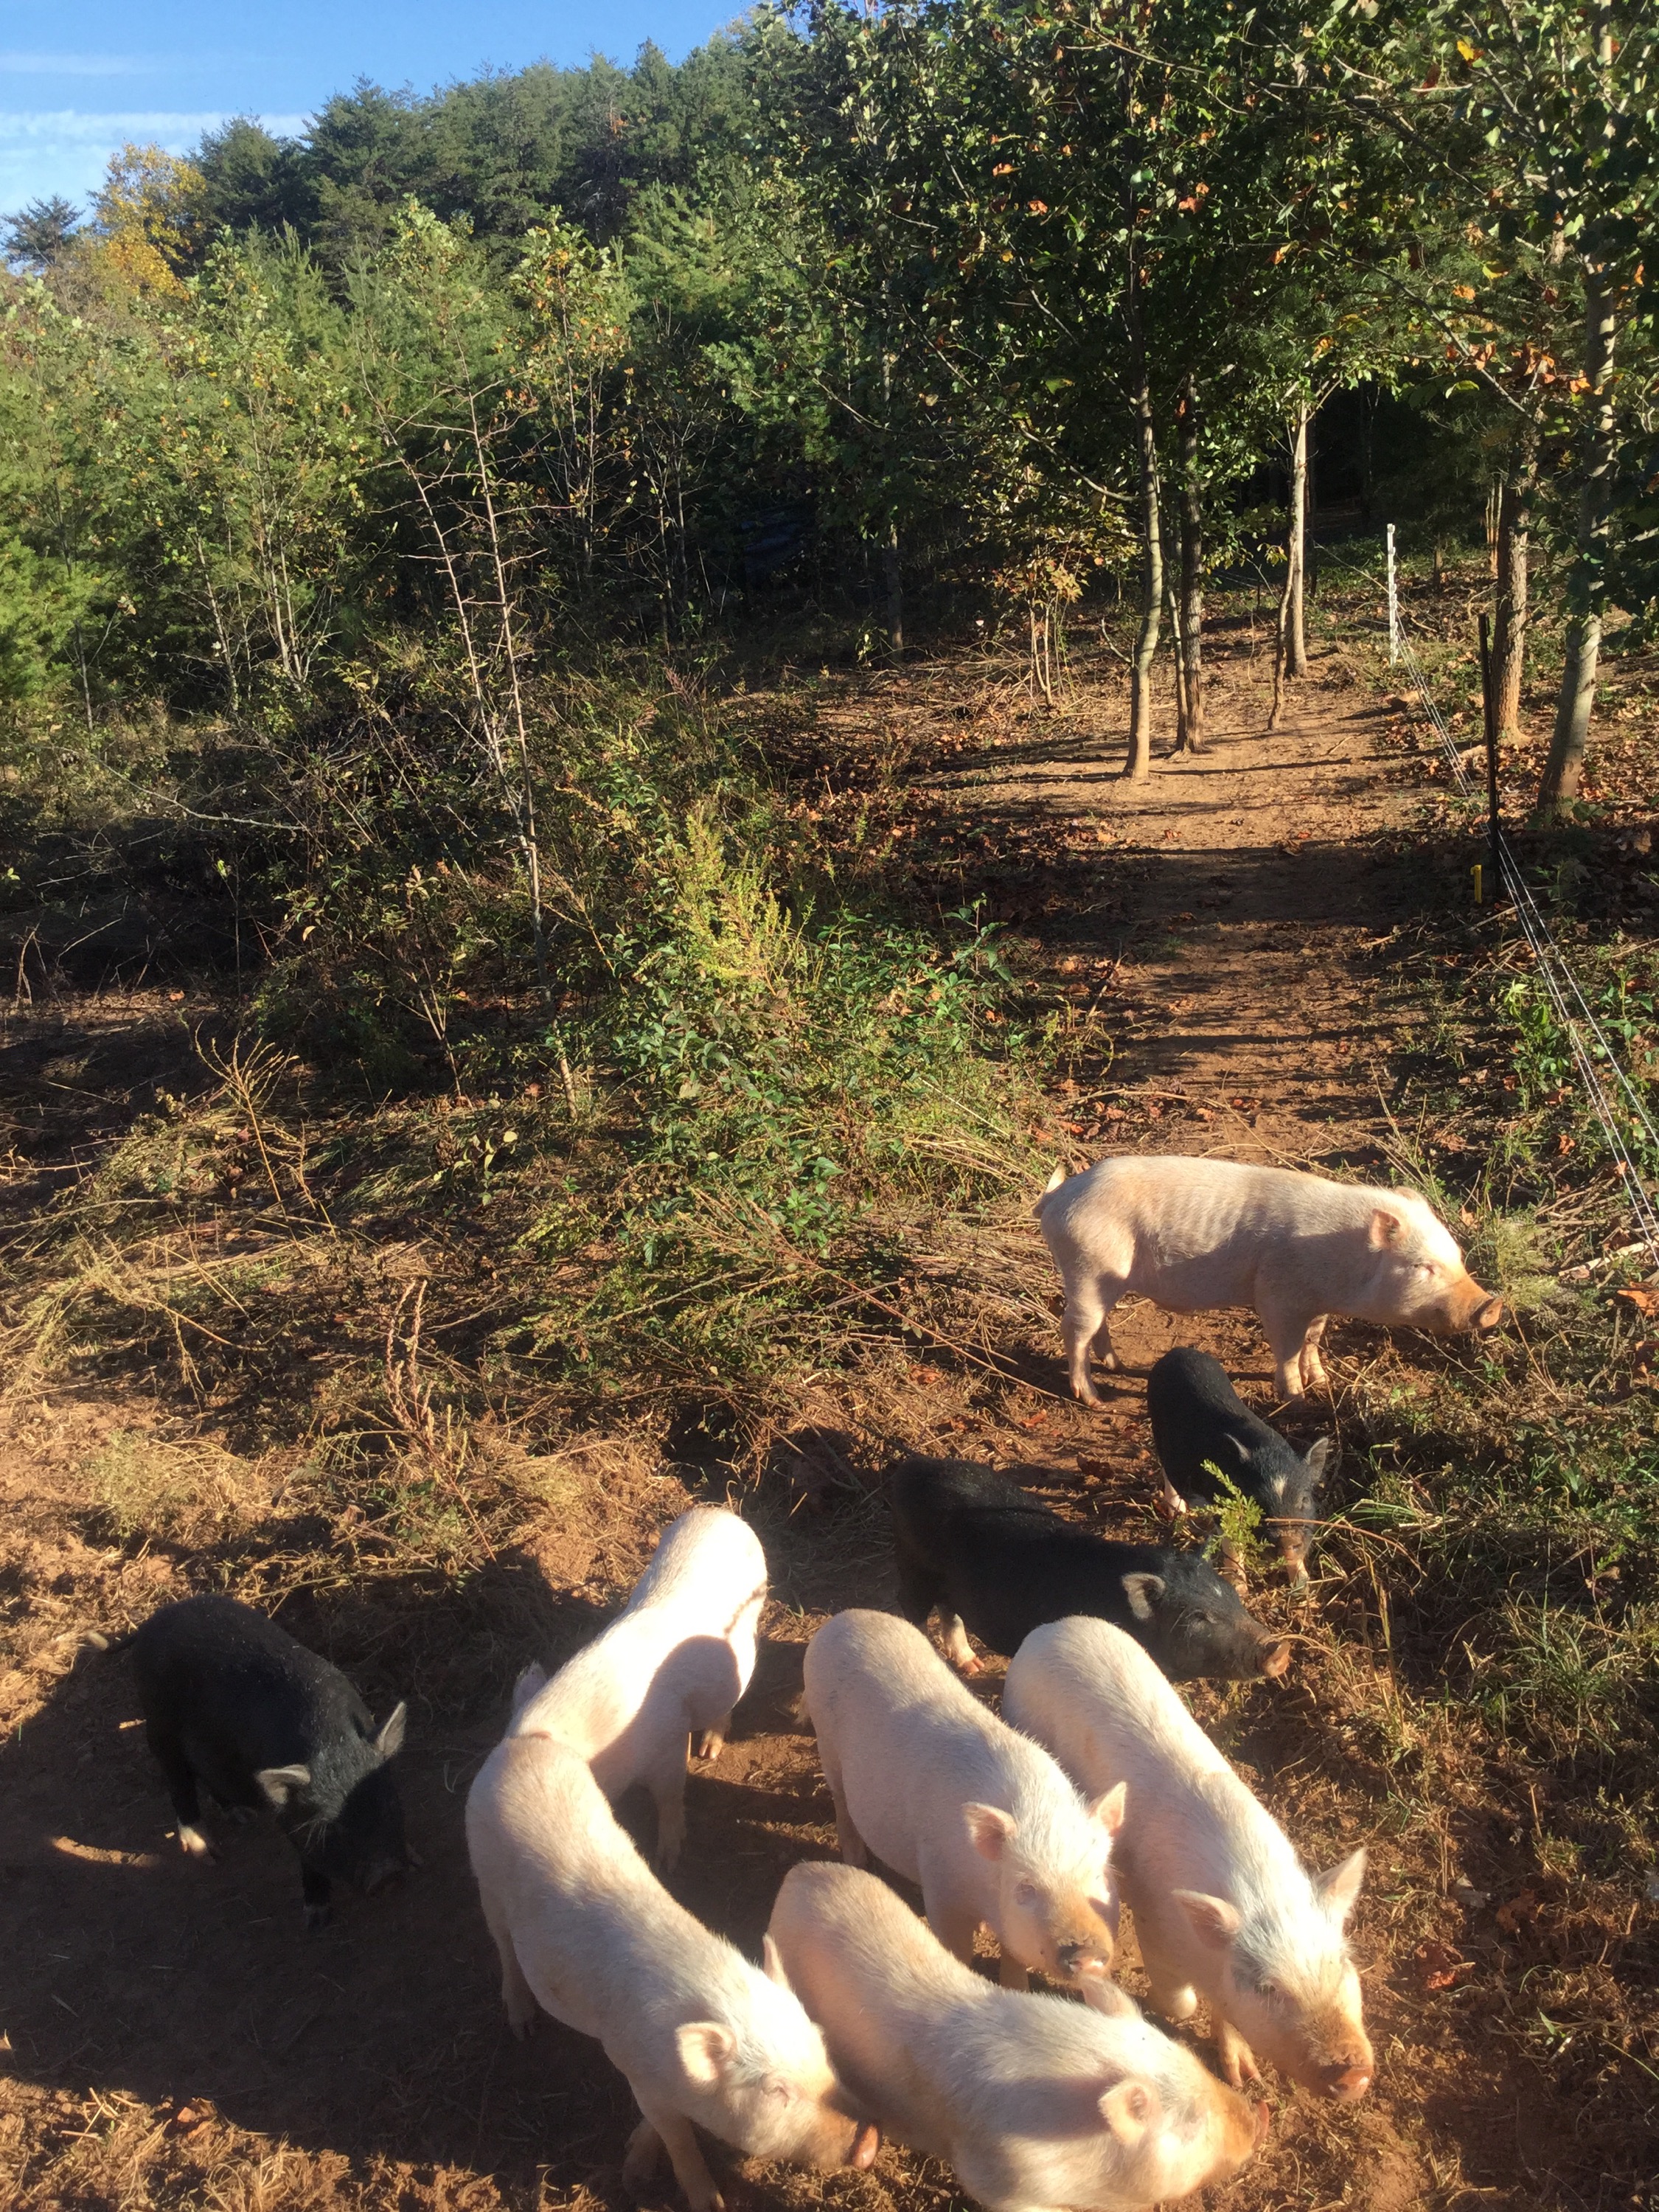
The pigs come over to say hi!
.:.
Our very own bacon, and yes, we’re excited!!!
A few months ago we talked about making homemade sausage on our Facebook page, and we have enjoyed eating that delicious sausage for breakfast, and in soups and casseroles. We will run out soon, so we decided to break out the bacon.
Some of our bacon was cured with salt and some with salt and brown sugar. The meat/fat/skin was cured in our fridge in bags and frozen unsliced in medium-sized sheets.
It was very exciting to slice the bacon… We decided to slice some pieces as thin as we could and leave others thicker. All of the pieces cooked up well, and the crunchy skin on each piece was amazing!
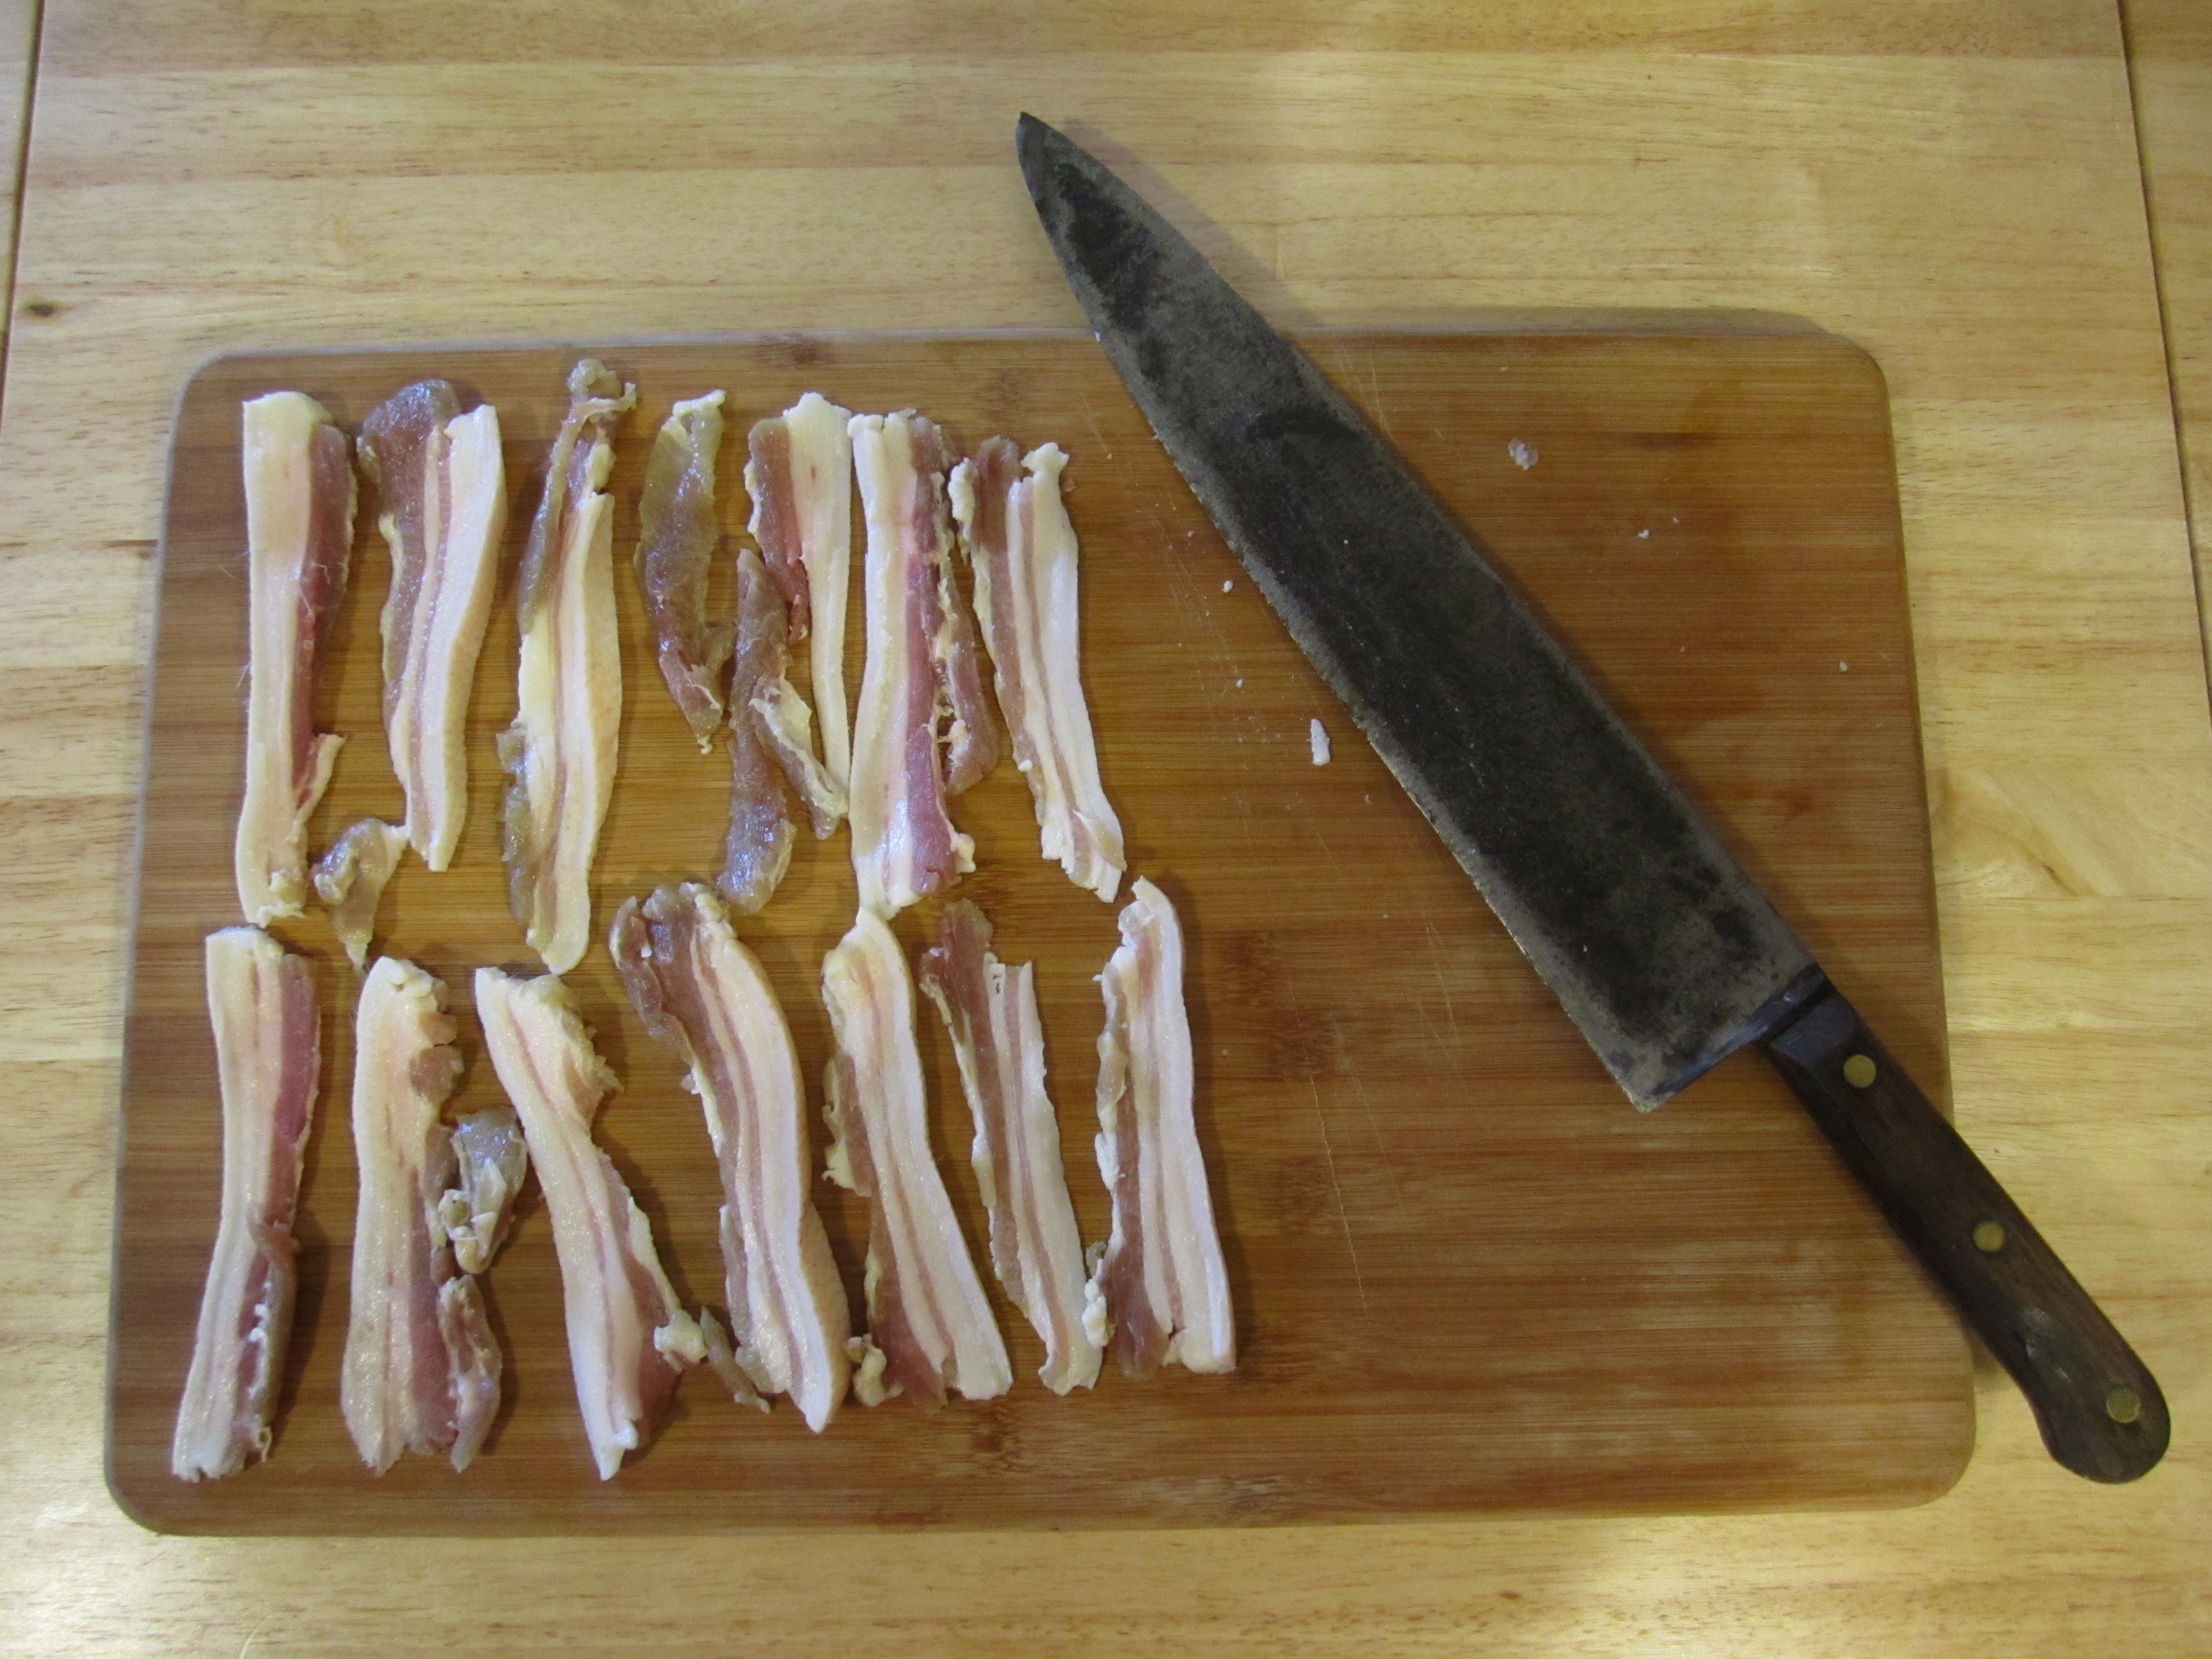
Slicing our bacon!
If you look at the image below, you can see the pinker meat, the layers of white fat in the middle, and the thick layer of skin on the outside edge. This is how bacon should be…!
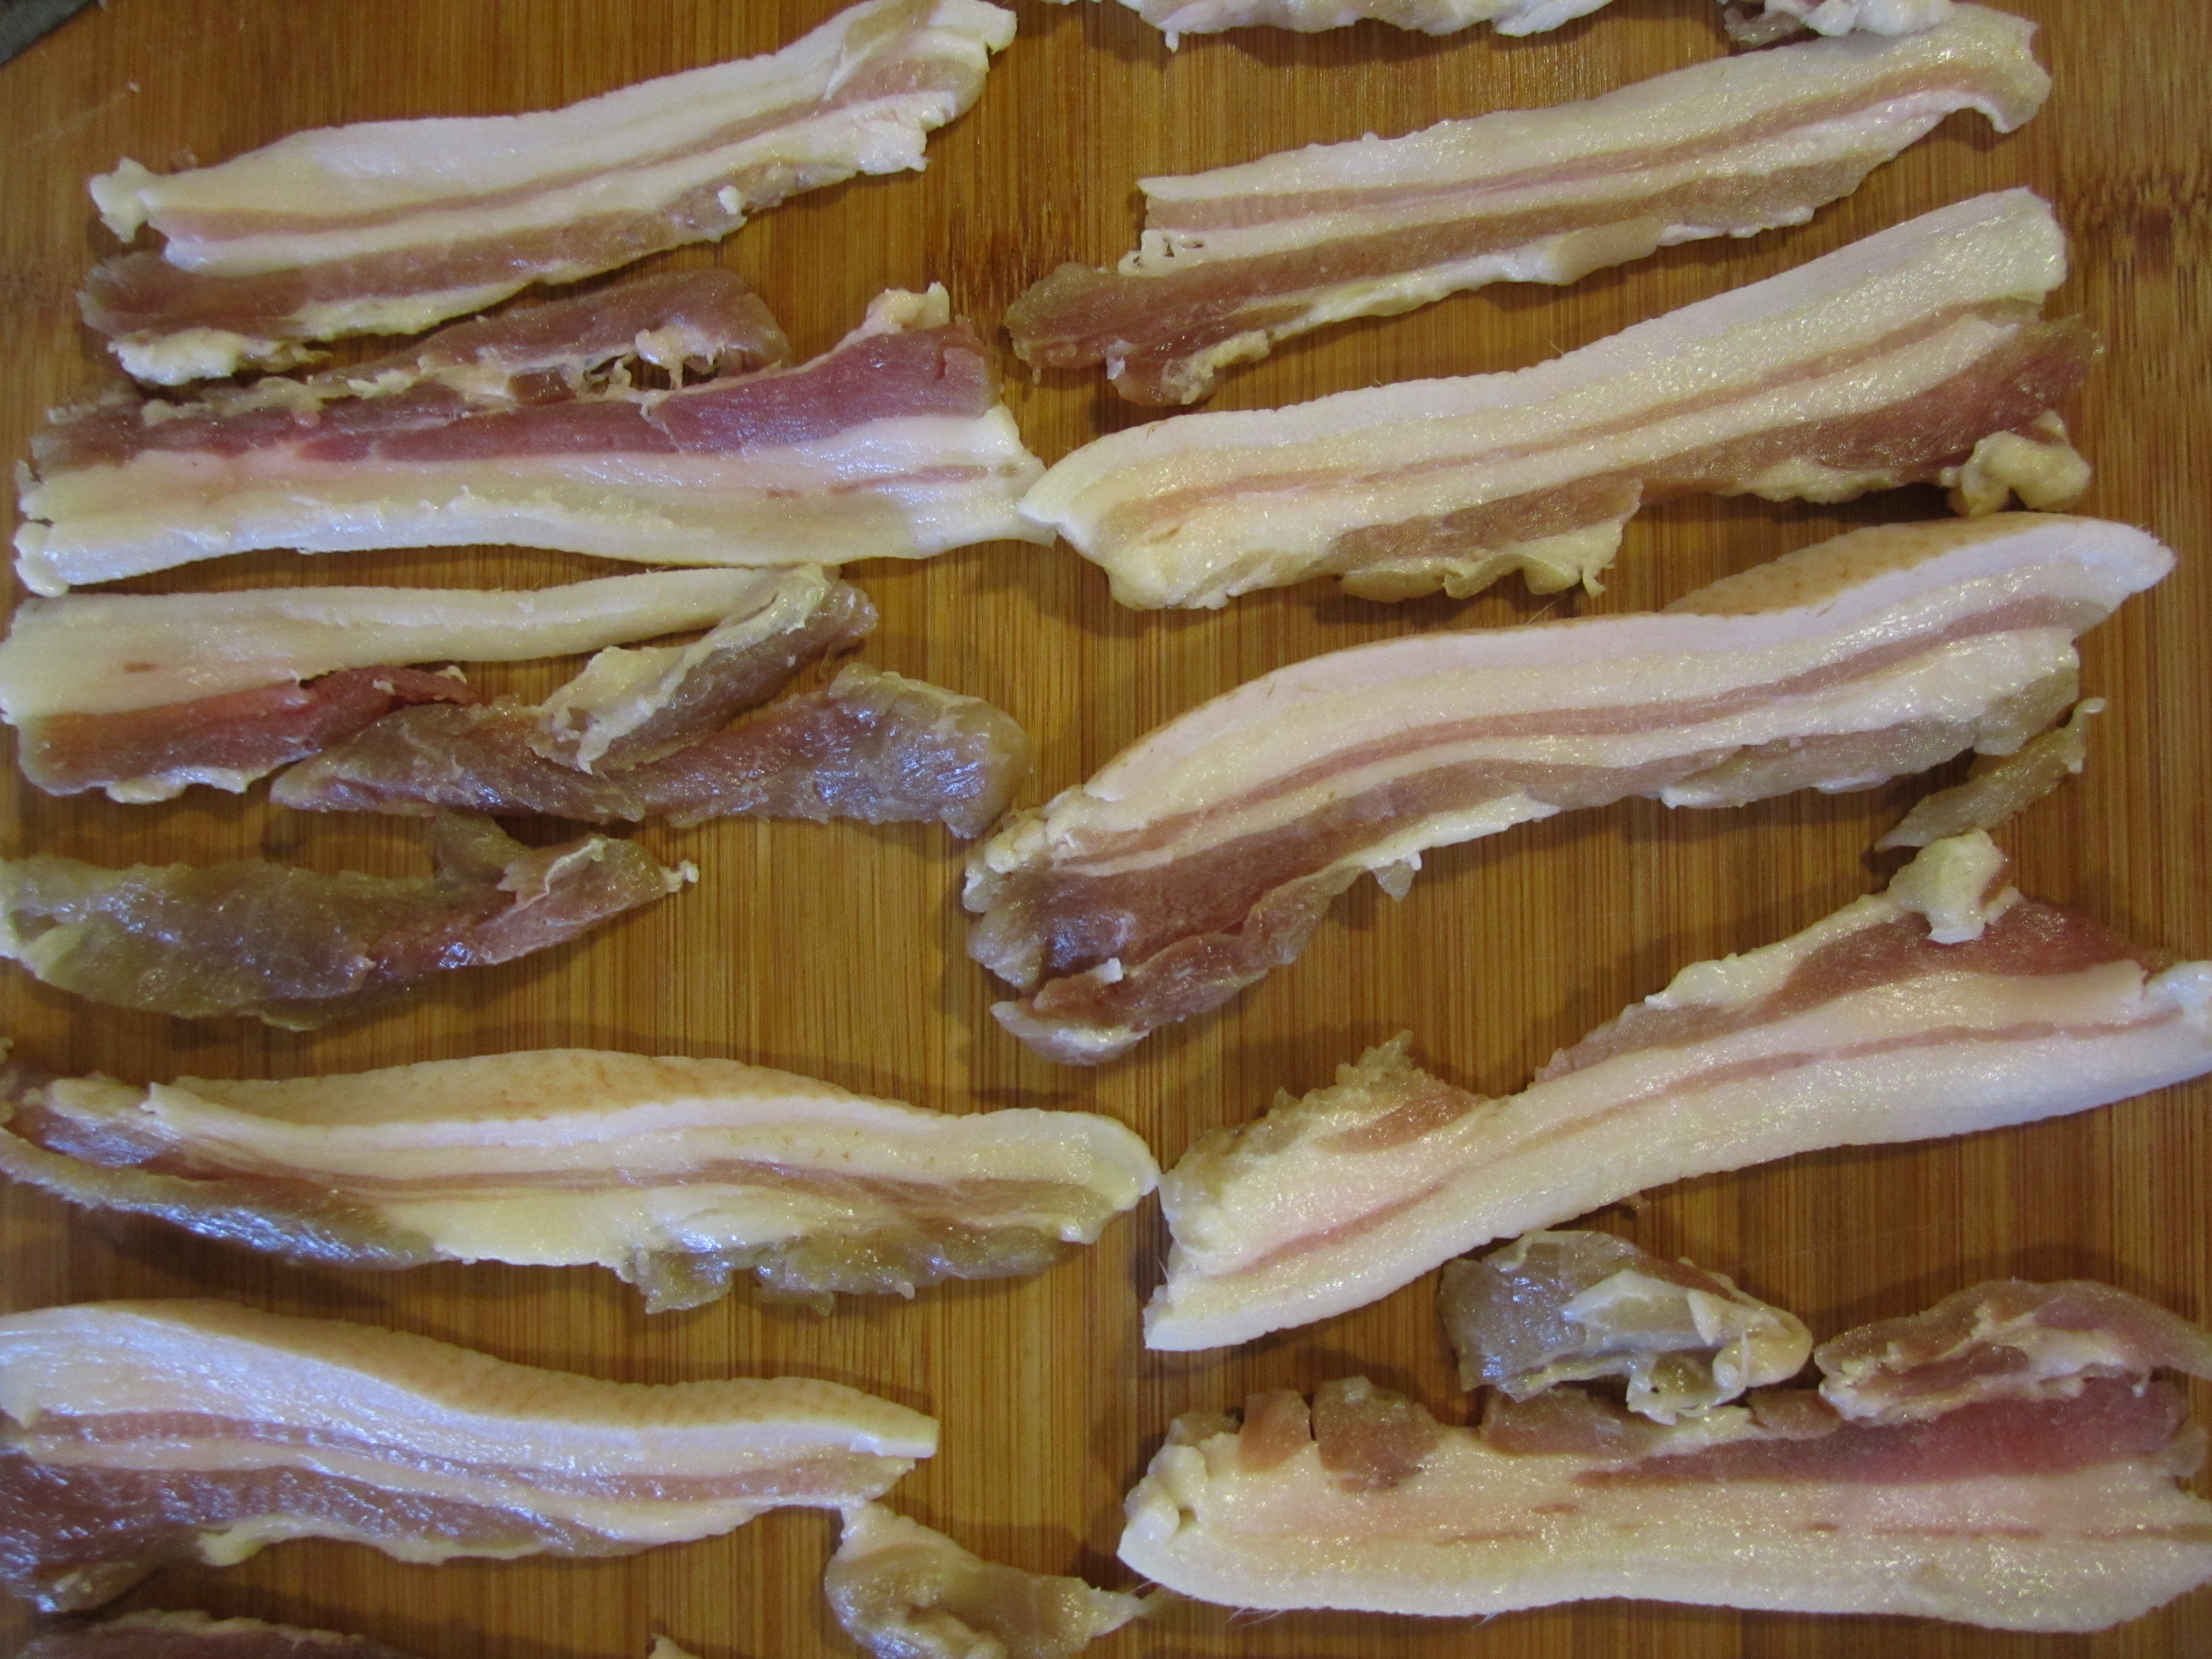
Not much is better than bacon!
Yum!
.:.
With only 4 weeks to go until Thanksgiving, we sure hope you’ve started thinking about your turkey plans!
We shot this video with you in mind, hoping that this funny call-and-response “Turkey Talk” might remind you to start preparing for the upcoming holiday meal!
If you’re interested in reserving your Heritage Thanksgiving Turkey from us, click here!
.:.
We’ve been experimenting with Pekin duck recipes over the last few weeks, learning about the best ways to cook our new favorite meal! We want to offer you some of our thoughts about our simple recipes, in case you are new to cooking duck and wonder how it should be done. So far we’ve cooked 4 ducks in 4 different ways, and we do have our favorite techniques! The exciting thing that we’ve learned from all this cooking, is that it’s really hard to ruin duck, short of burning it. There is so much fat that the meat never dries out the way chicken or turkey does when overcooked. Knowing this should help quell your fear about cooking duck… Just go for it!
Here is the fourth recipe we tried!
Lower Heat, Longer Time (and a Pan Seared Breast): 250 degrees for 3 hours, 350 for 45 minutes, and a quick broil
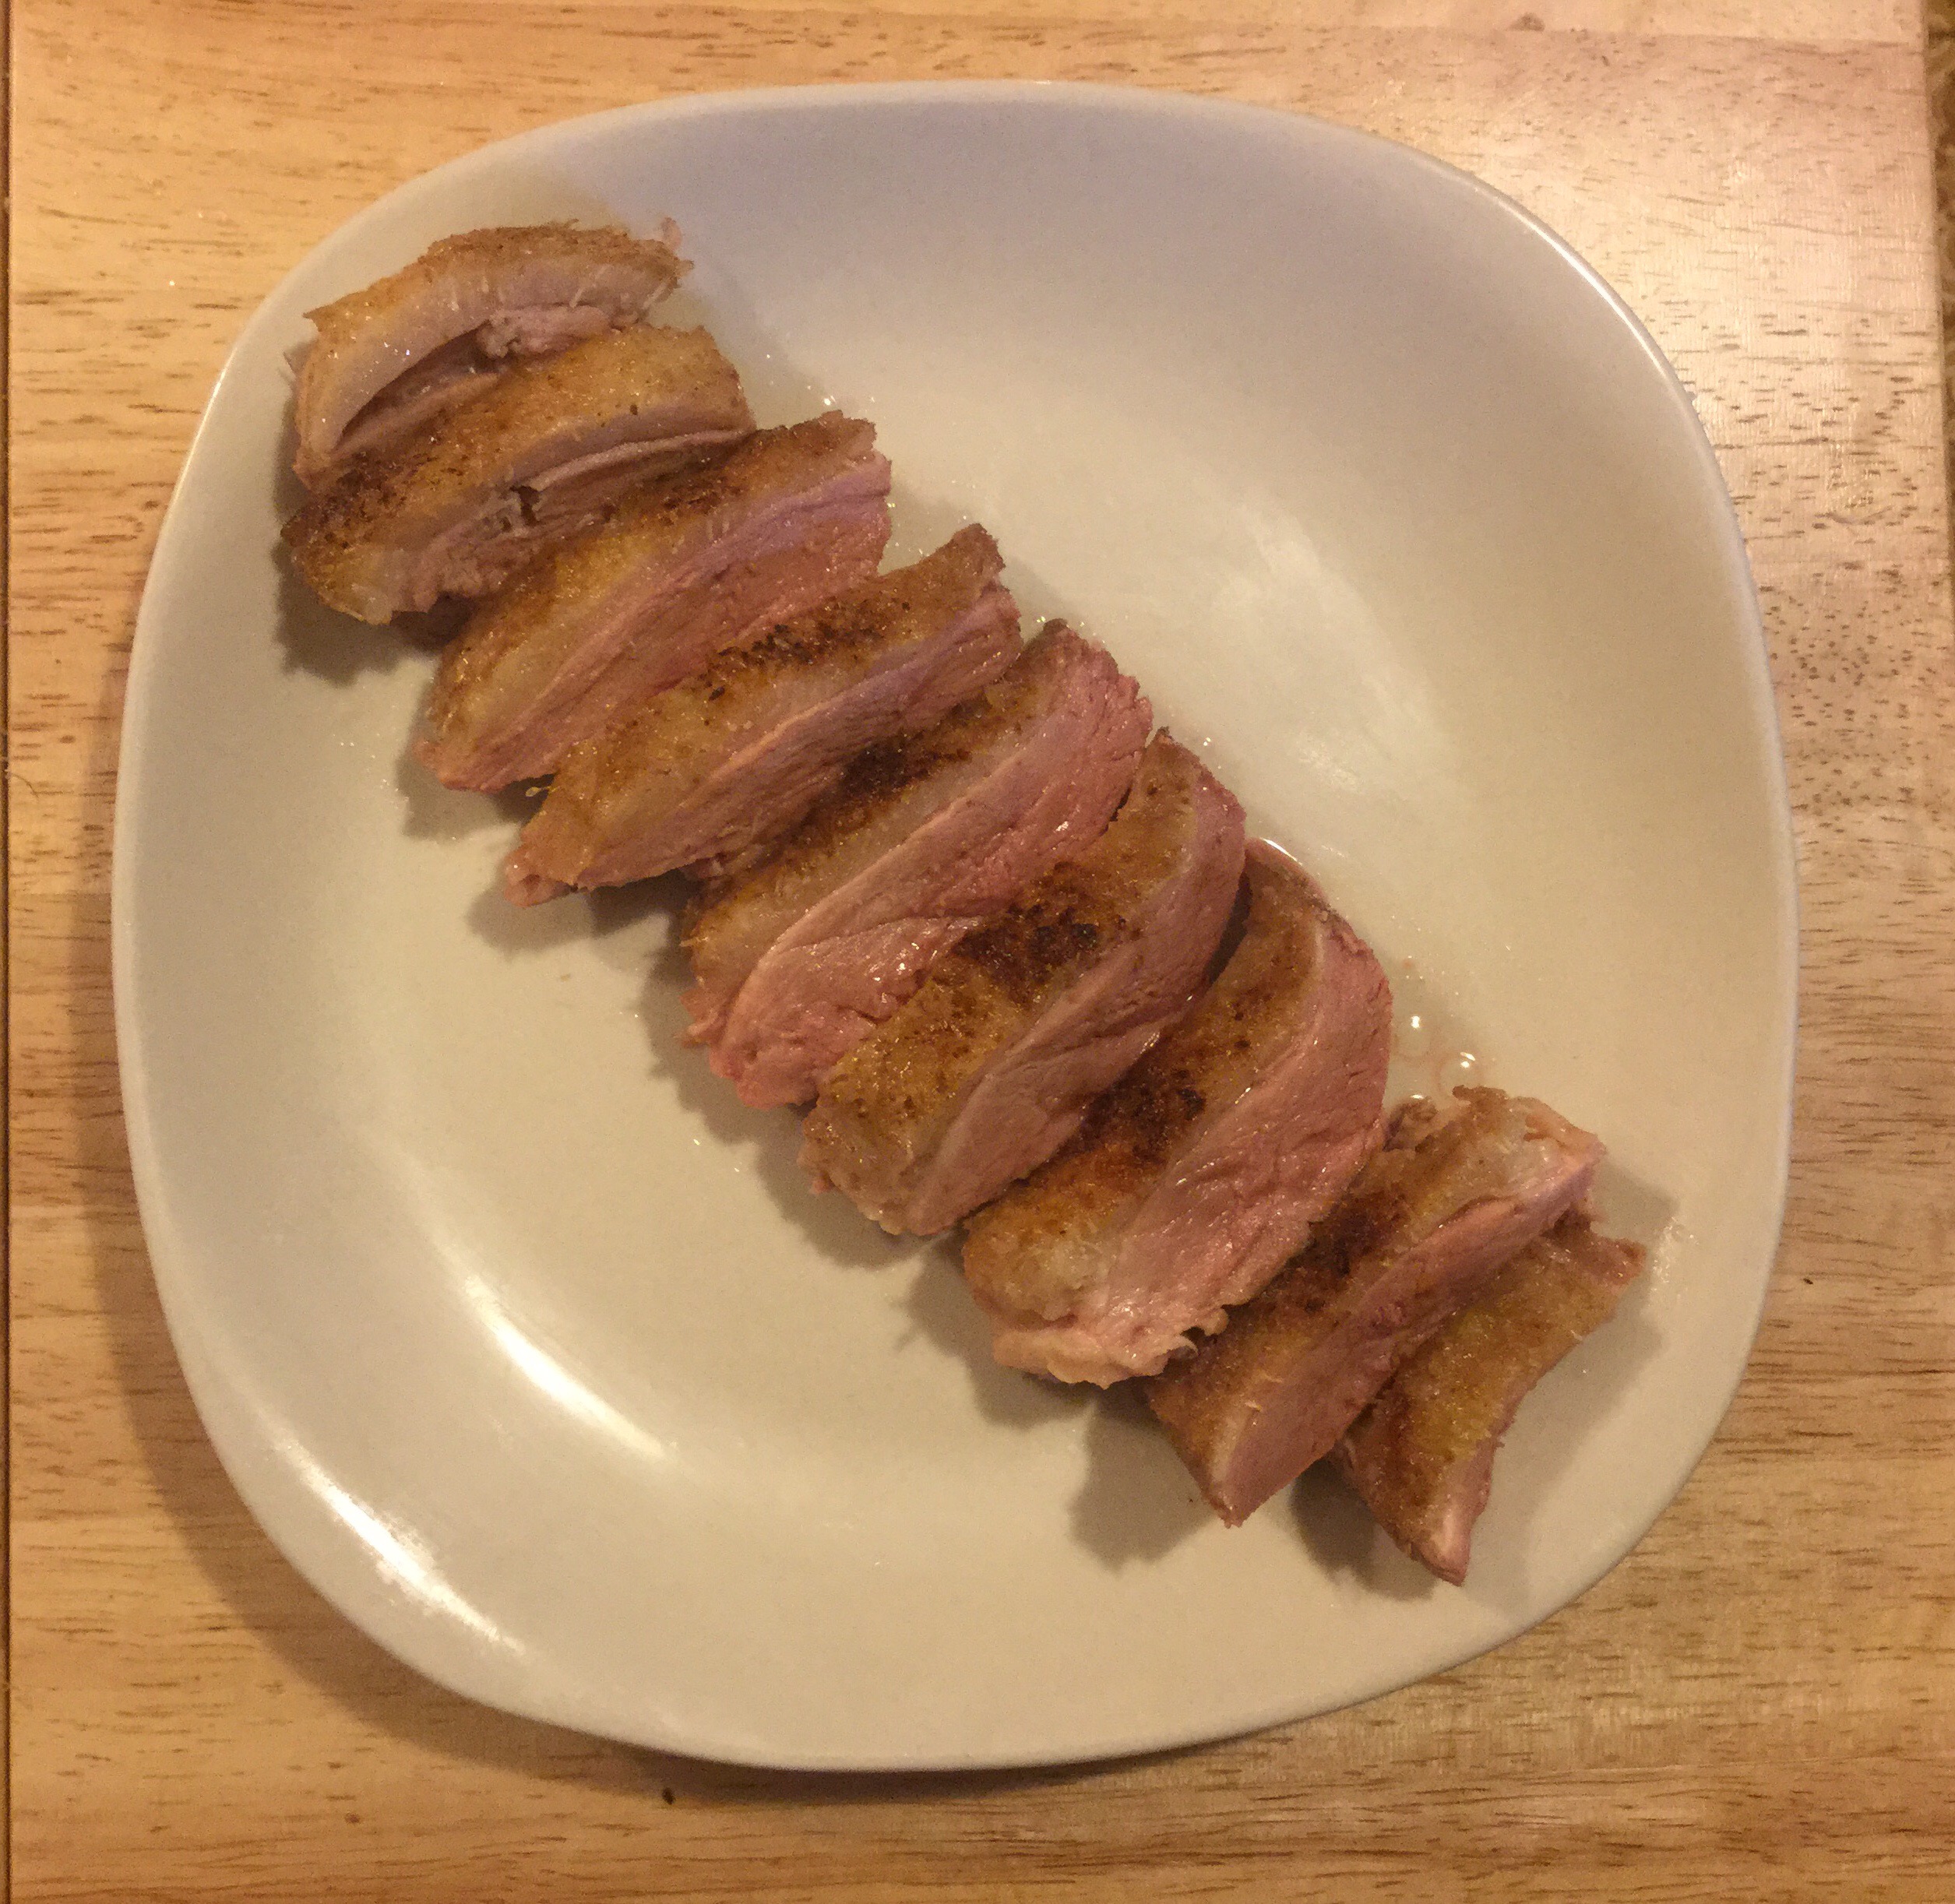
First, cut out the breast! When you remove the breast before you cook the meat for any length of time, it allows you to choose your desired meat temperature/color when you cook it. This is our favorite way of dealing with the bird, since the skin gets all crispy in the pan! Yummy!
Then, score the skin on both sides so that the fat will cook out of the bird and pool in the bottom of the dish. This allows the meat to stay moist but the skin to get crispy!
Cover the duck liberally with salt and garlic powder.
Place the duck, breast down, in a dish and cook for 3 hours at 250 degrees. Then continue cooking the duck at 350 degrees for 45 minutes longer. If you desire even crispier skin, finish off the bird in the oven for a few minutes on broil.
At any point in time, cook the breast in a skillet on the stove. Cook it on medium heat, skin side down so the skin becomes crispy and the fat runs out into the pan! Cook it to the desired color (we think pink is the best)!

Taste Test:
The breast was moist and delicious, with crispy skin! It tasted like a tender cut of beef and was very pink and juicy. This was our favorite breast, since we didn’t cook it in the oven before pan searing it!
The legs were moist and falling off of the bone! These were our favorite thighs to date. Also, the rest of the bird stayed moist and didn’t dry out even though it was cooked for almost 4 hours!!
The skin was super crispy, Jason’s favorite!
Yum!
Through all of this taste testing, we learned that duck can withstand a lot of weirdness and still be great! So don’t be afraid to try out your own recipes. And if you do… Let us know about them here!
.:.
With only 6 weeks left until Thanksgiving, we thought we would leave you with a video of our free ranging Heritage Turkeys enjoying their afternoon walk…
Feeding time!
.:.
We’ve been experimenting with Pekin duck recipes over the last few weeks, learning about the best ways to cook our new favorite meal! We want to offer you some of our thoughts about our simple recipes, in case you are new to cooking duck and wonder how it should be done. So far we’ve cooked 4 ducks in 4 different ways, and we do have our favorite techniques! The exciting thing that we’ve learned from all this cooking, is that it’s really hard to ruin duck, short of burning it. There is so much fat that the meat never dries out the way chicken or turkey does when overcooked. Knowing this should help quell your fear about cooking duck… Just go for it!
Here is the third recipe we tried!
Medium Heat, Pan-Seared Breast: 325 degrees for 1.75 hours
Score the skin on both sides so that the fat will cook out of the bird and pool in the bottom of the dish. This allows the meat to stay moist but the skin to get crispy! Do not score the skin over the breast!
Cover the duck liberally with salt and garlic powder.
Place the duck in a dish and cook for 1 hour. At the end of the hour, remove duck from oven and cut out the breast. Return the rest of the bird to the oven and continue cooking 45 minutes longer. Be sure to flip the bird a few times during the total cooking period.
Now, finish off the breast in a skillet on the stove. Cook it on medium heat, skin side down so the skin becomes crispy and the fat runs out into the pan! Cook it to the desired color (pink is the best)!
Pan-seared duck breast!
Taste Test:
The breast was moist and delicious, with crispy skin! It tasted like a tender cut of beef, and was best served pink. Our second favorite breast, since we thought that we could have cut it out of the bird earlier, around 30 minutes…. Then pan-seared it.
The legs were moist and very good, but not our favorite thighs to date. In fact, the entire bird remained moist (just like with the second recipe)!
The skin was crispy–perfect for me! Jason thought that we could have cooked the bird maybe 30 minutes longer for even crispier skin.
Stay tuned for the fourth recipe we tried!
.:.
We’ve been experimenting with Pekin duck recipes over the last few weeks, learning about the best ways to cook our new favorite meal!We want to offer you some of our thoughts about our simple recipes, in case you are new to cooking duck and wonder how it should be done. So far we’ve cooked 4 ducks in 4 different ways, and we do have our favorite techniques! The exciting thing that we’ve learned from all this cooking, is that it’s really hard to ruin duck, short of burning it. There is so much fat that the meat never dries out the way chicken or turkey does when overcooked. Knowing this should help quell your fear about cooking duck… Just go for it!
Here is the second recipe we tried!
Medium Heat, Roasted Breast: 325 degrees for 2.5 hours with veggies
Score the skin on both sides so that the fat will cook out of the bird and pool in the bottom of the dish. This allows the meat to stay moist but the skin to get crispy!
Cover the duck liberally with salt and garlic powder.
Place the duck, breast up, in a dish filled with your favorite veggies (we used carrots, celery, and onion). The great thing about this is that the veggies will soak up the duck fat and become the most delicious veggies you’ve ever tasted! Add as many veggies as you’d like… There is plenty of duck fat to go around!
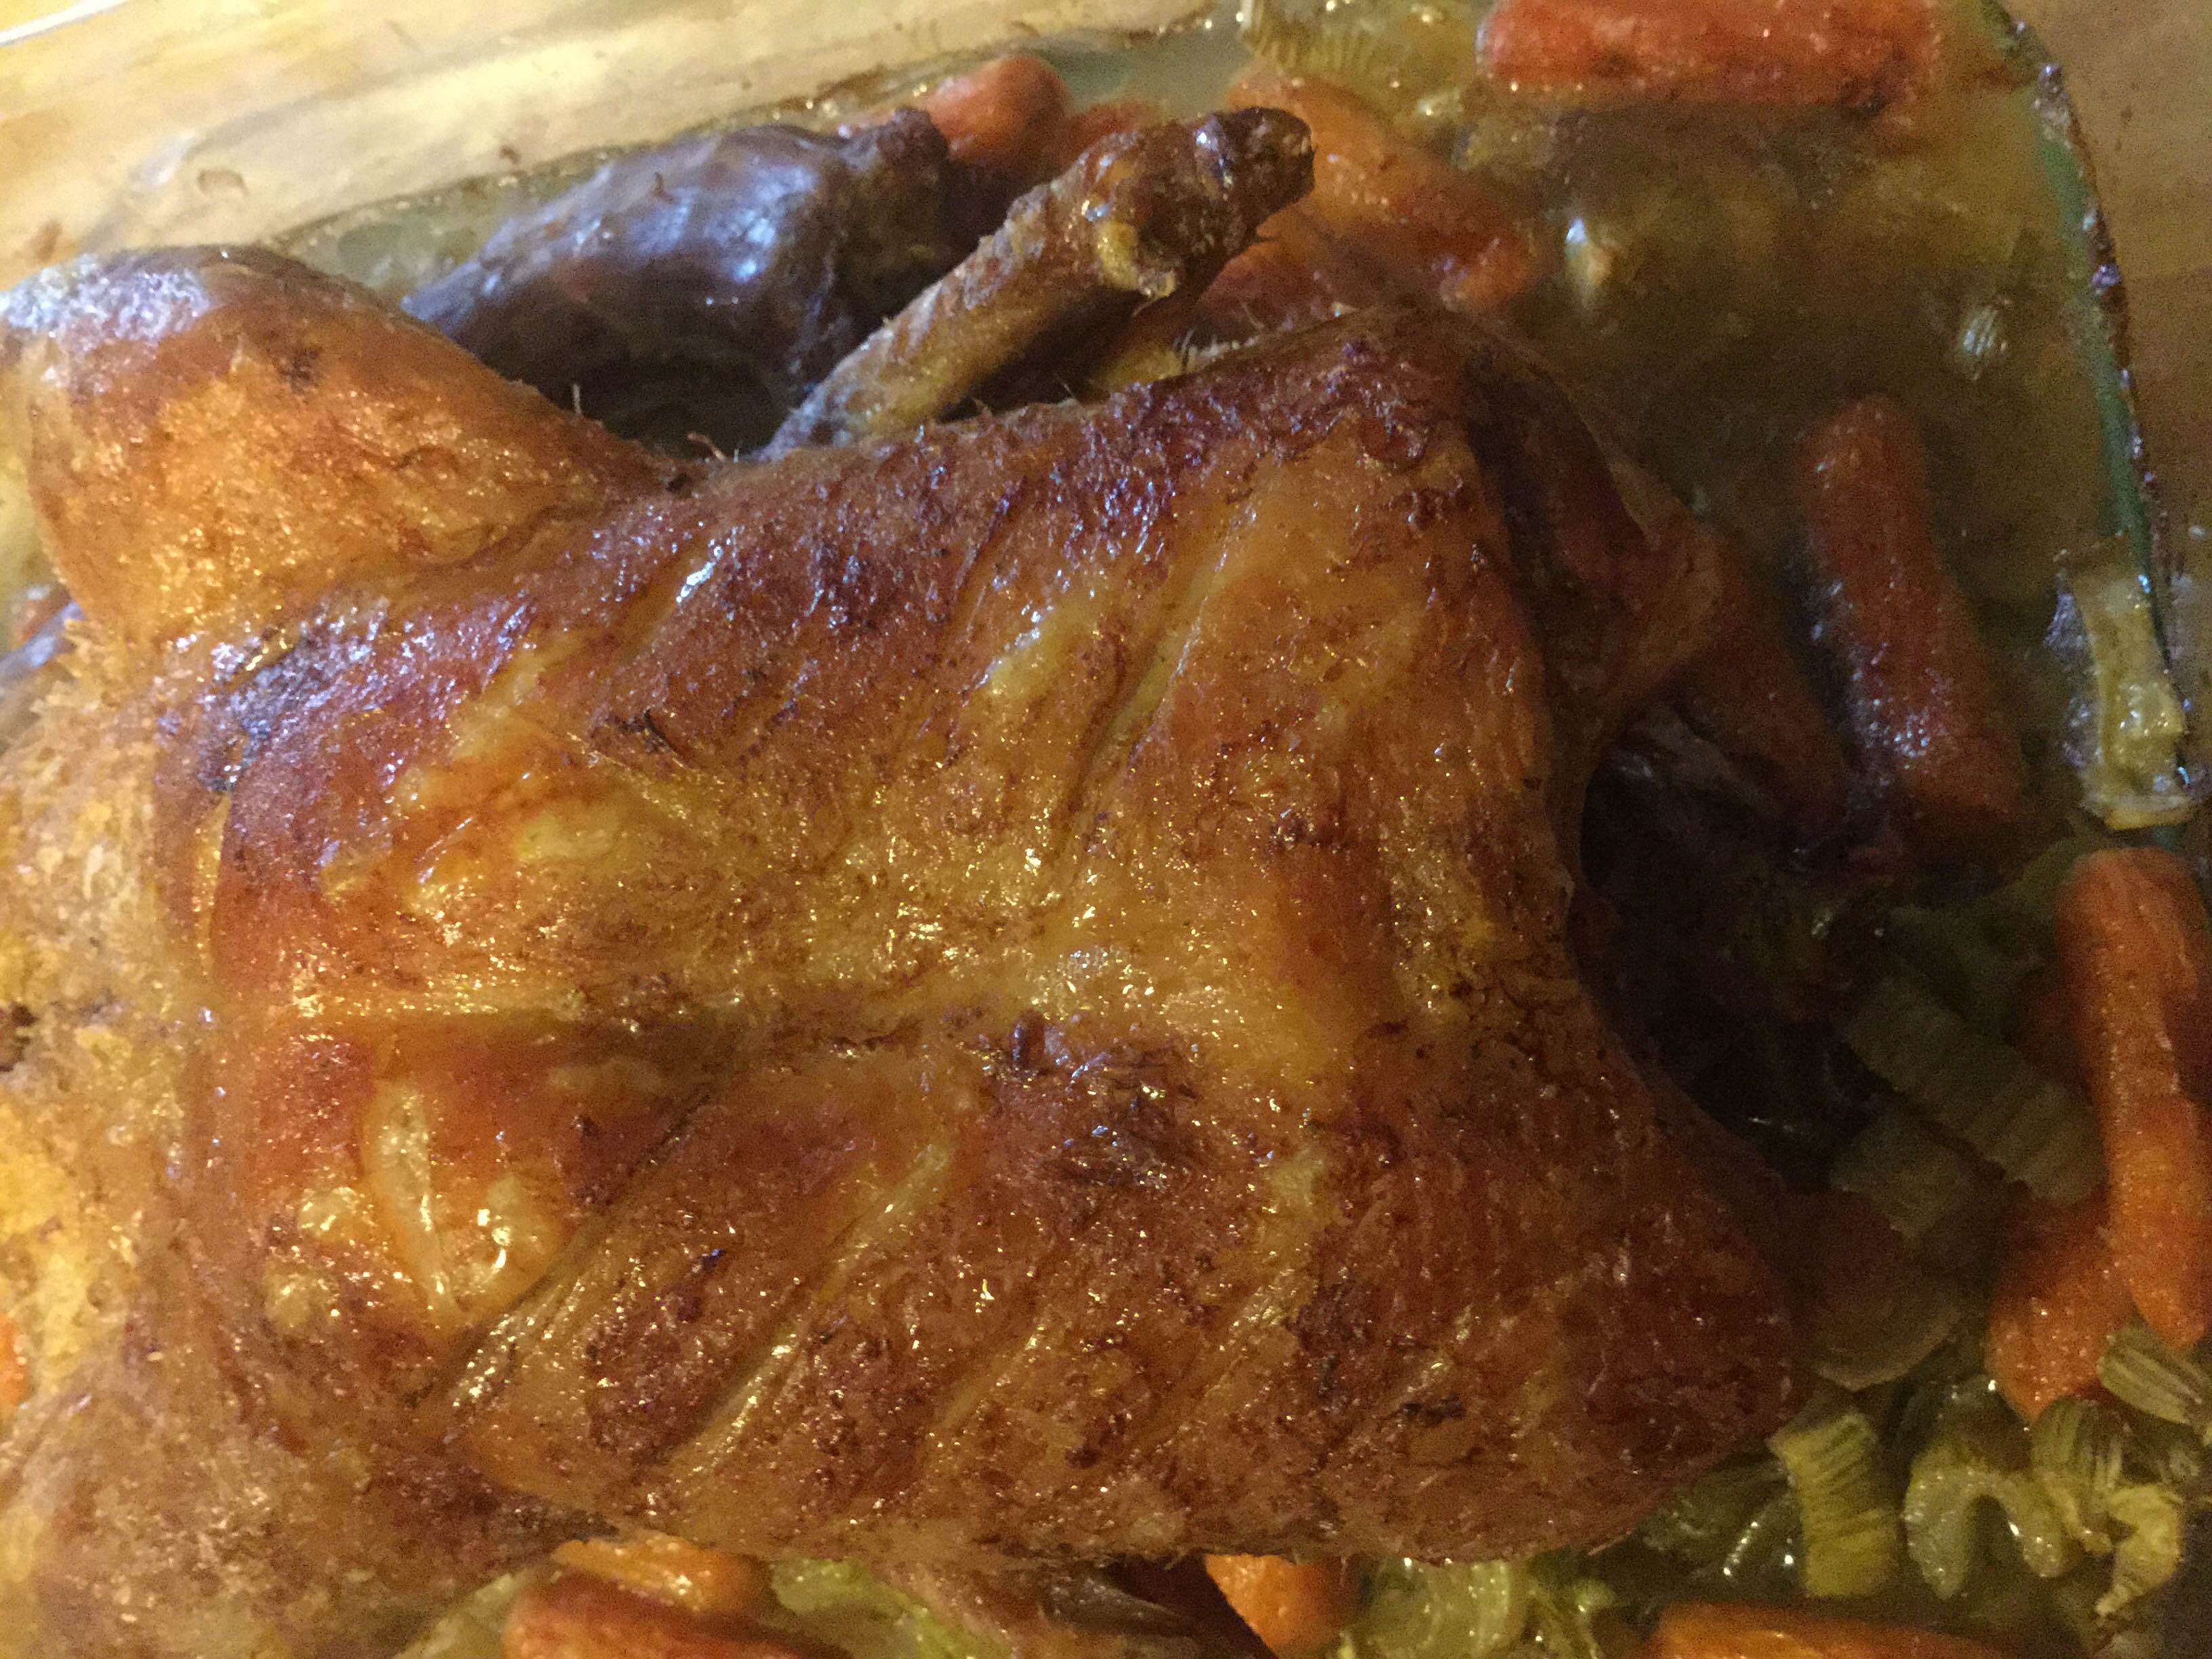
The finished product!
Taste Test:
The breast was moist and delicious, but it wasn’t our favorite technique to date!
The legs were a moist and very good, but not our favorite thighs to date.
The skin on the top of the bird was crispy, and my favorite skin overall! But, since the bird was not flipped during the cooking time, the skin adjacent to the veggies was not crispy!
Stay tuned for the third recipe we tried!
.:.
We’ve been experimenting with Pekin duck recipes over the last few weeks, learning about the best ways to cook our new favorite meal!We want to offer you some of our thoughts about our simple recipes, in case you are new to cooking duck and wonder how it should be done. So far we’ve cooked 4 ducks in 4 different ways, and we do have our favorite techniques! The exciting thing that we’ve learned from all this cooking, is that it’s really hard to ruin duck, short of burning it. There is so much fat that the meat never dries out the way chicken or turkey does when overcooked. Knowing this should help quell your fear about cooking duck… Just go for it!
Here is the first recipe we tried!
High Heat, Low Time: 425 degrees for 2 hours
Score the skin on both sides so that the fat will cook out of the bird and pool in the bottom of the dish. This allows the meat to stay moist but the skin to get crispy!
Cover the duck liberally with salt and garlic powder.
Flip the bird 2 or 3 times during the cooking time, spaced evenly throughout the 2 hour time period.
Cut the breast out of the bird after 1 hour and 15 minutes and continue cooking the rest of the meat for another 45 minutes.
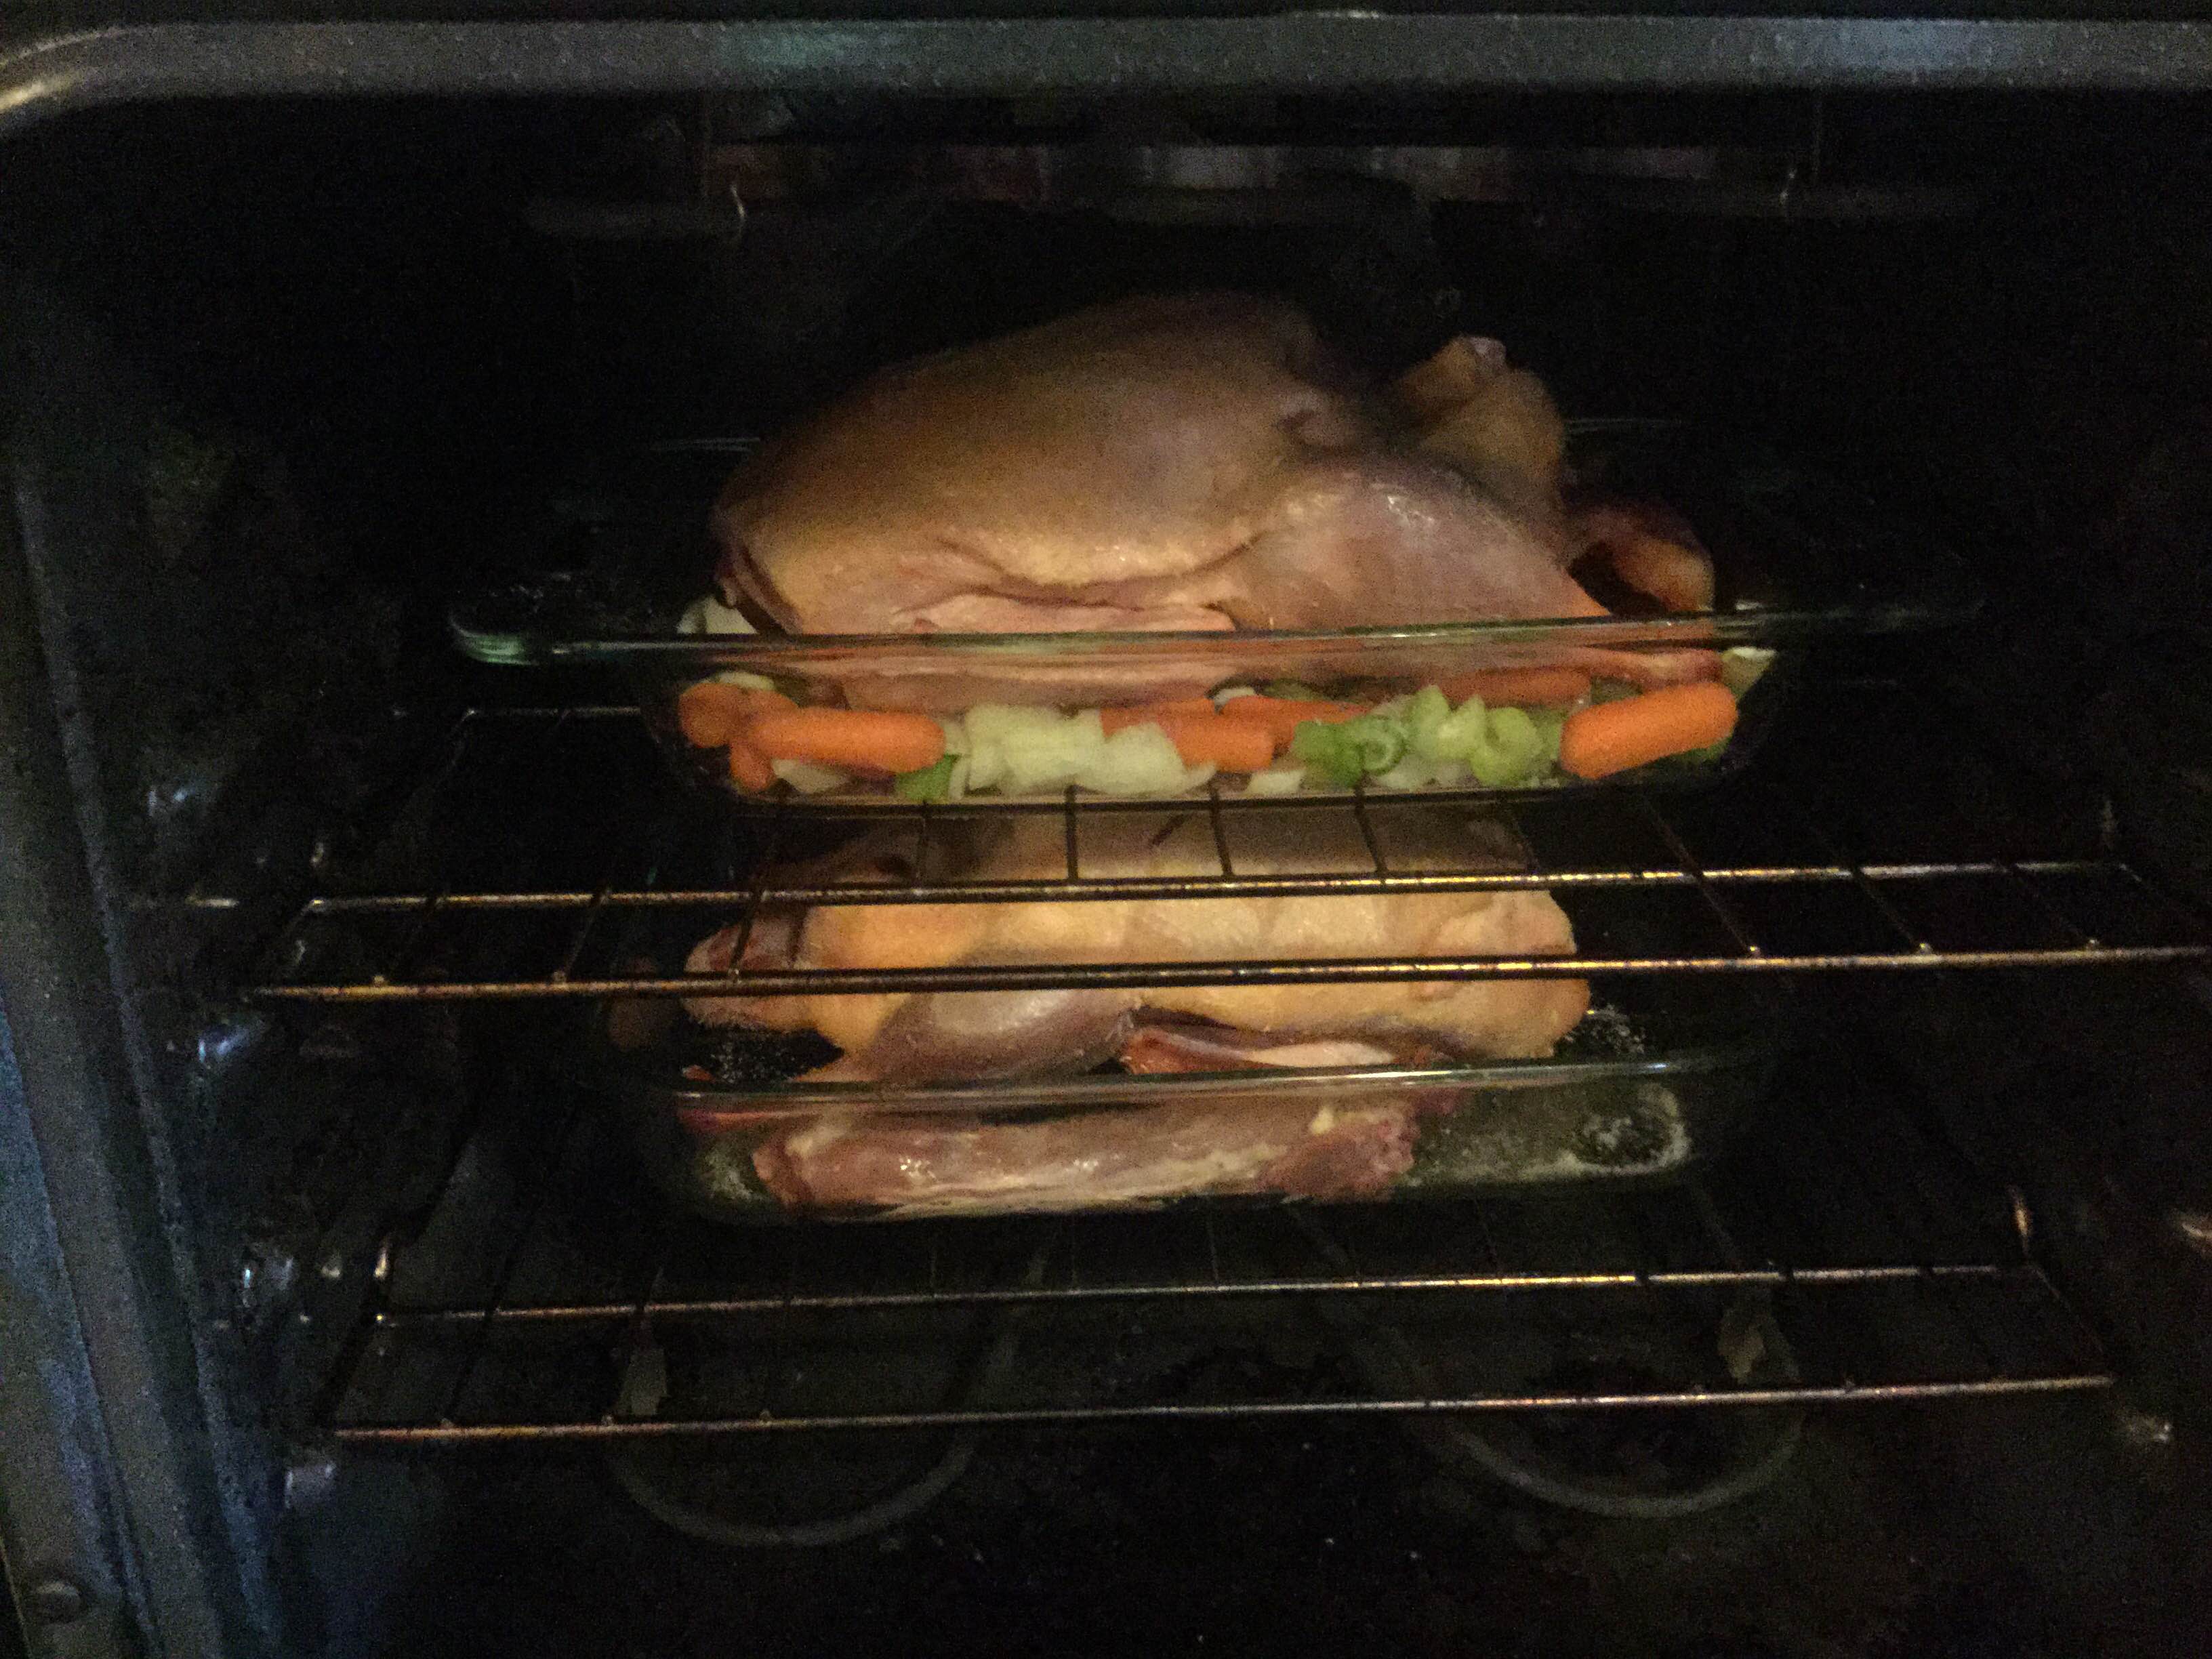
Ducks going in the oven!
Taste Test:
The breast was overcooked and a little dry. We learned that we should have cut it out much sooner!
The legs were a perfect moistness.
The skin was partially crispy, which was great for me but Jason would have preferred it crispier!
Stay tuned for the second recipe we tried!
.:.
© 2025 KW Homestead
Theme by Anders Noren — Up ↑