KW Homestead

Pasture Raised Poultry & Edible Landscaping Plants Since 2013

Category: his thoughts (page 8 of 13)

First Potato Harvest Taste Test of 2014

The other day we harvested the first of our 2014 potato crop. We planted 9 different types of seed potatoes, and we figured it was time to check on 2 of our early varieties, Cobbler and Early Ohio. The vines still had some life to them, but we decided to check on their progress anyway and dug up 1 plant of each. We jumped the gun a bit, but between the 2 plants, there was enough for a nice side dish of boiled new potatoes.

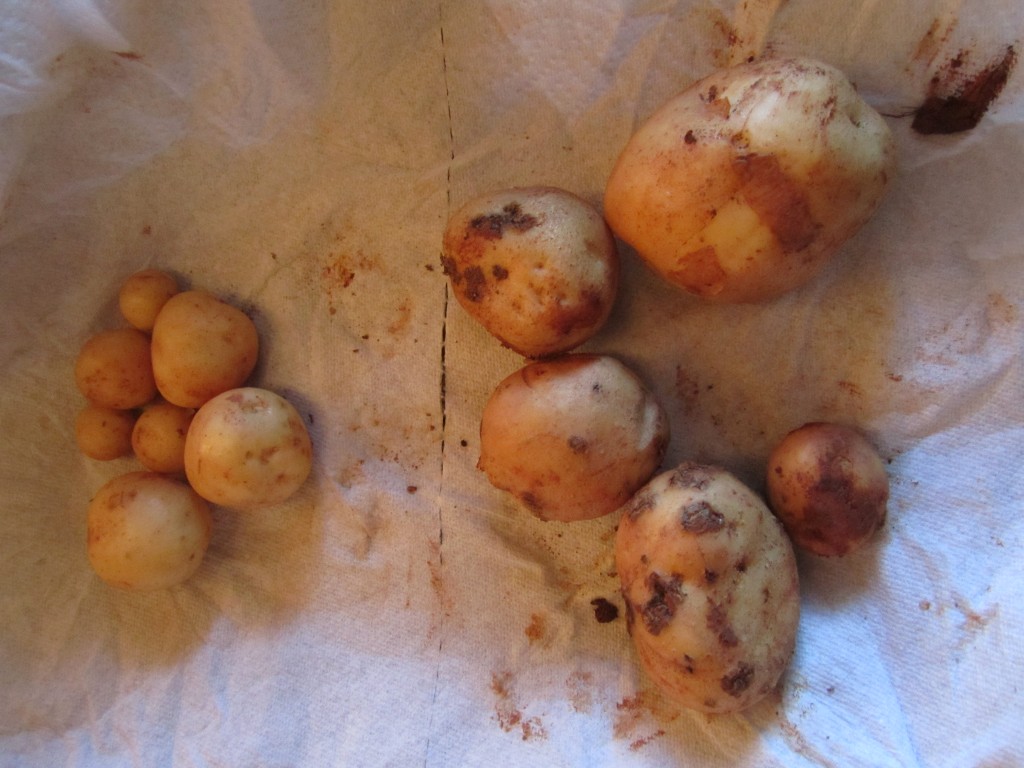
early ohio vs cobbler potato

Early Ohio potatoes on the left, and Cobbler on the right.

The Cobblers were noticeably larger, and the plants had just begun to die back, whereas the Early Ohio’s were tiny, and they were many more pea sized potatoes that were still in the process of growing. We harvested some of the bigger tubers from each plant, and then replanted and watered in the rest to give the tiny tubers some more time. All told, we got 3/16 of a pound of Early Ohio, and 5/8 of a pound of Cobblers.

After a quick rinse and scrub, we cut the cobblers into pieces about the size of the tiny Early Ohio potatoes, and boiled them in salty water. Fresh potatoes cook much quicker than store bought ones and in almost no time we began our first of many potato taste trials. The two early white potatoes were similar in flavor and texture but still different. I enjoyed the sharpness of the Early Ohio, while Emma enjoyed the more potatoey flavor of the cobbler which is better suited to boiling and steaming.

Because these early potatoes still needed more time, I fertilized all of the potatoes today with a mix of bone meal, alfalfa meal, and greensand. I for one can’t wait until we have all 9 varieties harvested, and can review and compare them all at the same time!

Easy, Fun, and Attractive Wattle Fencing

Part of the process of clearing land is dealing with the abundance of small trees, branches and other woody material. On our property, we try to utilize as much of the wood as possible, either by burying the wood to make hugelkulture raised beds, dropping it as rough mulch, piling it in gullies to slow erosion, or as firewood. But the other day we came up with another way to use this surplus…wattle fencing.

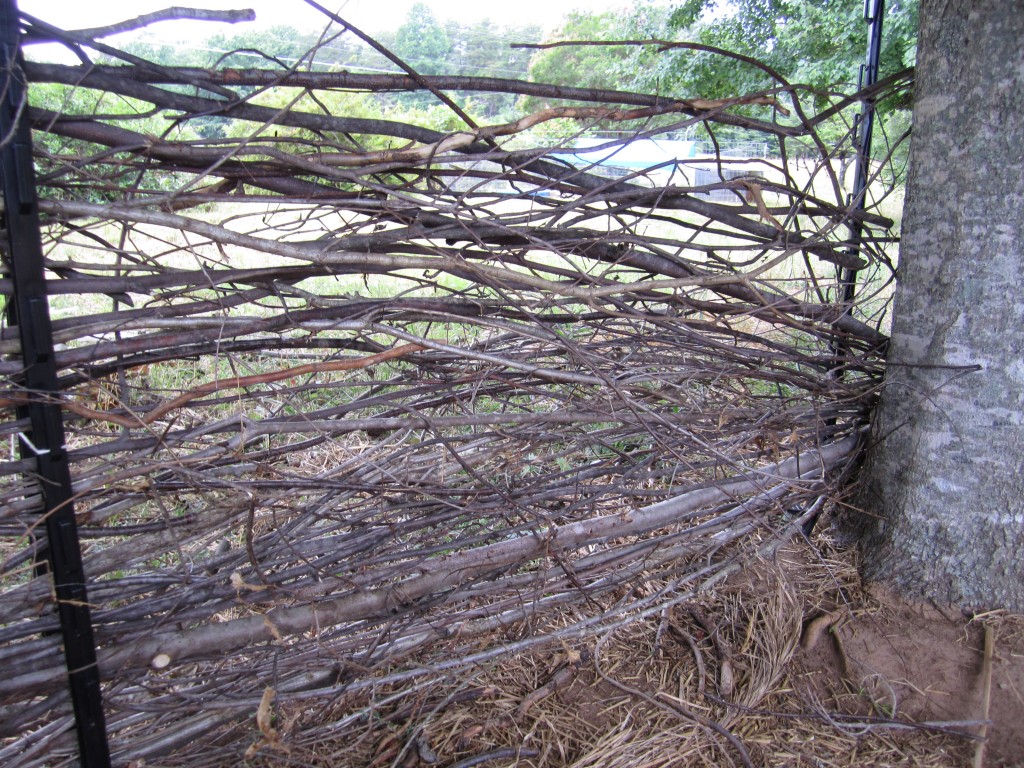
simple wattle fencing

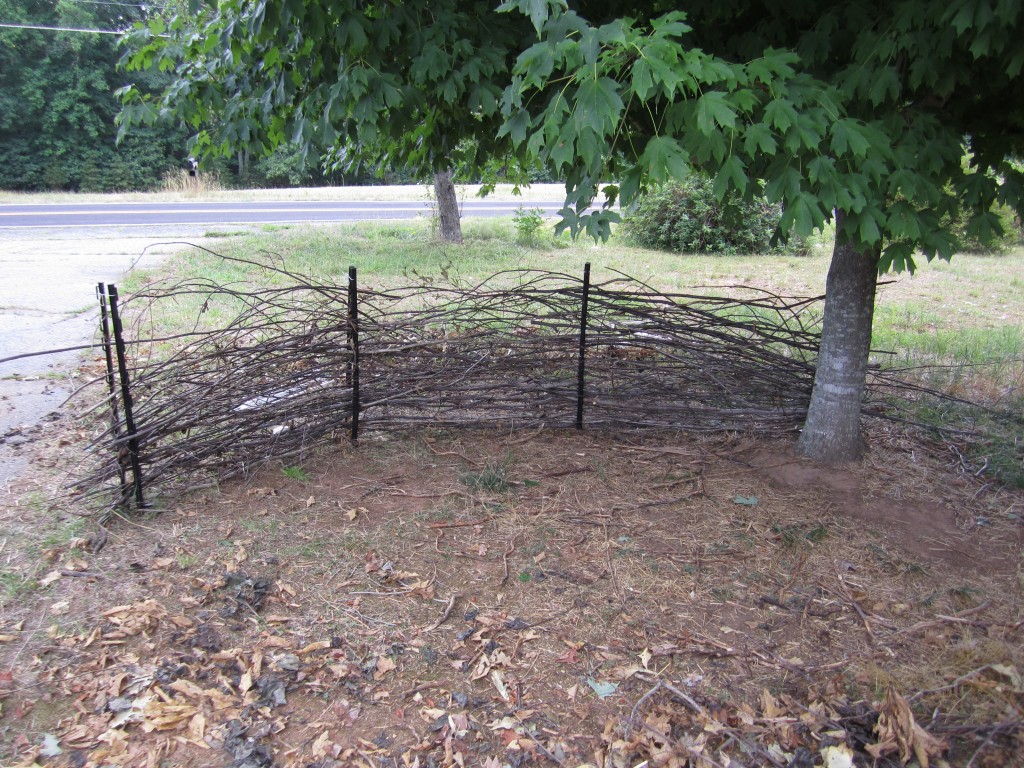
Wattle fencing is an easy and elegant way to re-purpose waste wood for good use.

Wattle fencing is an ancient technique that farmers, peasants, and the rest of humanity have utilized for hundreds of years. At it’s most basic level, it involves weaving long, thin pieces of supple wood around upright posts to form a solid fence. We decided that a wattle fence would be a great way to make an attractive dog enclosure for Bridey in our front yard under a nice shady maple tree. Much more appealing than the chicken wire paddock she has now.

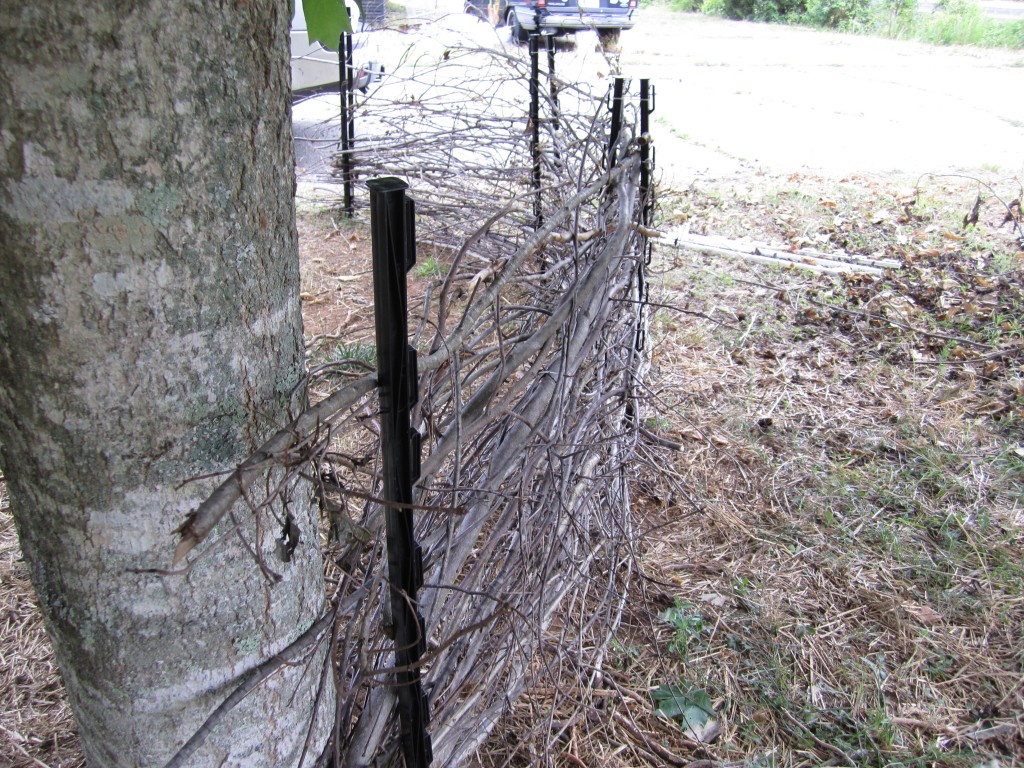
wattle fencing homesteading

The natural variation among the different sizes and types of wood looks great in our homemade wattle fence.


Traditionally, coppiced woods like hazel, willow, and chestnut were used for both the vertical poles and the horizontal weavers, but we used the mixture of woods that we had piled up from our recent clearings, mainly oak, poplar, tree of heaven, and some maple. For uprights, we used fiberglass step-in-posts that are used for electric fencing and portable poultry netting. We decided on a circular shape that matched the shadiest area beneath the tree, and placed pairs of posts a few inches apart, every 4-5 ft to hold the fence together. We then slid the long pieces of wood between the pairs of posts, following the natural curve of the branches, and weaving the supple twigs together to form a pretty weave that is simple, strong, and sturdy.

wattle fencing technique

We used step in posts to keep the wood in place, but next time  we will probably just use wooden posts.

This is actually a lot of fun, and is half puzzle, half art project. Our mix of woods makes for a rustic look, and we are already planning where else we can build some wattle fencing, but first we’ll have to finish Bridey’s new dog pen. In the future we will definitely use wooden posts for a more authentic feel, most likely digging with a post-hole digger and setting the uprights in place like corner posts. Either way, wattle fencing is an age old technique, but a beautiful one that modern homesteaders should consider when designing and laying out their property.

Small Scale Wheat Harvest

Last fall, I planted some winter wheat in a small part of our front yard. After allowing our flock of chickens to scratch, weed, and manure their 16 ft. by 32 ft. enclosure, we moved their mobile chicken coop, and I broadcast some winter wheat seed. It seemed to barely grow over the winter, and I feared I had planted it too late in the season to get established before the cold came, but come Spring it sprang into life and started to head out. Our  beautiful little plot of wheat, bristling in the wind, made us understand the sentiment of “amber waves of grain”. It was quite a site from the carport.

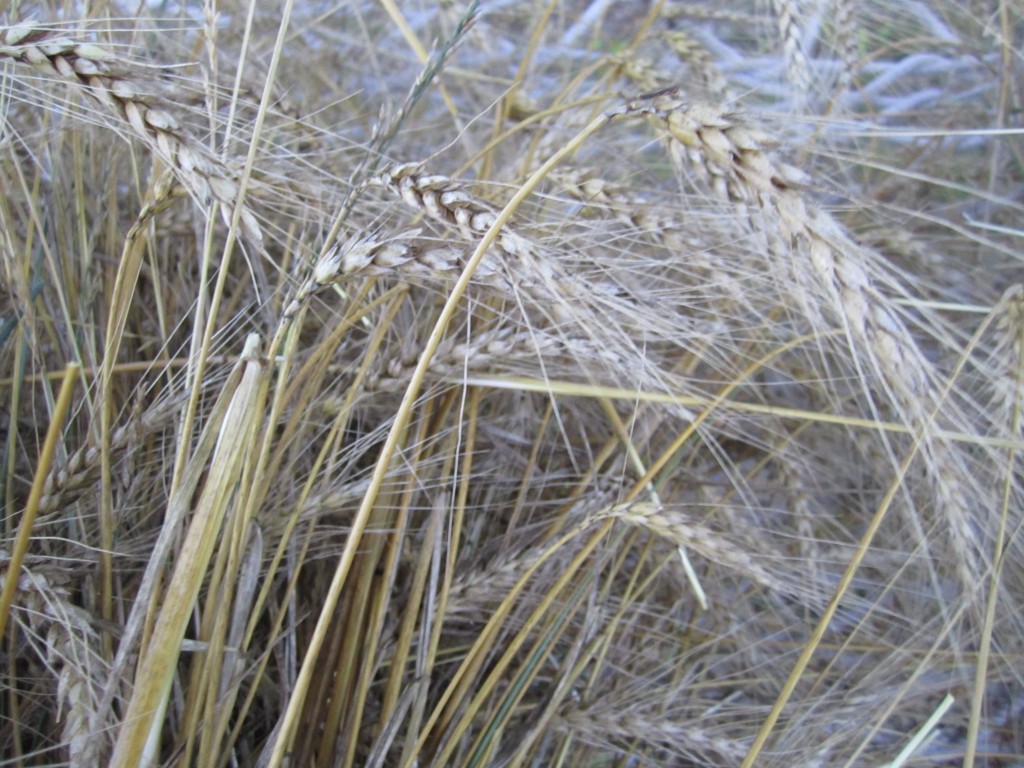
homestead blog wheat

Nice Heads of Homegrown, Homestead Wheat

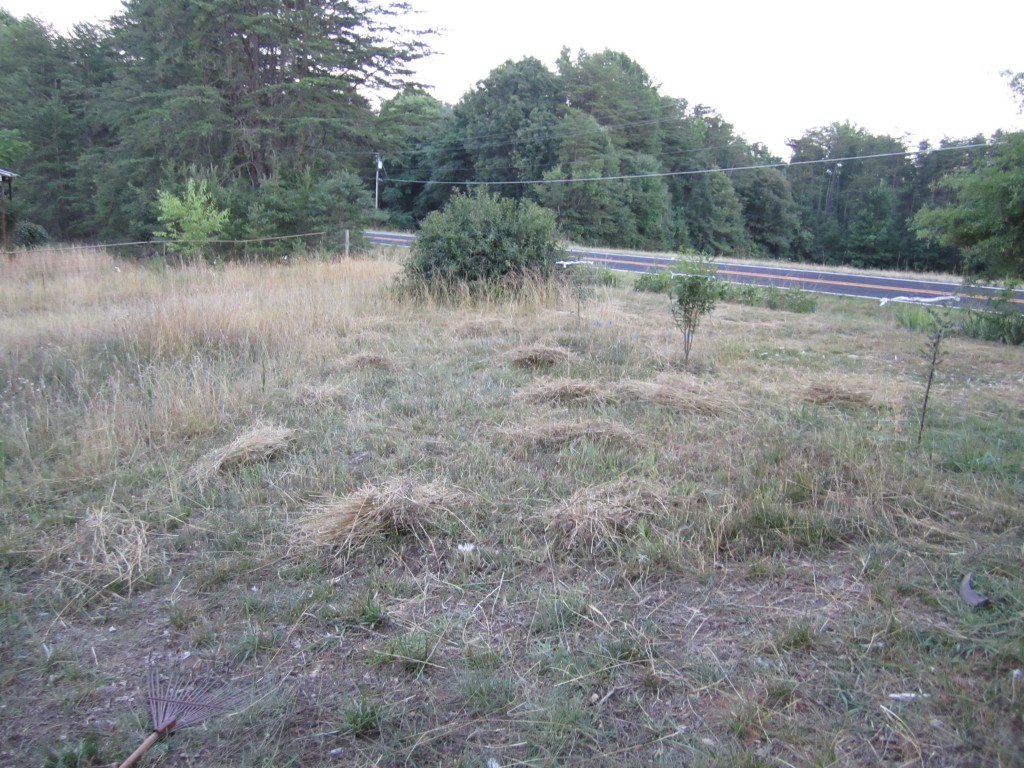
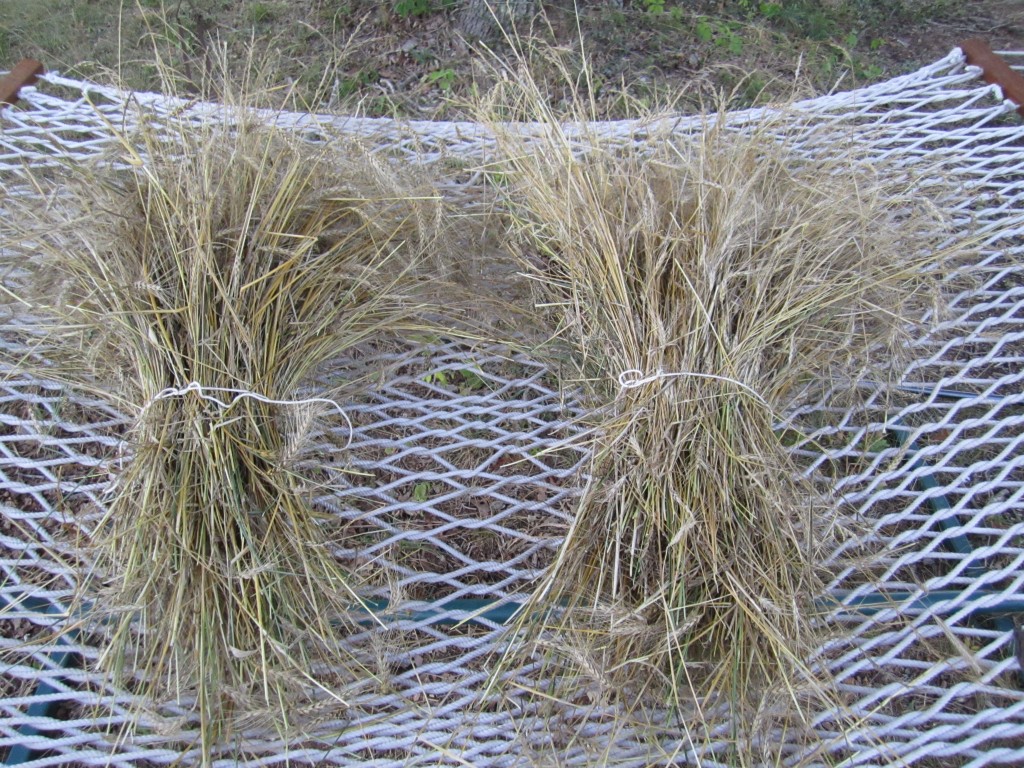
The heads of grain had started to dry out, and were drooped over facing the ground, letting us know that it was time to harvest. I couldn’t find my corn knife/sickle, so I fired up the weed-eater. I made sure to cut in only 1 direction so the stems all ended up in semi-neat rows. Such a small amount took only a few minutes, and I was soon bundling up the straw/wheat combo into sheaths. I then raked all of the smaller bits into piles. The yield was somewhat low, but still a success.

wheat harvest small scale

Bundles and sheaths of wheat. The wheat grew right around some of our new fruit trees

What’s nice about growing wheat is that in March I was able to inter-plant some white clover right into the stand, where it germinated,and grew, biding it’s time. The wheat shaded it during this abnormally dry summer, protecting it from drying out too badly, and that the wheat has been cut, it should take off.

sheaths of homestead wheat

The 2 best sheaths of wheat, ready for further drying.

We may end up planting a lot more this fall, and actually try and get a usable amount of wheat, barley, rye, and/or oats, both for us and our birds. I’ll need to brush up on the timing, and seeding rates in my copy of Gene Logsdon’s Small Scale Grain Raising though.

Independence Day

Today being July 4th, I thought it prudent to put together a post acknowledging and celebrating the day that honors the signing of the Declaration of Independence. There is a lot of wisdom and foresight in this document and I wish I read it more often, but July 4th is always a great time to fresh up on the ideals, and reasons behind the American Revolution.

The unalienable rights mentioned in the Declaration; life, liberty and the pursuit of happiness, are not granted or established by any man, his pen, or his government, but by his version of god or creator. These rights are universal, and when the enemies of liberty attempt to banish or deny them, it is the duty, right, and responsibility of those oppressed to rise and throw off the tyranny that plagues them. These sentiments, and the others found in the declaration are important lessons from  our history and should not be neglected.

So I am glad that we still celebrate this day as independence day, and that at the very least we are reminded once a year of the ideals that this Nation of States was founded on. I try and listen to a reading of the declaration every July 4th, and this year I found one by JFK. I think it’s worth a listen.

Sprouting Grains for Chickens

Sprouting grains to feed chickens and other poultry is a great way to supply top quality nutrition in a cost effective way. We try to avoid feeding GMO feed whenever possible and 1 great way to do that is by sprouting whole grains and seeds into fodder and feeding that instead of pre-packaged chicken food. It’s very easy and only takes a few minutes a day. Our system involves plastic buckets, a scoop, and some grain. That’s it. We modeled it after Jack Spirko’s Dead Simple Fodder Technique, and the birds are loving it. We take grains like wheat, barley, millet, sorghum, and black oil sunflower seed, and transform them into sprouted fodder. This increases their nutritional value, almost doubles their protein, and makes more of the nutrients bio-available to the flock.

sprouted grains for chickens

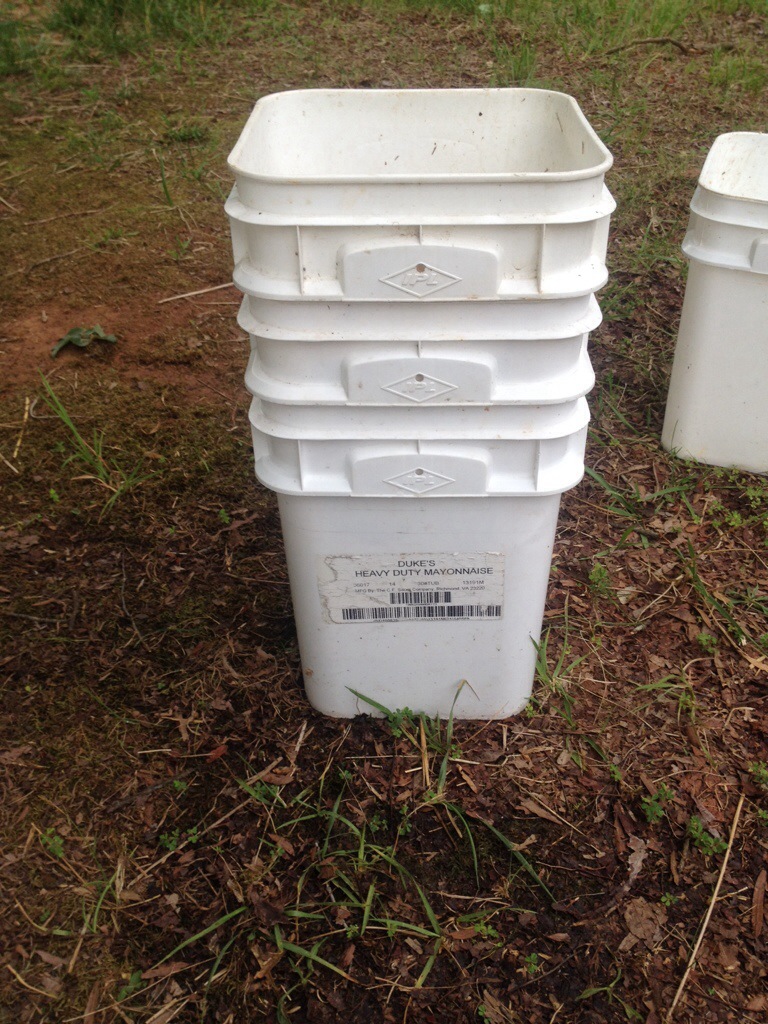
3 buckets with holes in the bottom is how we rinse the sprouted fodder.

First, I drilled holes in the bottom of the buckets with a 1/8th in. drill bit. I drilled a lot of holes, maybe 40 or so on each bucket. These buckets hold the grain, and allow the sprouts to get rinsed off at least twice a day in order to prevent mold growth. That’s really the only setup involved, as everything else is the sprouting process.

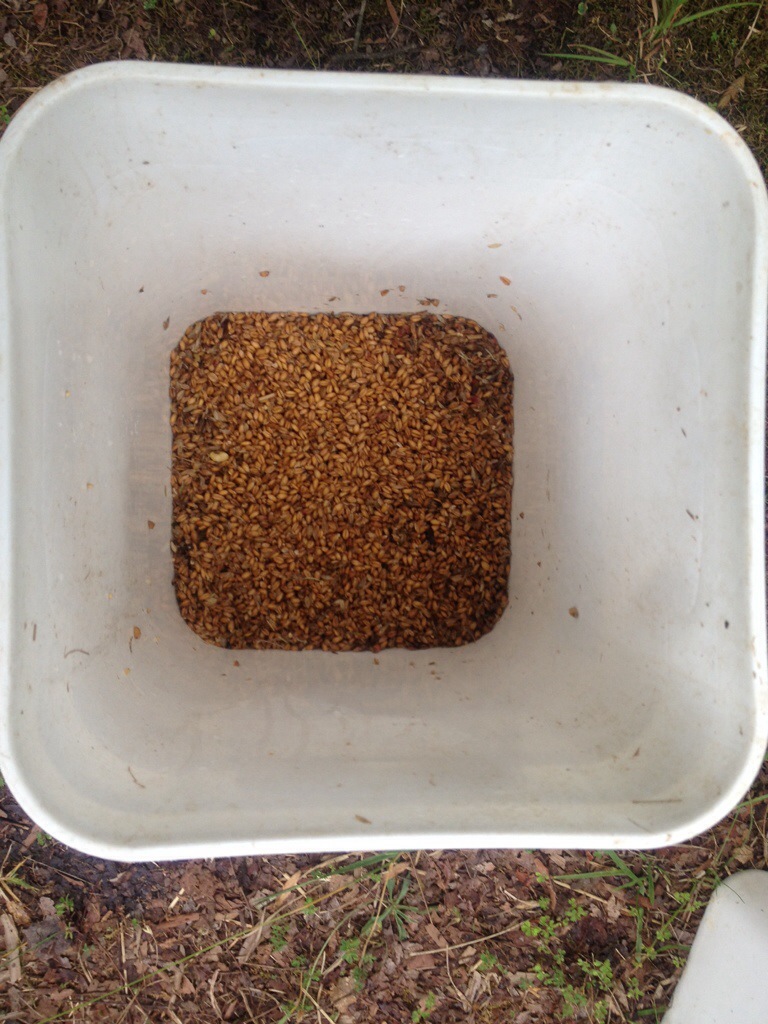
The sprouting cycle begins with an overnight soak of grain. We do about 1 qt. at a time, but adjust this to suit your needs and your flock size. The next morning this grain gets dumped out into one of the drain buckets with holes, and rinsed. That night, a new batch is soaked overnight, and then dumped into a fresh drain bucket that is stacked into the older one. This flushes all the buckets with water, rinsing all of the grain. This process is repeated until the sprouts reach the stage you prefer.

sprouting grains for chickens

Soaked wheat and millet in one of the drain buckets.

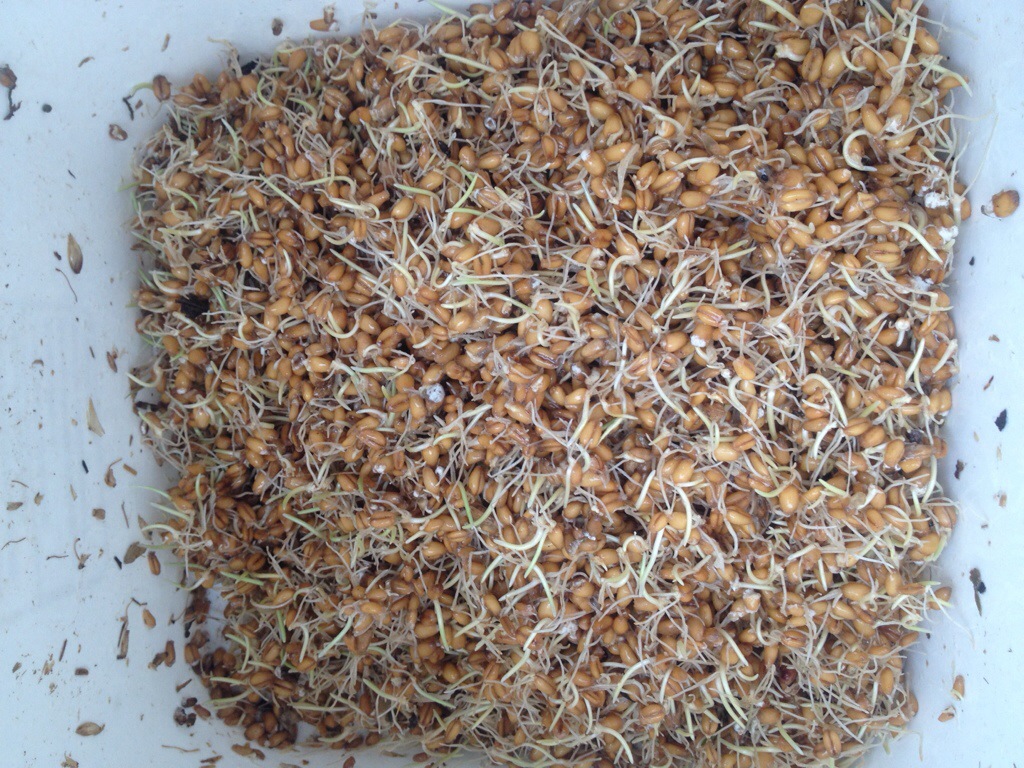
Right now, because it is so hot, we are only going 3 days before feeding, and only have tiny sprouts forming on most of the grain. The chickens seem to like it this way. You could let it go 7 days, and it would form a dense mat of grass and roots, which would be great for animals like horses, goats, sheep, cattle, and pigs.

sprouted wheat for chickens

The end product after 3 days.

By soaking and sprouting the grains, we change their nutritional profile, and when we add a mineral mix and other high quality supplemental feed, as well as food scraps and garden waste, our chickens get a healthy and well rounded diet that allows them to lay delicious eggs. If you have chickens look into sprouting some grains for them. Go to your local  feed mill and ask for untreated barley or wheat and give it a try. If you decide it’s not for you, the chickens will eat the unsprouted grain as well, so there really isn’t much to lose.

Rain Dance Blog Post

This is an official rain dance blog post. It has been really dry here in Stokes County, and we need some rain to recharge our ponds, swales, aquifers, and forests. Somedays I can even hear the thunder in the distance but not a single drop falls on our homestead. It just feels weird without summer storms that sweep in and dump a bunch of rain, and this post is an attempt to change that.

It seems like we are following the model for an El Nino year, a warm and dry summer, but hopefully we’ll swing the other way soon. Some rain would be much appreciated. That’s it. Let it rain!

The Chicken Bucket

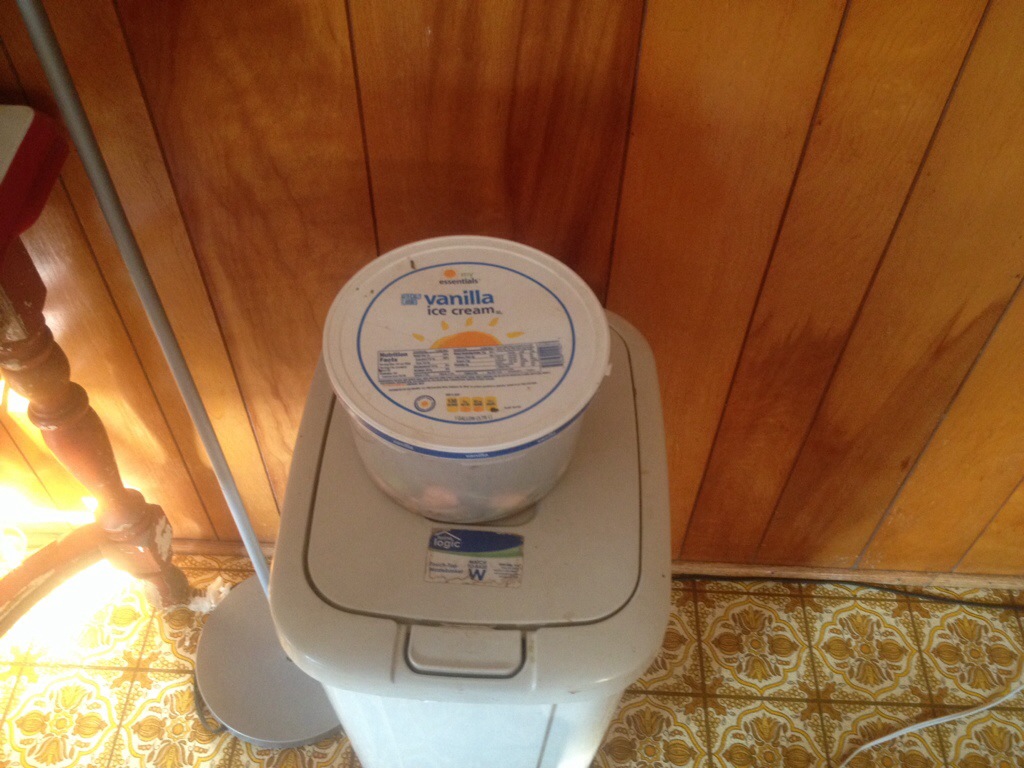
What do you do with your food scraps? You know, those tiny bits of leftovers, peels, and stems. Some people toss them on the compost pile as a decent source of nitrogen, or in the trash, but we are lucky enough to have a flock of 28 avian composters right outside our door. Our chickens readily devour anything from pizza to outer cabbage leaves from the garden. In order to separate these nutritious treats from the rest of our waste, we employ a simply, yet effective strategy.The chicken bucket.

chicken bucket

Old ice cream containers make great chicken buckets for holding and transporting food scraps.

chicken bucket

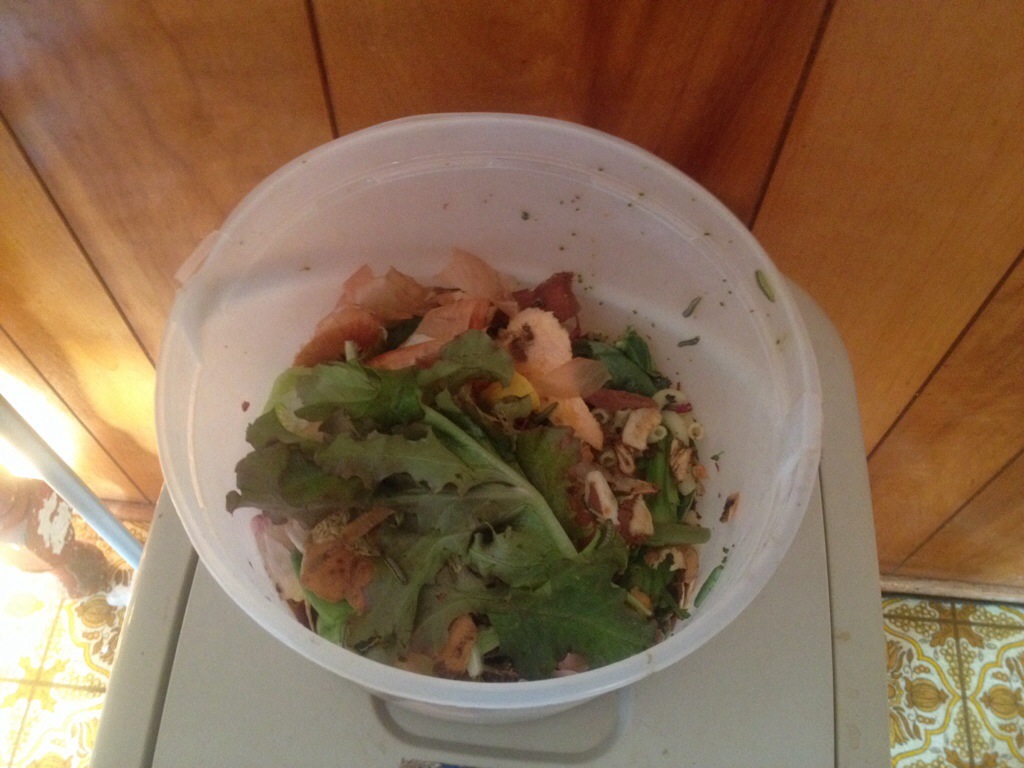
Almost everything except coffee grounds and eggshells go into the chicken bucket.

We have found that an old 1 gallon, plastic ice cream container works perfectly as a chicken bucket. The cheap, store brand version is best for the application. It has a handle that makes for easy transport, is made of rigid plastic that holds up at least 6 months, and is easily rinsed and cleaned. Right now we have our chicken bucket on top of the trash, and any time we peel sweet potatoes, snap green beans, or have leftovers that are just a little too old for our taste, we dump them in the bucket. Then, about once every few days, we dump the contents into the chicken yard and stand back and watch as they turn our leftovers and waste into high quality eggs. What do you do with your food scraps? Let us know in the comments!

Sweet Potato Slips: The Start of Something Great

Last year’s sweet potato crop was a great one. We are still eating them to this day, and have a few dozen more to go through. This will probably coincide nicely with the first round of early potatoes from the garden, which is exciting because that means we have not had to buy any sort of potato or root tuber since we harvested our potatoes last September, and our sweet potatoes last November. This is definitely one area where even a small homestead can achieve self sufficiency.
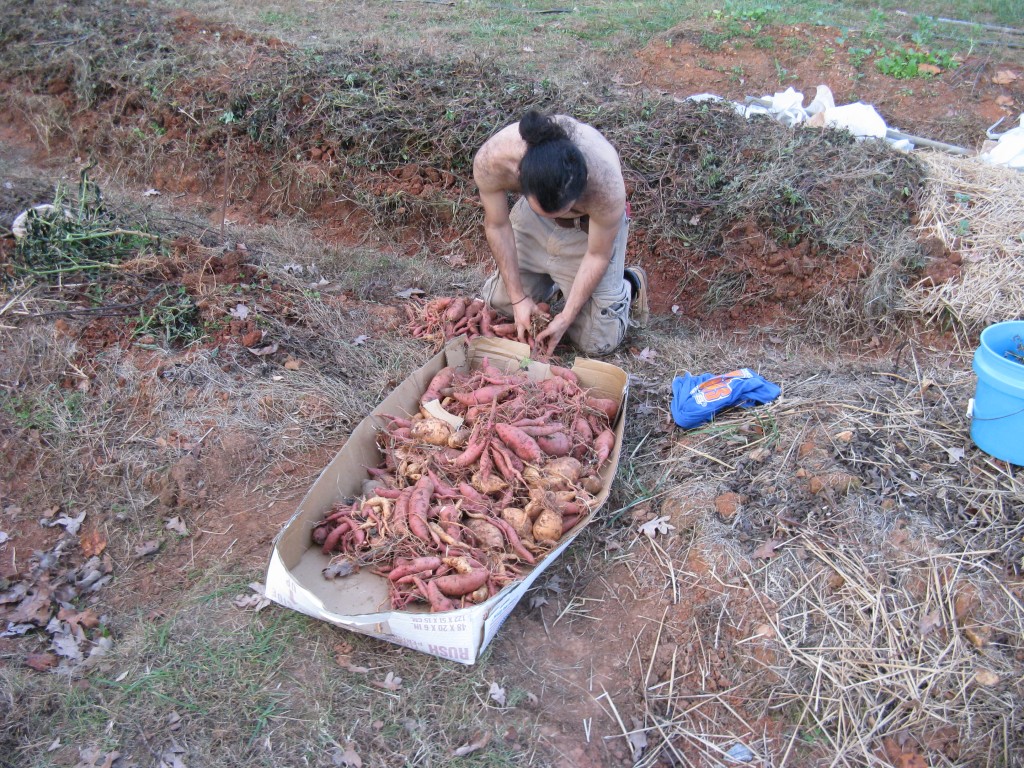
jason, placing freshly dug sweet potatoes in a box

Some of last years harvest

In that regard, I tend to favor sweet potatoes as a self reliance crop. They store better, are healthier, are more adapted to our humid summers, are more tolerant of drought and pests, and they are easier to propagate. To start a new crop of sweet potatoes, you must produce slips, small green shoots that sprout from the tubers. These shoots are then pinched, cut, or slipped off and transplanted into the garden. 1 small tuber can produce over 1 dozen slips, and will do so readily in many conditions. Compare this to Irish potatoes, where you plant seed potatoes. These are small potatoes, or chunks of larger potatoes with at least 1 eye. These must be stored from last year’s harvest, and we have found it much easier to store sweet potatoes, which seem to only get better with age, than Irish potatoes, which want to shrivel up and grow numerous long, creepy, eyes.

sweet potato slips in tires

a tire makes a nice place to start some sweet potato slips

Last year, Emma’s father got some sweet potatoes from a local farmer, and started the slips for us. This year, we tried a few different methods on our own and are now overrun with sweet potato slips ready to be transplanted. Some of our slips were started from tubers planted horizontally in tires filled with garden soil. The black tires absorb the heat from the sun, and stimulate slip production and growth. These slips are nice because they are already partially hardened off to the outside world, and are growing roots from the parts of the shoots that are under soil.
mason jar sweet potato slips

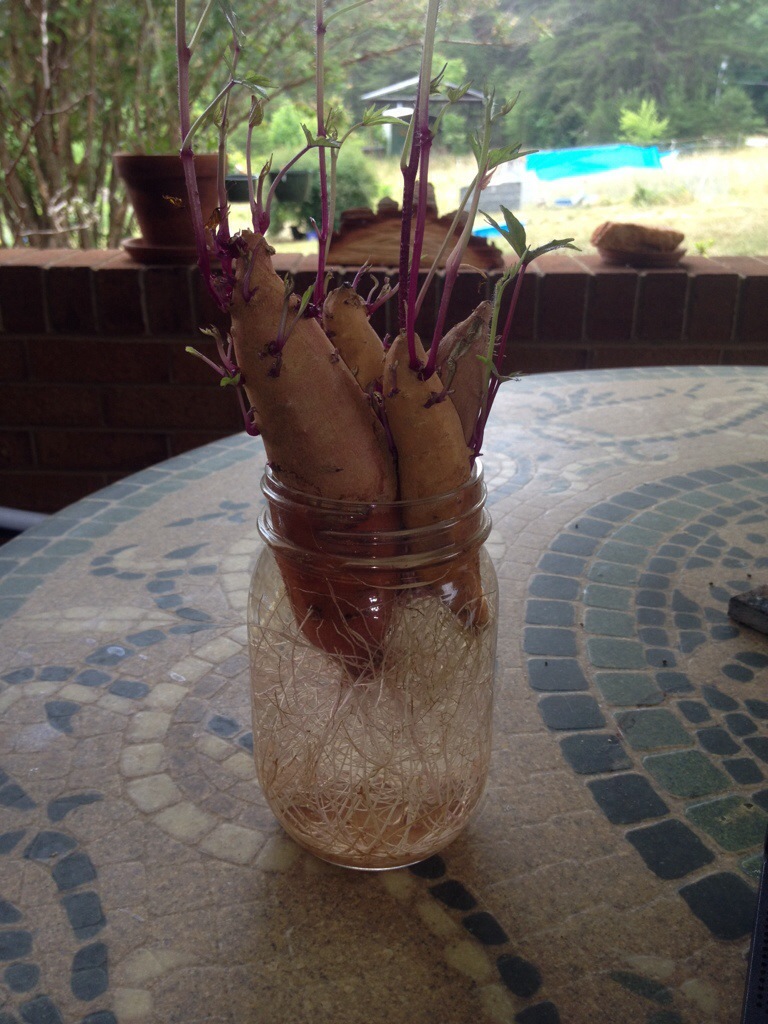
The shoots growing out of the tubers are the the slips.

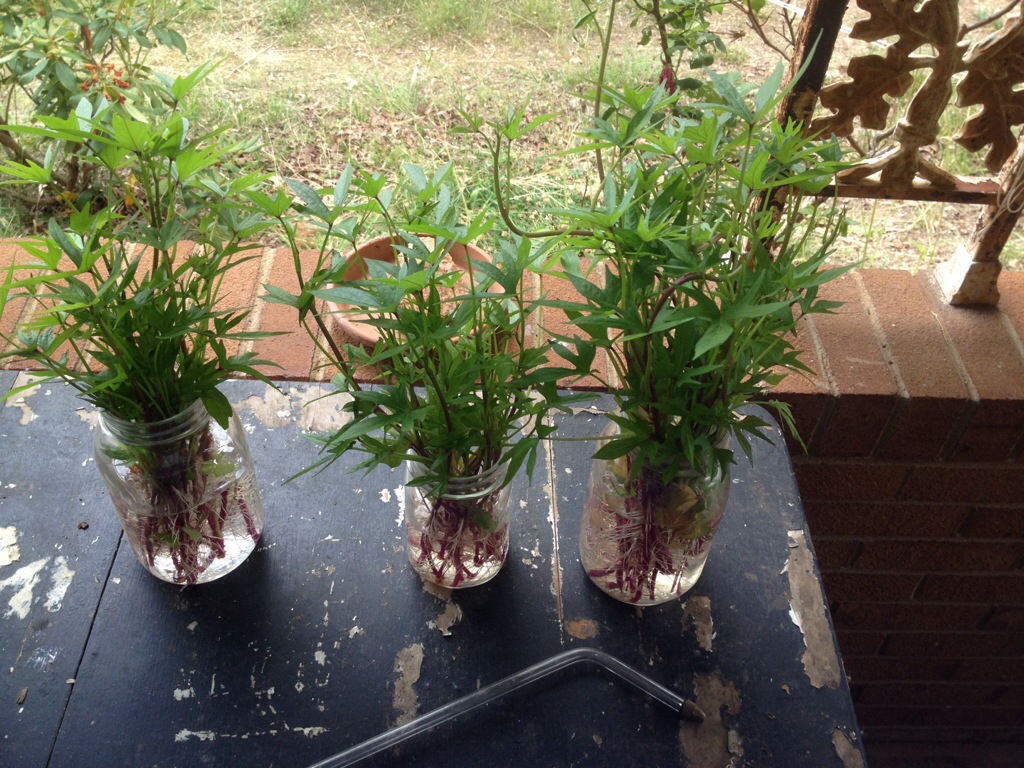
We also started some slips in mason jars. We picked small tubers for these and jammed them together in the jars making sure that about half of the tubers were over the top of the jar. A few toothpicks helps to keep everything in place. We then filled the jars with water and placed them in a sunny window. By keeping the jars inside, the temperature never got too cold and was often in the 70-80 degree range that triggers slip production. Slips began to form in about a week, and when they were 5-8 inches long, we separated them from the tuber by pinching, nipping, or cutting it off at the base, and then put them in water to produce roots.
sweet potato slips

Store the slips in water before transplanting so that they start to grow roots.

These slips, along with some given to us by Emma’s dad, will be transplanted soon. Some will go into the new hugelkulture woody beds we are in the process of making, some will go into other beds in the garden, and I want to experiment with some as a ground cover around the fruit trees in our new food forest. I know that this is often done in the tropics and sub-tropics where sweet potatoes are perennial, so I don’t think its too far of a stretch to try it in our temperate climate as an annual herbaceous support species. Either way, we hope that this year’s will match last year’s sweet potato harvest, and we look forward to dining on sweet potato ginger soup, sweet potato fries and hashbrowns, as well as roasting and adding them to hearty stews. Mmmm….
Dodger, The Homestead Cat

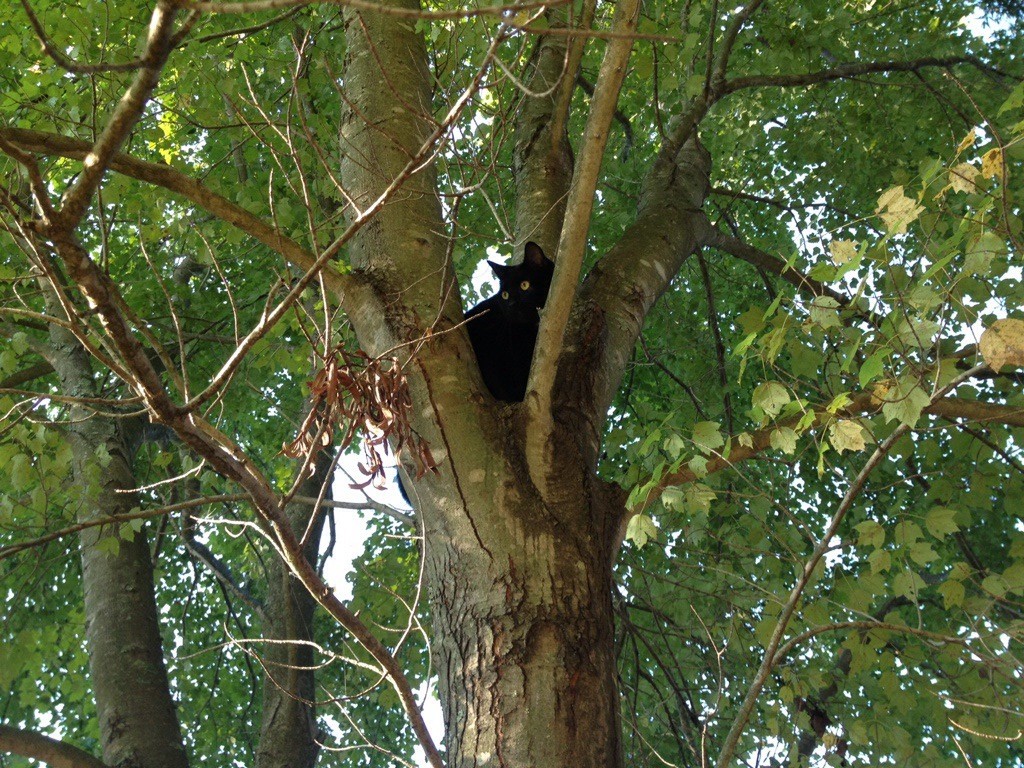
On our homestead we have some dogs, some chickens, some geese, and if my homemade swarm trap pans out, maybe some bees. But that’s not all! We also have Dodger. Dodger is our very lucky black cat. He has adjusted well to country life and splits his time between the outside world and the inside world where he tries to drink from my water glass ,which gets him exiled to the basement world. But we love him and he is actually quite cool.

dodger the homestead cat

Dodger! The homestead cat!

As a working farm cat, Dodger has 1 primary job on the homestead, hunting small creatures. He’s pretty good and has caught, killed and injured more than a few voles, moles, mice, snakes, lizards and birds. In a perfect world, he would focus his energy on the rodents, but that’s okay. He does however do a great job of patrolling the high grass and brush, and I think he is a huge component in keeping our rodent population in check. This is especially important when you have grains and chicken food around which are essentially mouse candy.

homestead cat

Dodger with a fresh mouse kill, about to chow down

Life on the homestead just wouldn’t be the same without our pal Dodgey. He’s quite an attention hog, and if you watch closely in our kids wondering videos, you can find him in almost every single one! Dodger, The Homestead Cat.

Trying to Catch a Swarm of Honey Bees: Part 1

When we went outside this weekend, we were greeted not only by the sound of the birds chirping, the geese hollering, and Rex and Roosty crowing, but by a strange and rhythmic humming sound coming from our big front yard oak tree. At first I didn’t know what it could be, but after a few moments of listening I realized that it was a whole bunch of bees! I was immediately on the lookout for a swarm, a great mass of bees that have evacuated an old hive to search for a new one most often as a reproductive measure and a way of splitting 1 colony into 2.  After about 30 minutes of looking, the buzzing only seeming to get louder and louder I hadn’t seen a single bee. My best guess is that they are perched high in the tree while the scout bees are searching for a new place to settle down and call home.

homemade swarm trap

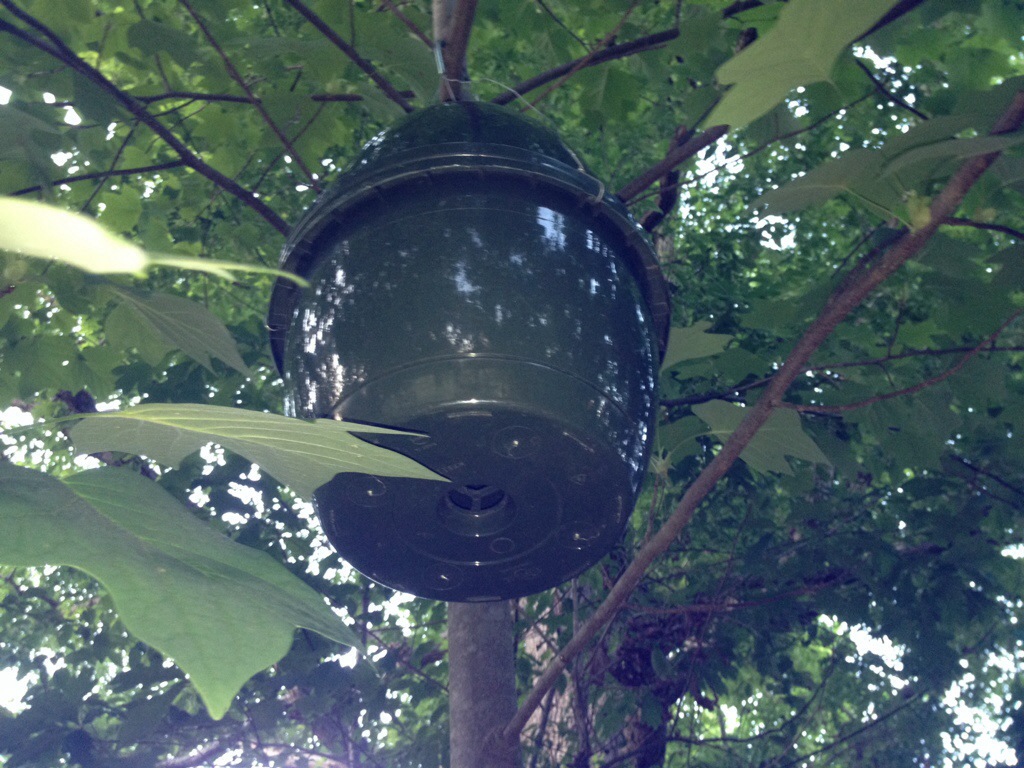
My homemade swarm trap made of 2 hanging baskets and a few drops of lemongrass oil.

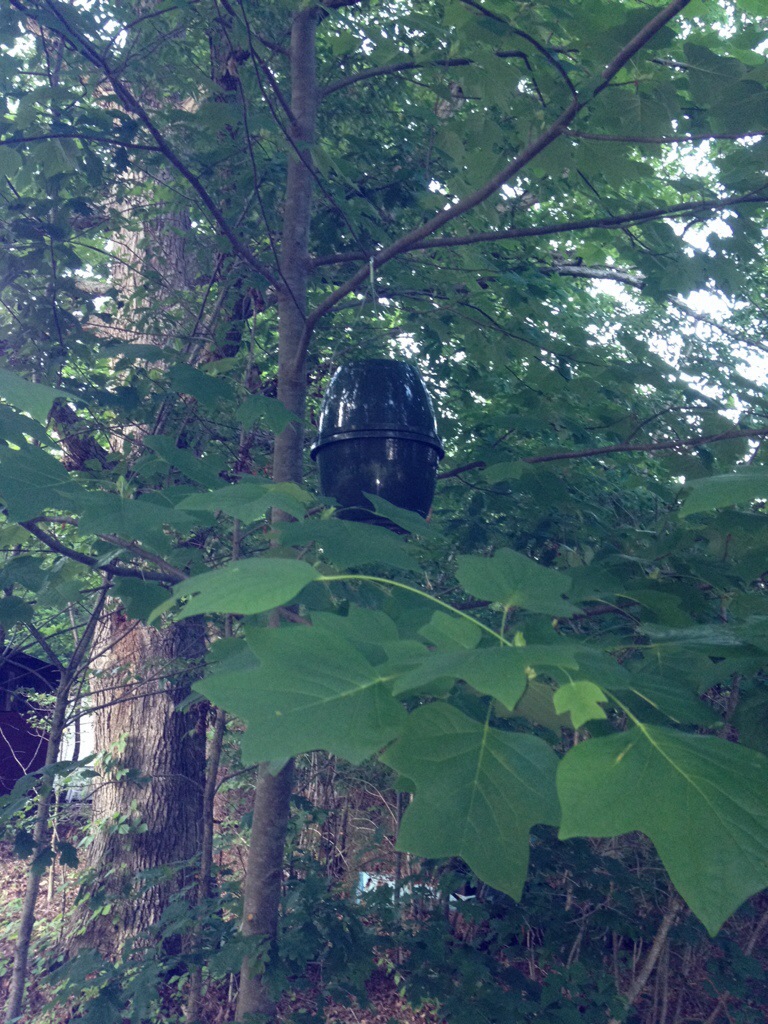
I’ve wanted to get into beekeeping for some time now, and if I ever had a chance of catching a wild swarm, it would be now. So I decided to put together some swarm traps and set them out in hopes of enticing these oak tree bees to hang out with me. I used 2 old hanging basket pots, the kind that hold flowers or ferns at the nursery store, and using the wire hanger that you hang them with, connected them end to end. I then taped up 1 of the drain holes, and left 1 open for scout bees to enter and explore. I hung these about 8-10 ft. high in 3 different spots: 1 in the lower branches of the oak where the swarm is, 1 in a poplar tree by our barn, and 1 by our old tobacco dryer.

homemade swarm trap

Fingers crossed!

In order to entice the bees even more, I added a few drops of lemongrass essential oil, a scent that attracts bees, especially those searching for a new place to set up a hive. I’ve been checking the last few days, but no luck yet. I have seen a few lone honey bees flying around the oak tree, but no sign of a swarm yet. Hopefully I’ll have good news in the next couple of days, and can start my mead making adventures with raw homestead honey!

Older posts Newer posts

© 2024 KW Homestead

Theme by Anders NorenUp ↑