KW Homestead

Pasture Raised Poultry & Edible Landscaping Plants Since 2013

Author: jason (page 9 of 13)

Dodger, The Homestead Cat

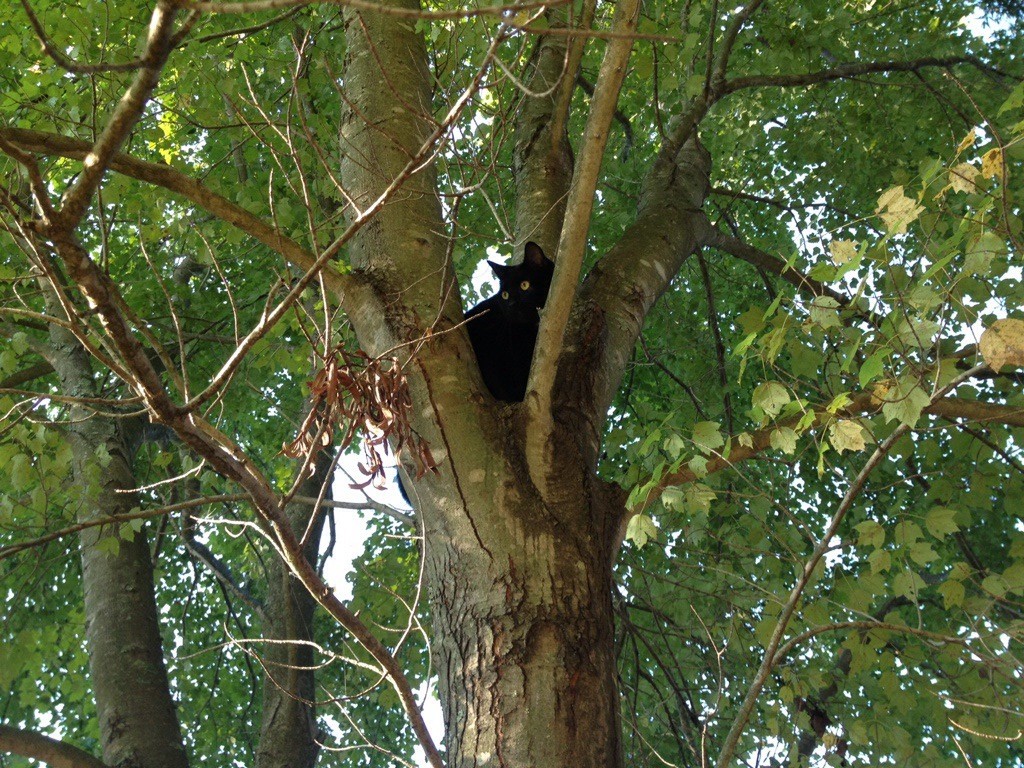
On our homestead we have some dogs, some chickens, some geese, and if my homemade swarm trap pans out, maybe some bees. But that’s not all! We also have Dodger. Dodger is our very lucky black cat. He has adjusted well to country life and splits his time between the outside world and the inside world where he tries to drink from my water glass ,which gets him exiled to the basement world. But we love him and he is actually quite cool.

dodger the homestead cat

Dodger! The homestead cat!

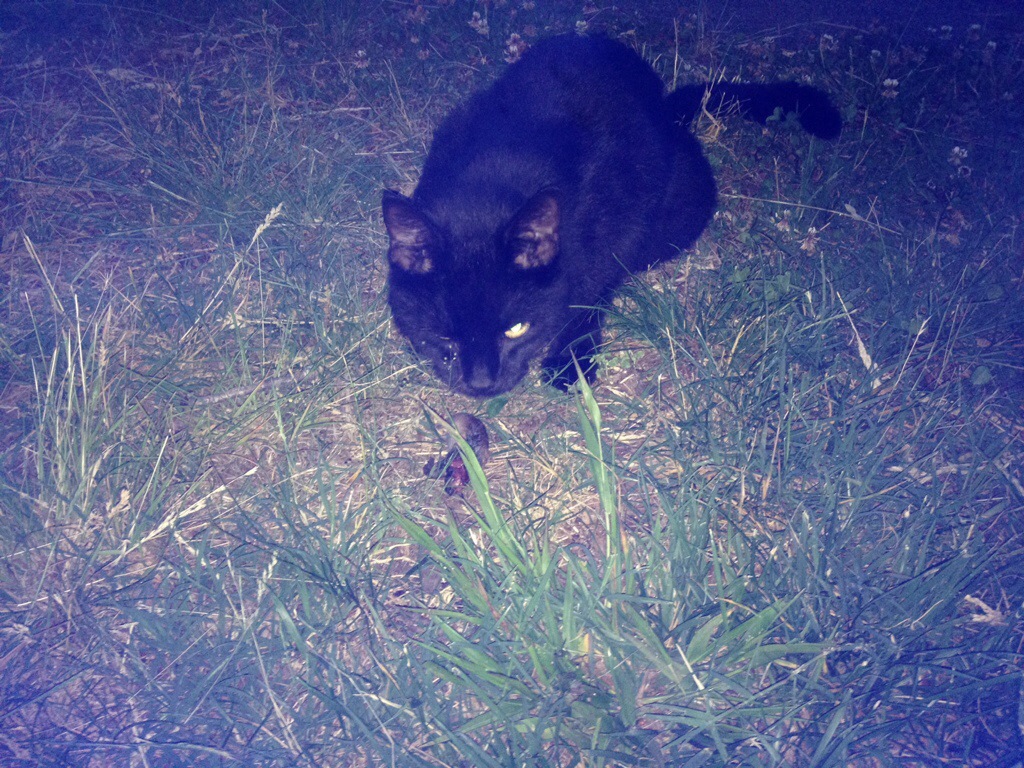
As a working farm cat, Dodger has 1 primary job on the homestead, hunting small creatures. He’s pretty good and has caught, killed and injured more than a few voles, moles, mice, snakes, lizards and birds. In a perfect world, he would focus his energy on the rodents, but that’s okay. He does however do a great job of patrolling the high grass and brush, and I think he is a huge component in keeping our rodent population in check. This is especially important when you have grains and chicken food around which are essentially mouse candy.

homestead cat

Dodger with a fresh mouse kill, about to chow down

Life on the homestead just wouldn’t be the same without our pal Dodgey. He’s quite an attention hog, and if you watch closely in our kids wondering videos, you can find him in almost every single one! Dodger, The Homestead Cat.

Trying to Catch a Swarm of Honey Bees: Part 1

When we went outside this weekend, we were greeted not only by the sound of the birds chirping, the geese hollering, and Rex and Roosty crowing, but by a strange and rhythmic humming sound coming from our big front yard oak tree. At first I didn’t know what it could be, but after a few moments of listening I realized that it was a whole bunch of bees! I was immediately on the lookout for a swarm, a great mass of bees that have evacuated an old hive to search for a new one most often as a reproductive measure and a way of splitting 1 colony into 2.  After about 30 minutes of looking, the buzzing only seeming to get louder and louder I hadn’t seen a single bee. My best guess is that they are perched high in the tree while the scout bees are searching for a new place to settle down and call home.

homemade swarm trap

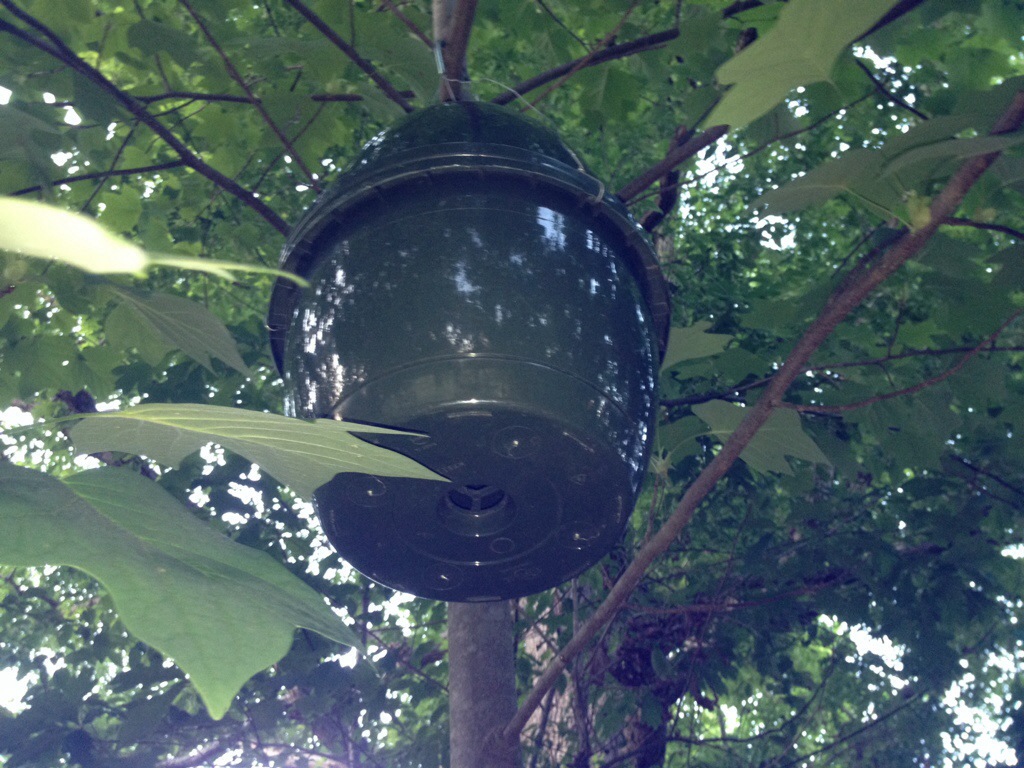
My homemade swarm trap made of 2 hanging baskets and a few drops of lemongrass oil.

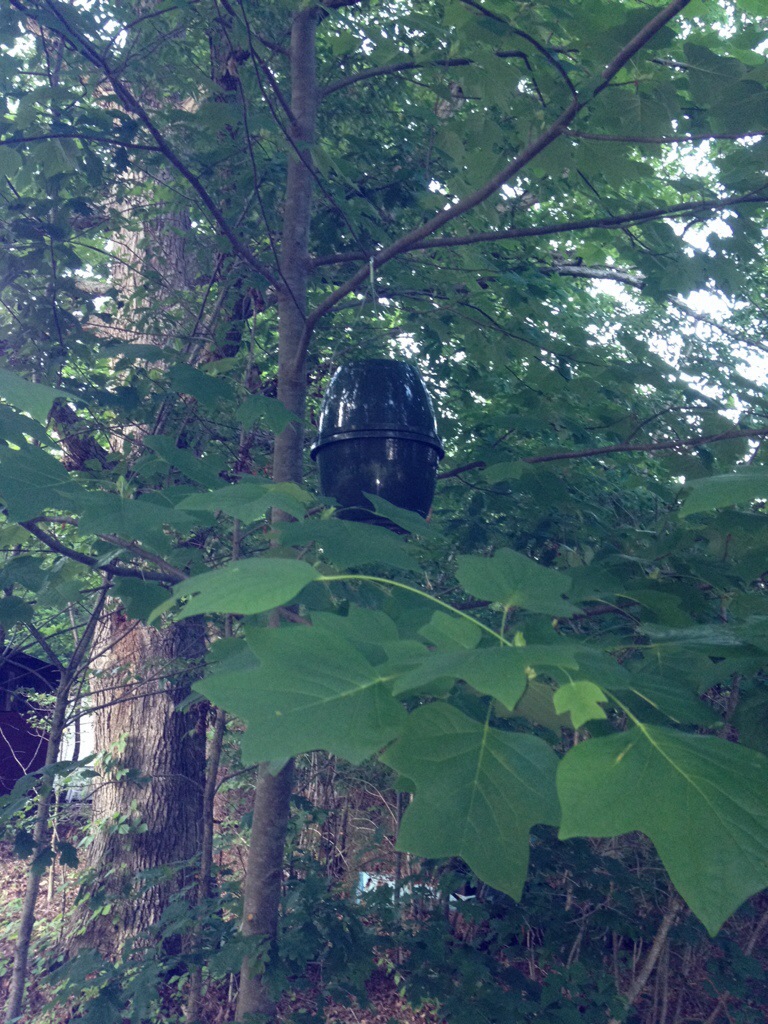
I’ve wanted to get into beekeeping for some time now, and if I ever had a chance of catching a wild swarm, it would be now. So I decided to put together some swarm traps and set them out in hopes of enticing these oak tree bees to hang out with me. I used 2 old hanging basket pots, the kind that hold flowers or ferns at the nursery store, and using the wire hanger that you hang them with, connected them end to end. I then taped up 1 of the drain holes, and left 1 open for scout bees to enter and explore. I hung these about 8-10 ft. high in 3 different spots: 1 in the lower branches of the oak where the swarm is, 1 in a poplar tree by our barn, and 1 by our old tobacco dryer.

homemade swarm trap

Fingers crossed!

In order to entice the bees even more, I added a few drops of lemongrass essential oil, a scent that attracts bees, especially those searching for a new place to set up a hive. I’ve been checking the last few days, but no luck yet. I have seen a few lone honey bees flying around the oak tree, but no sign of a swarm yet. Hopefully I’ll have good news in the next couple of days, and can start my mead making adventures with raw homestead honey!

Pan Fried Bluegill with Coconut Curry Sauce

I went fishing at the pond and the water was low and clear. I caught plenty of 12 inch bass, and a handful of nice sized bluegill. The bass were released to eat as many small bluegill as possible and encourage larger ones, but the hand-sized sunnies ended up in the frying pan. After a quick gut and scale, I sprinkled some salt, pepper, cayenne, paprika and curry on the fish and fried them in coconut oil until nice and crispy.

curry bluegill

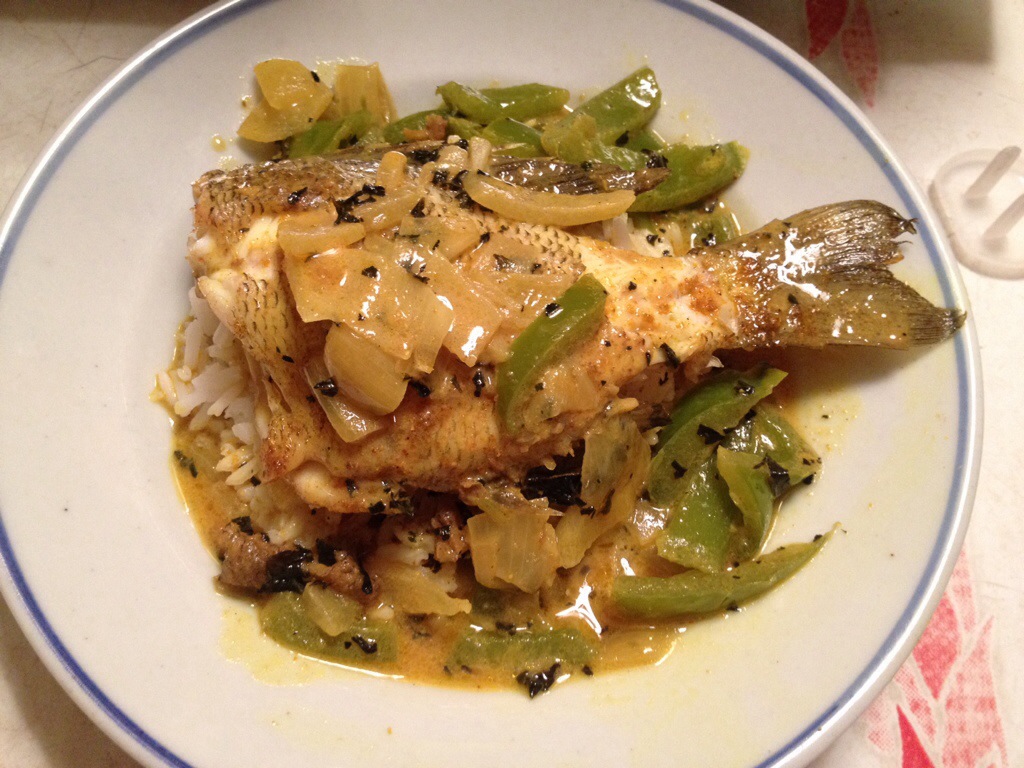
Coconut Curry Bluegill with Jasmine Rice


I then removed the fish and added a lot more curry powder and some more coconut oil and fried some onion. Next came some green pepper and then a handful of our dried basil and some garlic. After this cooked a bit, I added equal parts coconut milk and chicken stock until I had a little more sauce than I wanted to end up with. I cooked this down until it thickened up a bit, then spooned it over the hot fish and warm jasmine rice. MMM… good.

bluegill curry

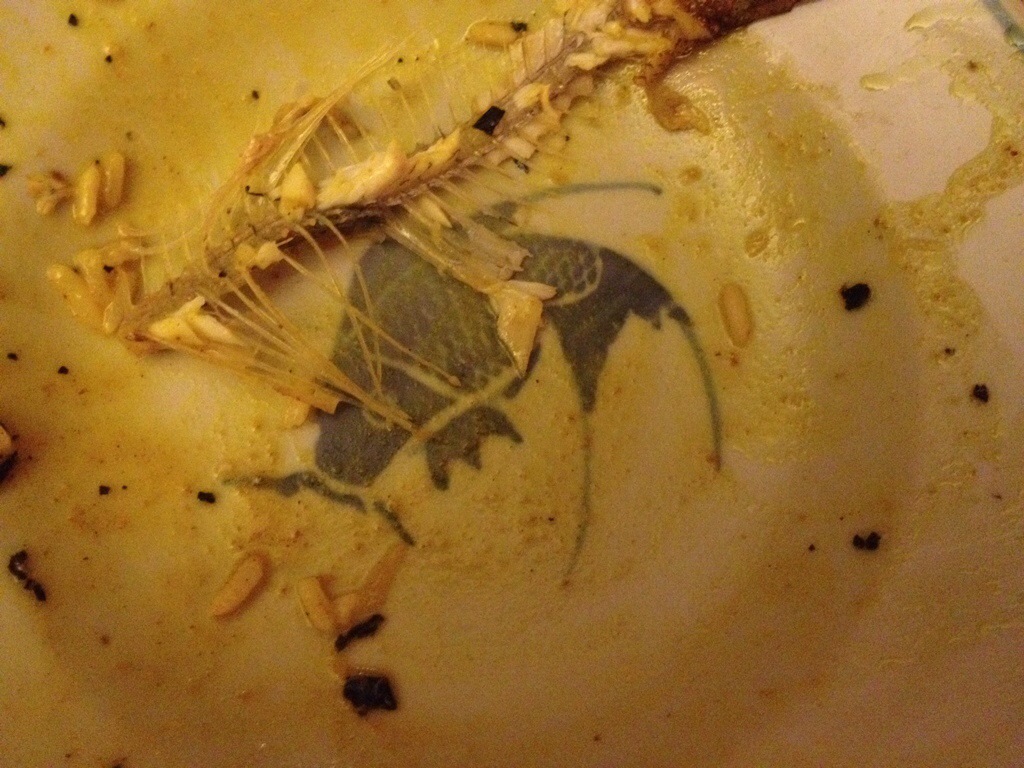
Yeah… It was good.

Bluegill, bream, perch, sunfish, or whatever you want to call them are some of the tastiest and sweetest whitefish around. It also helps that the best thing you can do for a bluegill population is to harvest as many as possible so that their growth isn’t stunted. So get out there with some worms and bring some bluegills home!

Bolt’s Bush: A Dog’s Best Way to Beat the Heat

Now that summer is rolling in and temperatures are quickly rising into the 90’s during the afternoon, a dog needs a way to stay cool and keep from overheating. While Emma and I can hang out in the carport porch and sip on iced spearmint tea, Bolt, our 1 year old black lab/boxer/? dog has to find other ways to avoid the hot NC sun.

He is somewhat of a wuss when it comes to hot weather and can often be found hogging the floor fan, or nestling right up to the AC vent to stay cool without a second thought for those of us “downwind.” However, when he is outside with us none of these options exist. So he has to be creative…

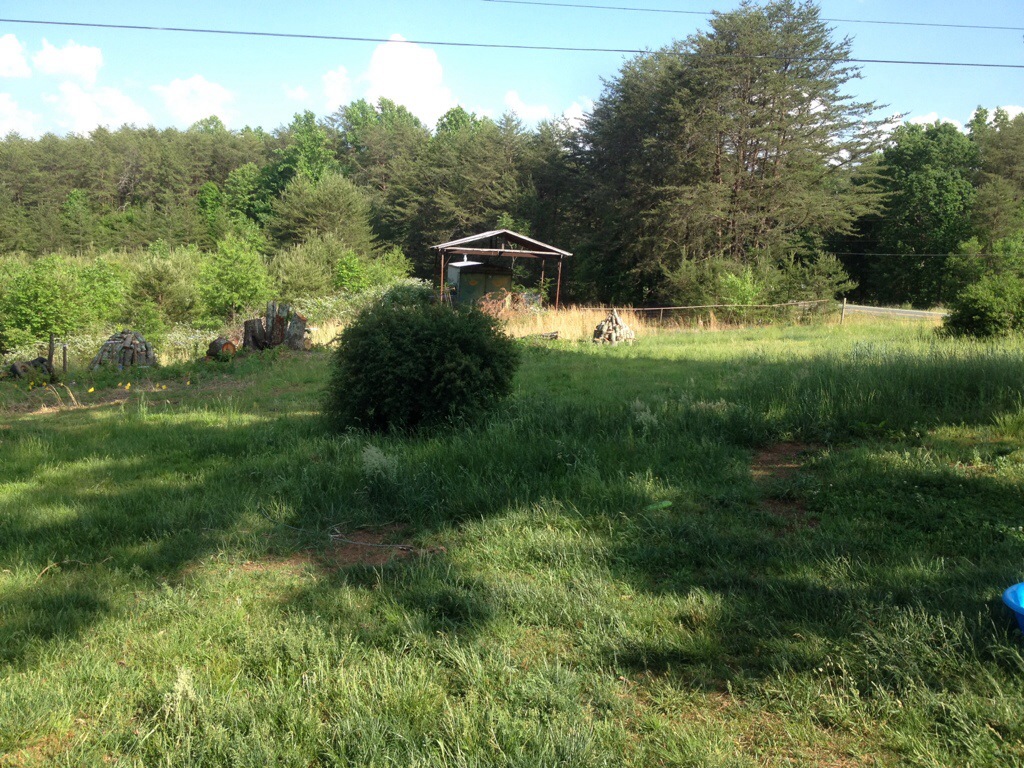
Take this bush for instance. It sits smack dab in the middle of Bolt’s outdoor area.

A lone bush in our side yard, the area where bolt hangs outside.

A lone bush in our side yard, the area where Bolt hangs out outside.

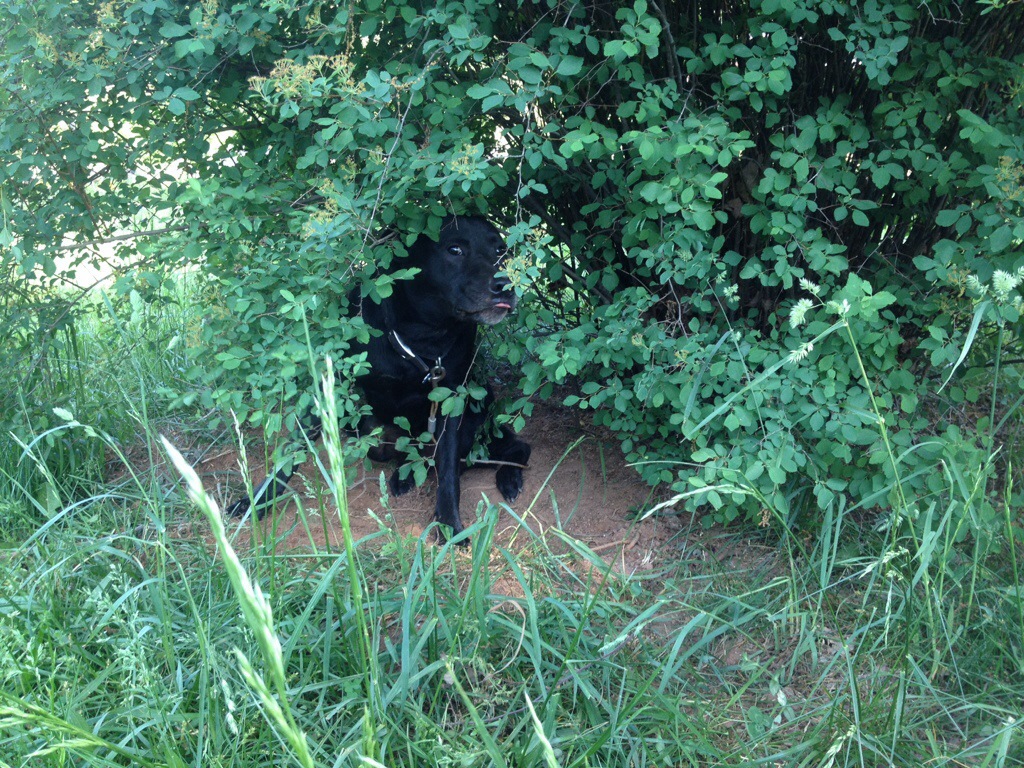
Notice anything interesting about it? No? Let’s get a closer look…

20140527-211431.jpg

It’s Bolt! The shade of this bush is the perfect place to beat the NC heat!

Hahahahaha! This bush is Bolt’s preferred hideout from the summer sun, and where he can most often be found when the thermometer dips above 83 degrees. Here he can snooze in the shade, roll in the dirt, and quickly ambush anyone foolish enough to casually walk by his bush (and scare the pants off me as I walk by with headphones in).

This got me thinking about how to make his bush an even better summer getaway and design it specifically for a dog’s summertime needs. Number 1 is shade–and any shrub or bush will do the job–but maybe a plant like rosemary, with anti-insect properties would take this up a notch, not to mention provide great herbs for the kitchen. What about planting some nice geraniums around it to help repel mosquitoes, the vector of heartworms and annoying itchiness. Maybe some pennyroyal, or fleabane to combat fleas, and some chicory in case he feels the need to fight some internal parasites.

I think this would be a really cool permaculture design project, and is definitely something I am going to think more about. Let me know if you know of any other plants that would fit well in a dog’s play area. But for now, you can find Bolt enjoying the shade and solitude of his bush, waiting eagerly for the cooler temperatures of fall, or for us to turn the AC on and bring him inside.

Venison Stew with Sweet Potatoes and Garlic Scapes

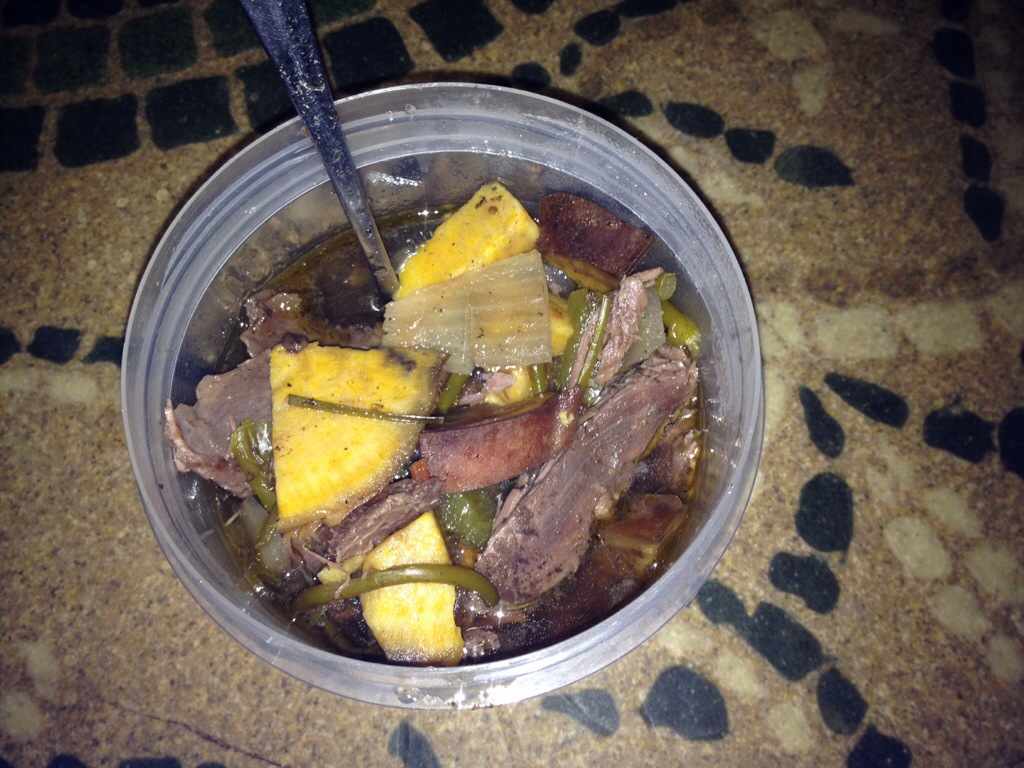
Tonight we ate dinner out on the porch and watched the fireflies. We ate a version of our savory venison stew, but this time I added a bunch of our freshly cut garlic scapes, and a couple of sweet potatoes from last year’s garden.

venison and sweet potato stew

Venison stew with sweet potatoes and garlic scapes

It was dark out when I took the picture, and we ended up eating out of plastic tuppeware to save on dish use, but it tasted great. The garlic scapes added a great flavor to the broth, and the sweet potatoes were delicious with the tender venison roast. A green pepper, white onion, a healthy splash of red wine, beef broth, and some sage and oregano rounded out the soup, and made for a great meal out in the cool Stokes County air. Yummm!!

Wood Wool and the Magic of Mulch

I love mulch. It makes me smile when I see a bed or fruit tree covered with a thick layer of mulch. Mulch hold in soil moisture and reduces irrigation needs, protects soil microorganisms from temperature extremes, blocks weeds, and slowly adds organic matter by breaking down and feeding the worms.

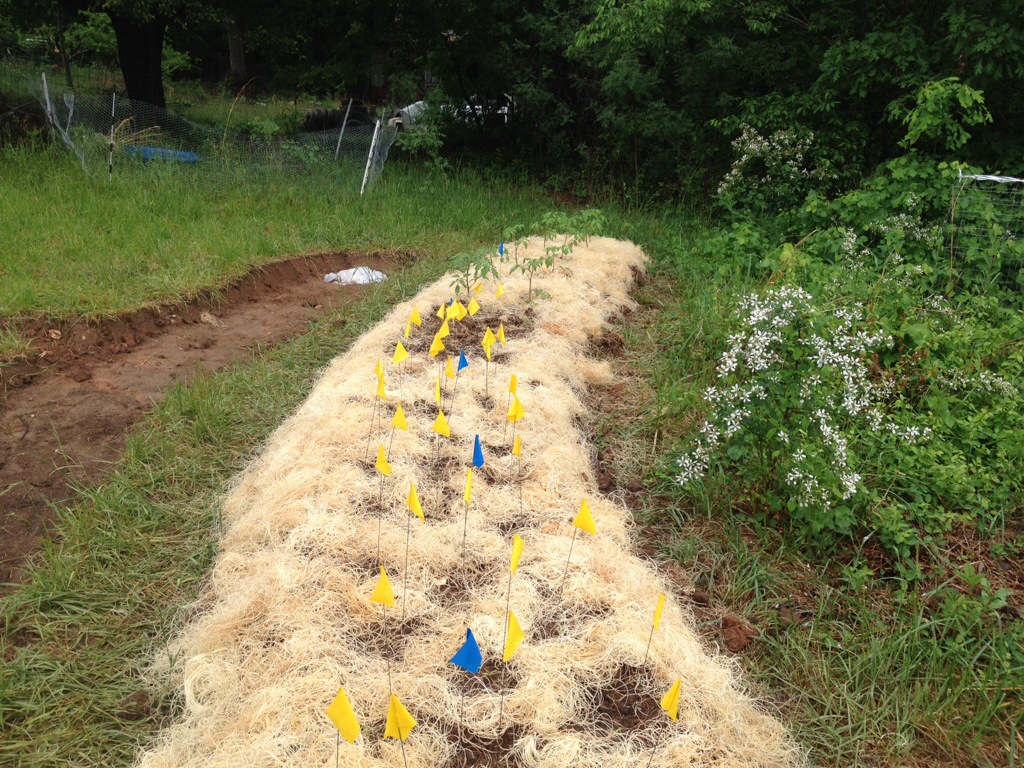
We mulch with leaves, sticks, paper plates, coffee grounds, palm fronds, and any other organic material we can find. But recently, we scavenged a bunch of wood wool, or excelsior, and this wood byproduct makes awesome mulch.

20140520-221742.jpg

It’s basically shredded aspen wood used as packing material, and it’s some of the best mulch we have ever used. It looks good, stays in place, and is easily applied around vegetable plants. We’re in the process of putting it on all of our raised garden beds, and if there is any left over, we may put some around our fruit trees also. I love mulch.

kids wondering… My Pal the Snake!

Join us for this episode of Kids Wondering as we meet a snake friend that we found while digging a hole in the yard!

Be sure to always ask an adult before handling any snakes that you see in your yard… They could be venomous!

We hope you enjoyed this episode of Kids Wondering… Remember, always speak with a trusted adult before picking up your own snake pals!
.:.

A Rainy Day on the Homestead

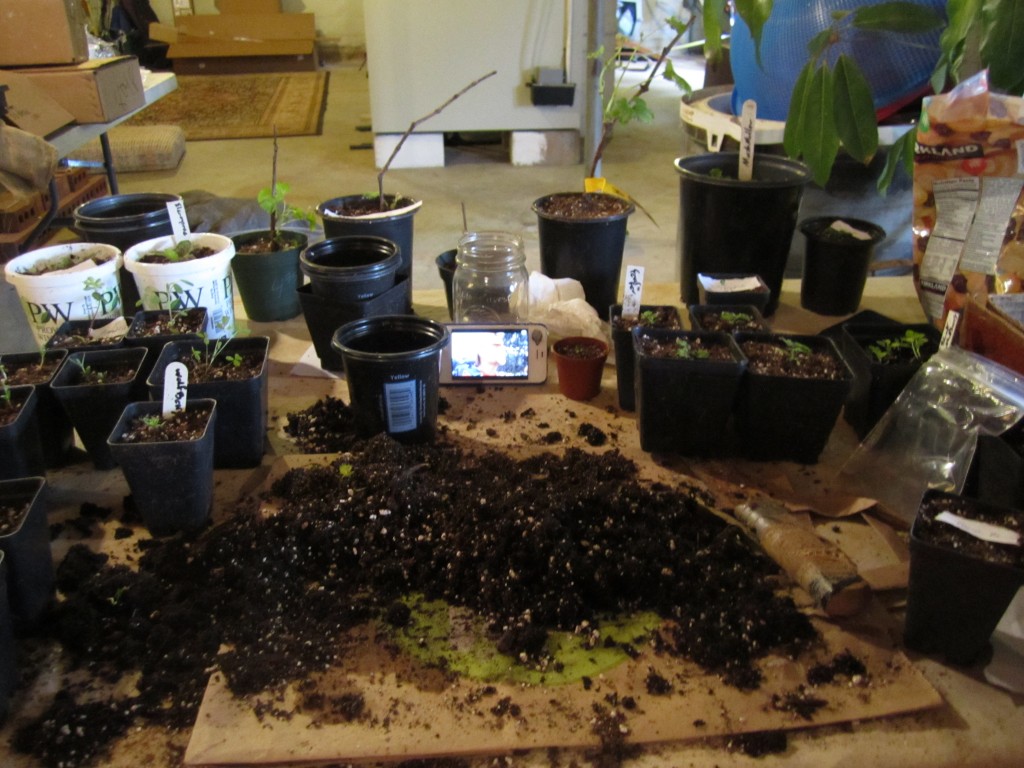
We got some much needed rain today here at Kuska Wiñasun Homestead, more than an inch and it’s still coming. Rain plays a role in the type of chores you can get done on a homestead, and today I spent most, but not all, of the time indoors, starting some more plants from seed, and potting up some small seedlings that germinated a while ago.

potting station

My planting station in the basement; potting soil, containers, root knife, and an iPhone for watching documentaries on Youtube.

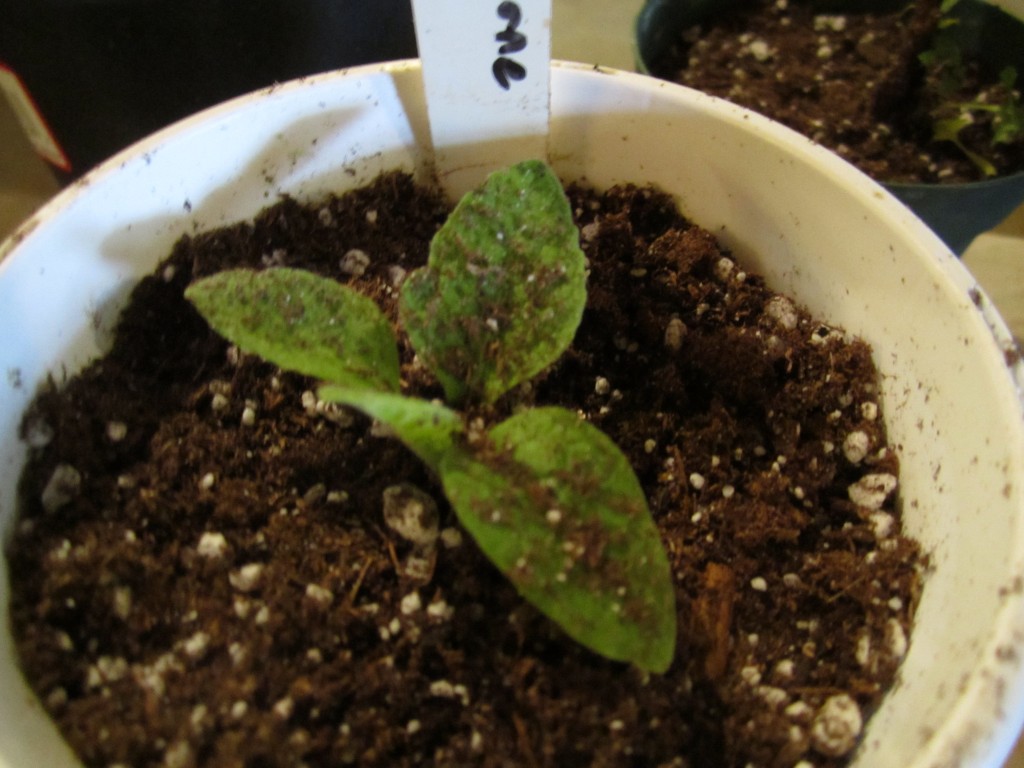
Many of the perennial herbs that were planted in the middle of March (elecampane, marshmallow, and feverfew to name a few) were a bit crowded in the small pots they germinated in and so I transplanted them into larger containers so as not to stunt their growth. I noticed that while these plants were slow to germinate, they had well developed root systems much larger than I expected for seedlings that looked so tiny. I also planted a few things from seed that we are very excited about growing: Monkey Puzzle Pine, St. John’s Wort, Ashwaganda, Blue Bean, and Lovage.

elecampane seedling

A healthy elecampane seedling, a great medicinal herb for lung and digestive problems.

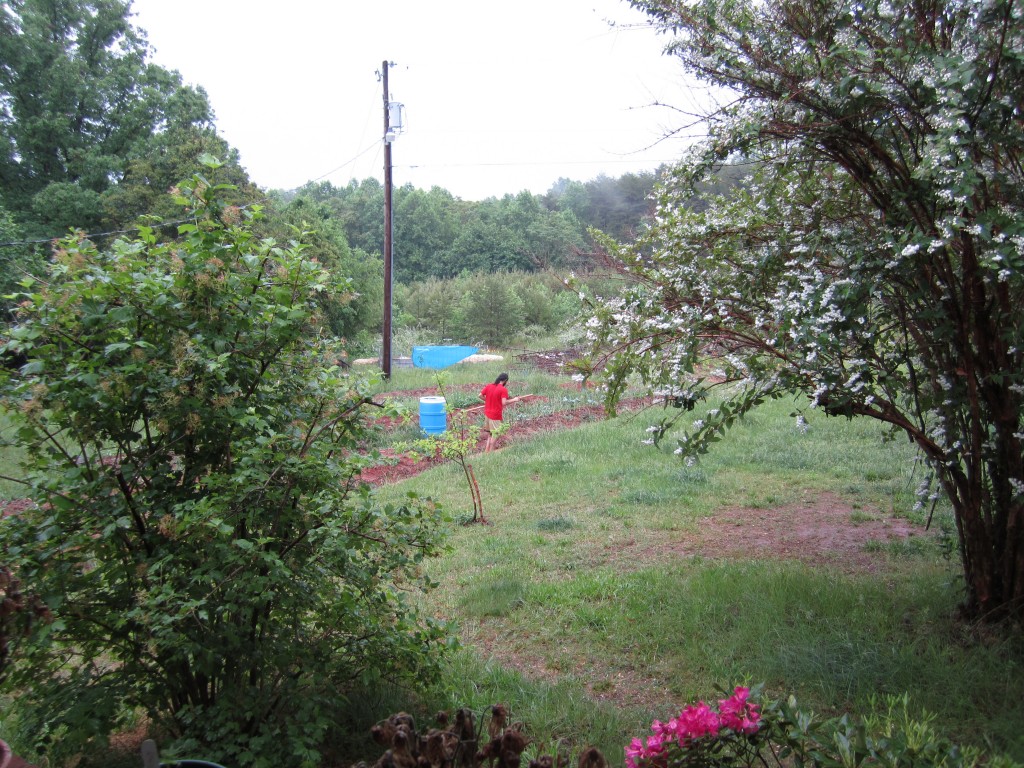
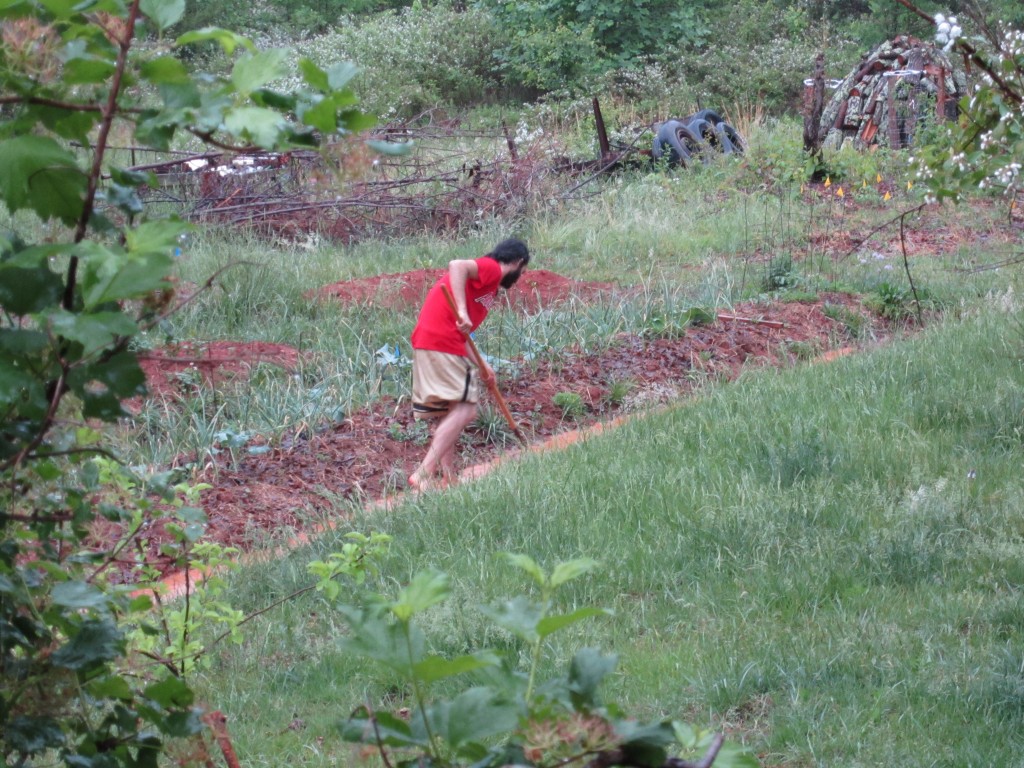
By this point it had been raining for a while, and our garden swales were starting to fill up. I noticed that they weren’t filling up evenly, and figured that it was a great time to get the hoe out and start leveling the contour paths. The small amount of water, about an inch or two, made it easy to find the high spots and then scrape that soil to the low spots. Then it was just walking up and down the swale, seeing how deep the water was at different spots and filling in with clay as needed.

garden swales

Taking advantage of some summer rain to work on the garden swales.

This was pretty fun work in the rain, and I felt like a rice farmer in China working on his paddies. The combination of a steady, rhythmic rain, and the watching the water slowly creep along the swale as it became level was very relaxing.

garden swales permaculture

So today was a rainy day not wasted. Some inside chores, and then some outside ones made easier with the help of the rain. We can also thank the rain for watering in our garden, filling up our ponds, keeping our shiitake mushroom logs moist, and charging up our forests with a much needed soak.

The Value of a Fruit Tree Investment

I wrote yesterday on how to plant fruit trees and it got me thinking about the potential value and return on investment that a food forest, or even just 1 fruit tree can provide. Today I want to look at what an apple tree can yield during it’s lifespan, and maybe try and persuade you that planting one just may be the best investment opportunity around.
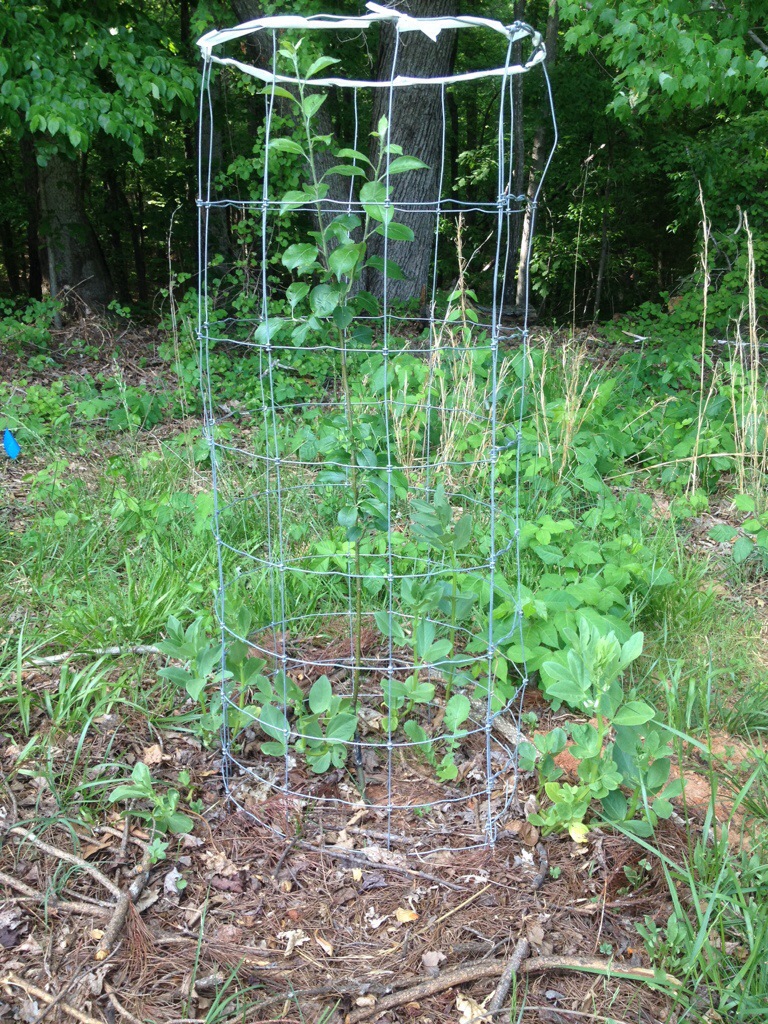
value of an apple tree

One of our heritage apple trees with a tomato cage to protect from deer, and fava beans planted around it to produce mulch and fix nitrogen.

Okay. Let’s look at a semi-dwarf apple tree, like the William’s Favorite apple that I showed in the pictures of yesterday’s post. A semi-dwarf apple tree will cost anywhere from 15-40 dollars and you can definitely find a high quality, heritage variety for under 30 dollars. After planting, you can expect some yield in 2 years, but 3-5 years is when this tree will really hit it’s stride.

How much does a semi-dwarf apple tree produce? Around 4-7 bushels of apples per year. A bushel of apples is about 45 pounds, so that makes 180-325 pounds of apples every year. That’s a lot of apples. It’s actually 500-880 medium-sized apples, and would likely satisfy your “apple a day”.

How much are these apples worth? Well, first off, go down to a store and try to buy a beyond organic, no spray William’s Favorite apple. How much is it? It doesn’t exist. You can’t buy it at a store, but we’ll substitute organic apples for our calculations. So, organic apples run anywhere from 1.99/lb. to 3.99/lb., but I’ll use the lower number to be on the safe side. So, at 2 dollars per pound, 1 tree will produce $360-650 worth of apples per year.

But what can you do with hundreds of pounds of apples? Well, you could make homemade apple pie, 60 -100 pies per tree actually.

What about cider? Did you know that President John Adams would drink a tankard of hard cider every morning to prevent gas? Well, your mature apple tree can produce enough apples to make 12-24 gallons of cider per year. That’s 128-256 bottles, or 21-42 6 packs of craft cider. If you’re not a cider drinker, I’ll tell you that a 6 pack of quality cider costs about 10 bucks, and most of these are made from the rejects of the fresh fruit market.

Now, for how long can you expect this investment to return? While standard apple trees, those grown on full size rootstocks, can easily live 100 years, semi-dwarf apples typically live from 20-25 years. So your $30 apple tree will produce around 5000 pounds of apples, enough to make 1500 apple pies, or 600 6 packs of apple cider. And thanks to inflation, who knows how much these will cost in the next 25 years.

I’d say that’s a pretty good deal. And after the first year, once the tree is established, it will require very little maintenance. Now if this 1 tree is surrounded by support species plants that fix nitrogen, attract pollinators, and provide mulch and predatory insect habitat, and maybe a small swale to hydrate the soil and reduce water needs, then this 1 tree becomes a self-supporting, and highly valuable aspect of your property.

And while you can drive out right now and buy a 2-3 year old apple tree to plant, you cannot buy a 10 year old tree that is in full production, with a root system 20 feet deep and capable of surviving drought like no corn field or garden can. All of these, and many more, are reasons to consider planting a fruit tree or two on your property. It’s not that hard, and can be an extremely profitable investment.
Planting Trees: A Quick How To

As we wrap up the initial planting of our backyard food forest, I thought it made sense to put together a post on how exactly we plant our fruit trees. We already uploaded a video about protecting fruit with tomato cages, so check that out if you haven’t already, but today I’m going to give a quick how to on planting bare-root fruit trees.

apple tree location

This spot in the front yard is just out from the dripline of a big oak tree and should get plenty of sun.

First off, decide where the best place to plant your fruit tree is. Some things to consider are the directions of your primary winds, how much sun the tree will get, what sort of shade the surrounding trees or structures may provide, and also how much shade your tiny fruit tree will provide when it is mature. It’s also nice to be near a source of water for both irrigation and planting if you can.

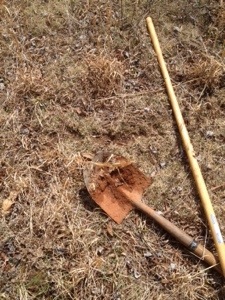
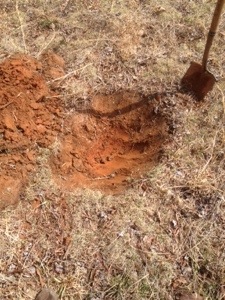
Next, I like to scratch off the top layer of sod or leaf litter, depending on where I’m planting, with either a mattock or shovel. This makes it easier to break ground, and also disrupts weed and grass growth in the area right around the young tree. Now it’s time to start digging. I like to dig a hole that is bowl shaped, with gently sloping sides, and a little deeper than the root ball on the dormant tree. For most of the trees we planted this year, this turned out to be a hole that was two and a half to three feet wide, and 18 to 24 inches deep.

fruit tree hole

Make sure your hole is big enough and you don’t cram the roots in!

After the hole is dug, I like to rough up the sides and bottom a little to make sure the tree roots can grow out into the native soil. I now backfill the hole a bit, and place the root ball of the tree on a small pile of dirt and see if the depth is right.

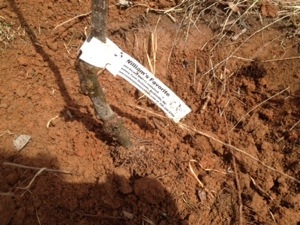
I try to plant the tree at the same level is was planted at in the nursery, a couple inches below the graft union. This is important because if you accidentally plant the graft union below ground, the tree will grow as a full size tree and you will lose any semi-dwarfing or dwarfing effects. Now this isn’t necessarily a bad thing, but if you spend money on a dwarf apple tree that only gets 6 ft. tall, you probably won’t be happy when it ends up being 60 ft. tall.

planting apple tree

Start packing in the dirt around the roots, making sure to bust up any big clumps.

Once I have the right depth, I pack dirt around the roots of the tree, being careful to try and break up any large clumps of our beautiful, red Carolina Clay. At this point, I may add a handful of our native forest soil, in order to inoculate the young tree’s roots with mature soil bacteria and beneficial fungal mycelium to help with the uptake and cycle of nutrients.

heirloom apple tree planting

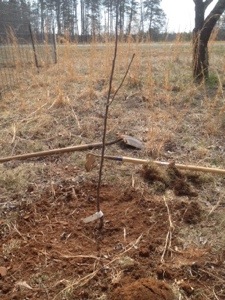
Fill in the rest of the hole and water deeply to remove any air pockets.

After that, I fill the hole in completely, and perform any grading or minor earth shaping to channel runoff and rain water. Ideally, now is when you would plant a few support species next to the tree, to help it grow. It’s also the best time to add a thick layer of mulch around the base of the tree, and then give it a good long drink to water it in.

And that’s pretty much it. All in all, after you get a few under your belt, it takes about 15-25 minutes per tree, depending on the size of the roots. Not too bad when you consider the value of a mature fruit tree, and how much food security it provides.

Older posts Newer posts

© 2024 KW Homestead

Theme by Anders NorenUp ↑