KW Homestead

Pasture Raised Poultry & Edible Landscaping Plants Since 2013

Author: Emma (page 33 of 36)

food forest details: keeping our plants safe and thriving

if you have looked at jason’s post from yesterday, detailing the why and where of our food forest, you know about our plans for planting over 100 fruit trees and bushes on our land.

the below video shows a few of our plant species and explains where we chose to plant them, as well as includes a demonstration about how to add a layer of protection around your own precious trees!

.:.

.:.

a day in the homestead life: her day

i just realized that i haven’t yet written a post detailing a typical day in our life from my perspective. so, i’ve decided to do just that! this is certainly a typical spring day, with longer daylight hours and better weather for planting and outdoor chores.

so, here is my typical day in our homestead life:

5:40 am

  • roll out of bed and put on my coveralls. i take the dogs out to pee and open the chicken house and feed the chickens their first of two daily meals. also, since we’ve gotten the geese, i’ve been letting them out of their nighttime enclosure and into their larger pen. they immediately head for the kiddie pool and start drinking and splashing about.
  • luckily, during this time of year the sun is already on the rise (still not sunrise, though) so all of my morning chores are easier and more fun to complete!
  • i load up the car, complete with the chicken bucket that i use to collect my students’ lunch leftovers for feeding to the chickens, my lunch, and my breakfast (which i eat during the 1 hour commute to work).

6:15-7:15 am

  • this is my drive-to-work time, which usually consists of listening to the radio and munching on my breakfast, i would rather be recording podcasts or writing songs, but i still have to get organized for doing things like that.
  • luckily it is easy to enjoy the car ride to work because i slowly get my brain geared up for working with kids and i get to enjoy the lovely country views (which in spring are filled with lots of horses, donkeys, goats, chickens, and flowers!).

3:00 pm

  • i get off of work and begin the drive home, sometimes later than 3:00.

4:00 pm

  • once i get home i let both dogs out, and often have to clean up after bridey who has probably peed inside, pooped inside, or both. i unload the car and start on the everyday afternoon farm/outside chores.

these everyday chores are:

  • dump and refill the “goose pond,” which is their beloved kiddie pool, and their water. i also feed the geese their afternoon grain.
  • feed the chickens the leftover scraps from my students’ lunch and their afternoon grain, refill their water, and collect eggs. collecting eggs can either be simple or not, depending on the mood of rex, our standard rooster, and whether or not he feels territorial and pushy. the hens also sometimes lay eggs under the house (perhaps they’ve wised up and realized that i take their eggs that end up in the nest boxes) and so i have to fish/roll those out with a metal hook.
  • feed the dogs their afternoon/evening meal and feed the cat.
  • wash the eggs, dry them, and put them in the fridge for storage. lately i’ve been washing goose eggs too, which are so amazing!
bolt, hanging out with me during afternoon chore time!

bolt, hanging out with me during afternoon chore time!

5:00 pm

sometimes my daily afternoon chores are completed by 5:00, sometimes not. once they are complete, i move on to other farm chores which don’t necessarily need to happen every day. these other tasks are often a little more creative and less routine. some of these, which i happened to do yesterday and today, are:

  • water our new seedlings that are growing in trays
  • water the flowers i’ve planted in pots, and the new mums that jason brought home from work the other day!
  • stake cages around our newly planted fruit trees and bushes
  • water our fruit trees/bushes
  • tie white tagging tape around the tops of each cage so we can see where not to step (the cages are really hard to see since the metal is so thin and dark)
  • jason and i moved the goose pen yesterday–our plan is to move them to fresh pasture every 2 days
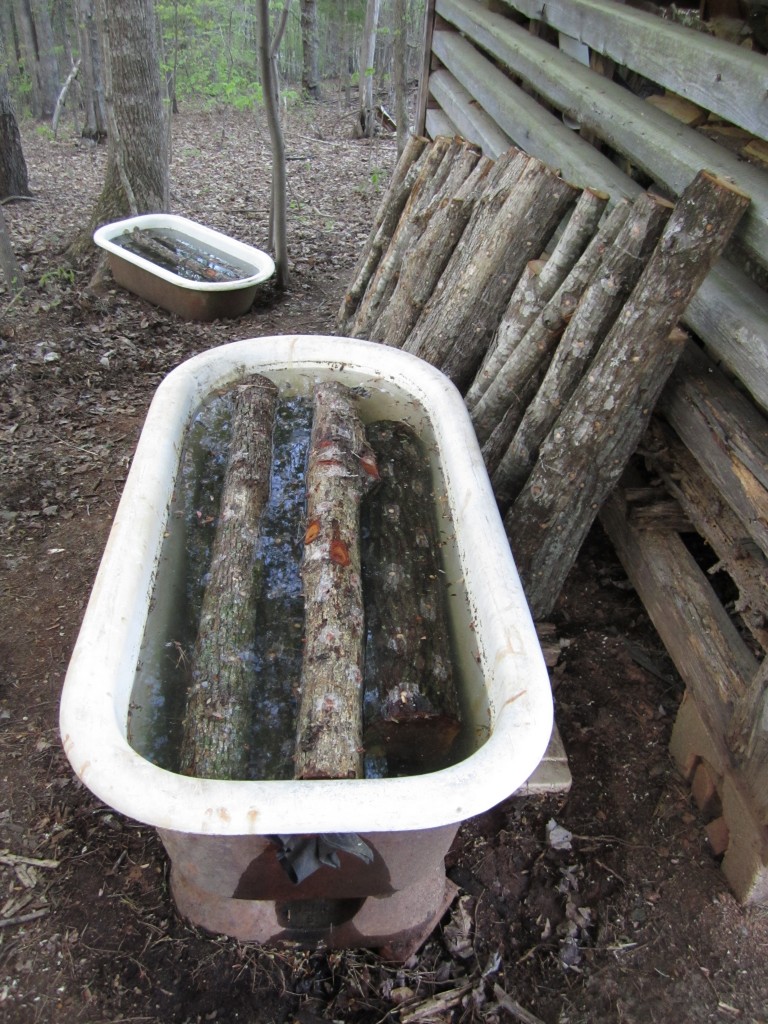
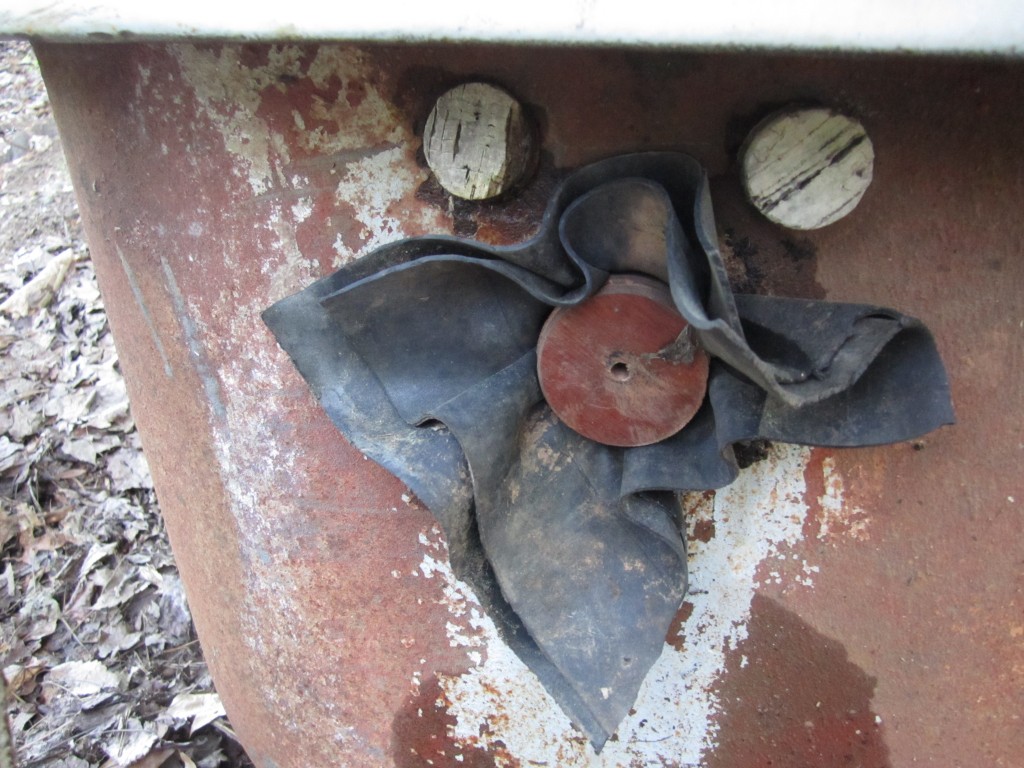
  • i also finally figured out how to plug the holes (where the spill drain used to be) at the top of my 2 cast iron/enamel tubs for soaking my mushroom logs. i used circular cuttings from an old mahogany door and layers of a thin, deflated, old tire. i placed the tire materials over the hole and hammered the wooden plugs into the hole. this pushed both rubber and wood partially into the hole, filling in all gaps and making a nearly-watertight barrier.
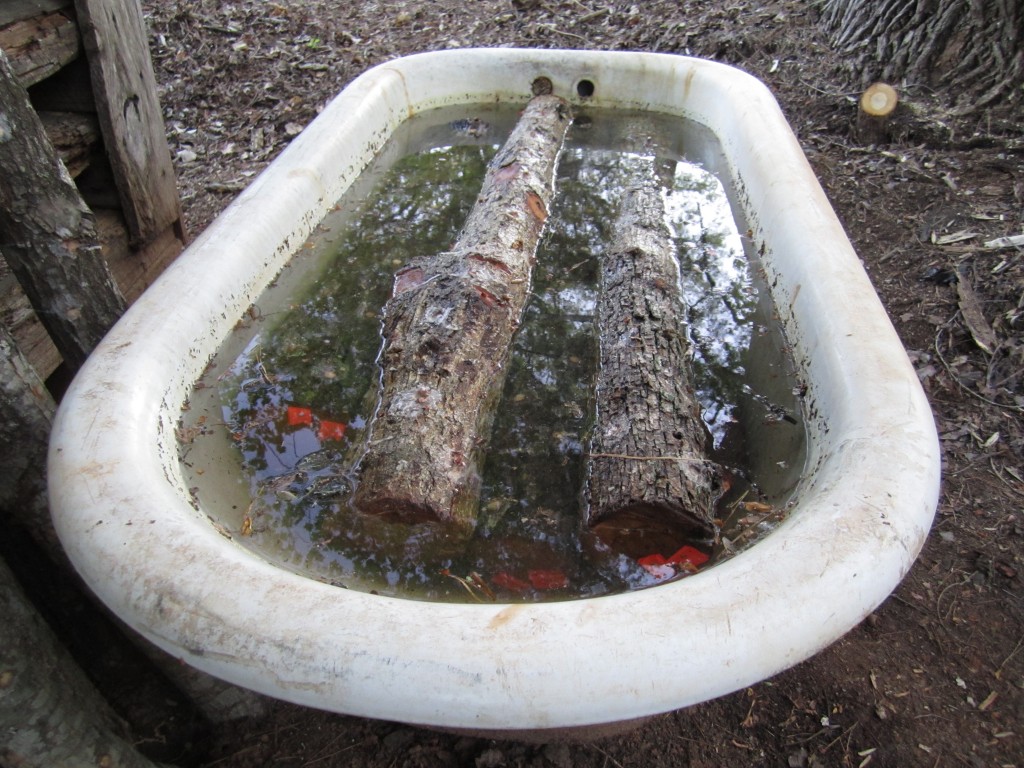
  • after determining that my plugs worked yesterday, today i went about soaking 1/4 of my logs, 7 in each tub (batch 1–the batch labeled with orange marking tape). they will soak overnight and i’ll lean them back up against the corn crib tomorrow!
two bathtubs filled with soaking mushroom logs!

two bathtubs filled with soaking mushroom logs!


today's batch for soaking was the "orange batch." labeled with flagging tape so i can keep straight the info about when logs  was soaked

today’s batch for soaking was the “orange batch,” labeled with flagging tape so i can keep straight the info about when logs were soaked.

my rigged plug--working well!

my rigged plug–working well!

in addition to these chores, jason spent yesterday digging his hand-dug pond out even more, planting more fruit bushes, watering plants and the seeded garden beds, and beginning to build our newest bed: a raised hugelkulture bed downhill from our others.

8:30 pm

  • sometime around dark we head inside, eat dinner, and try to rest a little.

bedtime and pre-bedtime (anywhere from 10:00 pm to 12:00 am)

  • one of us always writes a post in the evenings (monday–friday)
  • we take the dogs back out to pee
  • lock up the chicken house
  • close the geese into their smaller, fenced enclosure

and that is a general idea of what we do in this spring season to keep the homestead running and fruitful. some days we do more outdoor, farm-related chores, and other days we do less. it just depends, really, on our mood and the homestead necessities!

.:.

planting seeds and watching them grow!

on april 6th i planted a whole lot of our seeds for this year in seed trays and have since watched their successes and adventures in growing.

we wanted to share what we’ve experienced in their germination process, so that you can have an idea about what to expect if you plant any similar plants.

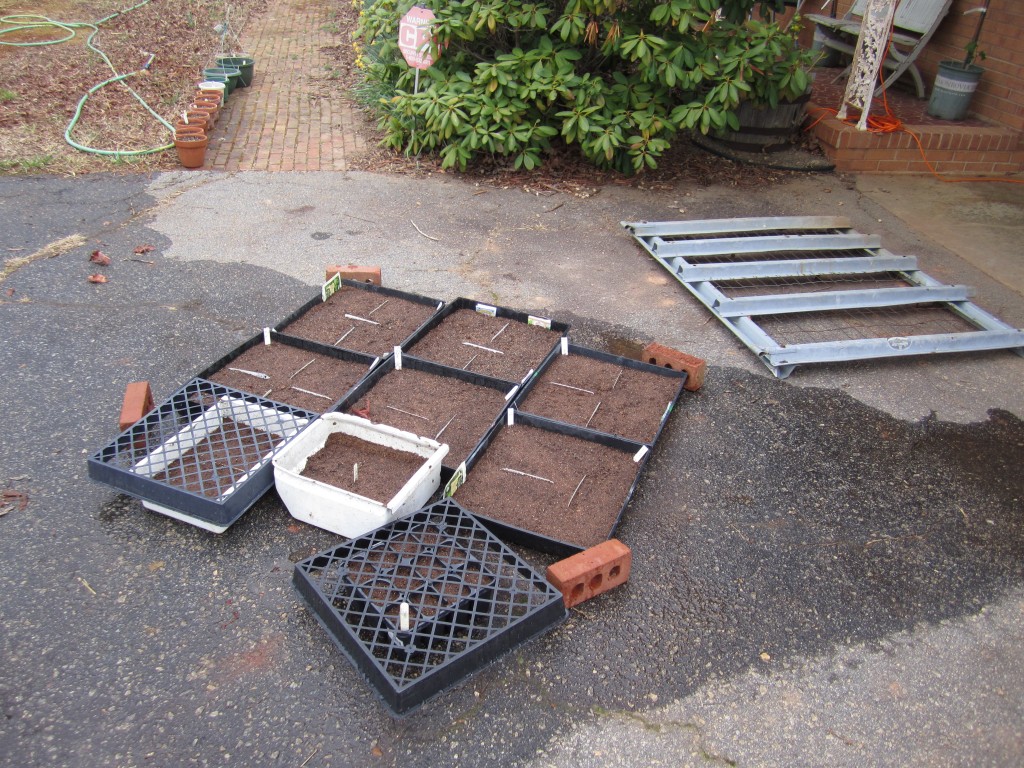
first of all, my potting mix consisted of about 2/3 peat moss and 1/3 black kow, with a little bit of vermiculite thrown in there. this is not my ideal mix (we were running low on vermiculite) but it worked fine for this occasion! the trays were watered the same day i planted the seeds and have been watered every day or every other day since then. they have been sitting outside in the sun on our driveway with a fence gate laid down on top of them so dodger doesn’t decide to sit in them (since he does love to be the center of attention).

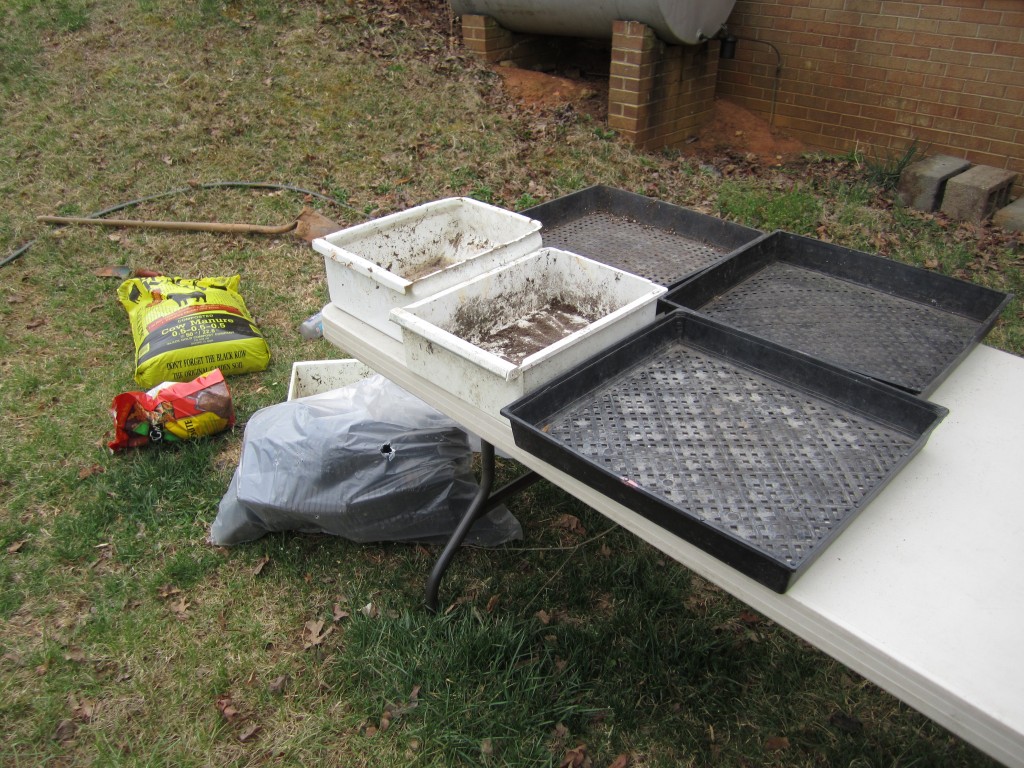
trays

readying the trays for planting seeds!

this is the list of all of the seeds that were planted in trays on the 6th of this month, categorized by how many days they took to germinate:

4 days

  • anuenue lettuce
  • butterfly garden mix (a mix of 30+ flower types that butterflies love)
  • save the bees mix (a mix of flower types that bees love)

5 days

  • sweet valentine lettuce
  • bronze arrow lettuce
  • speckled bibb lettuce

8 days

  • thyme
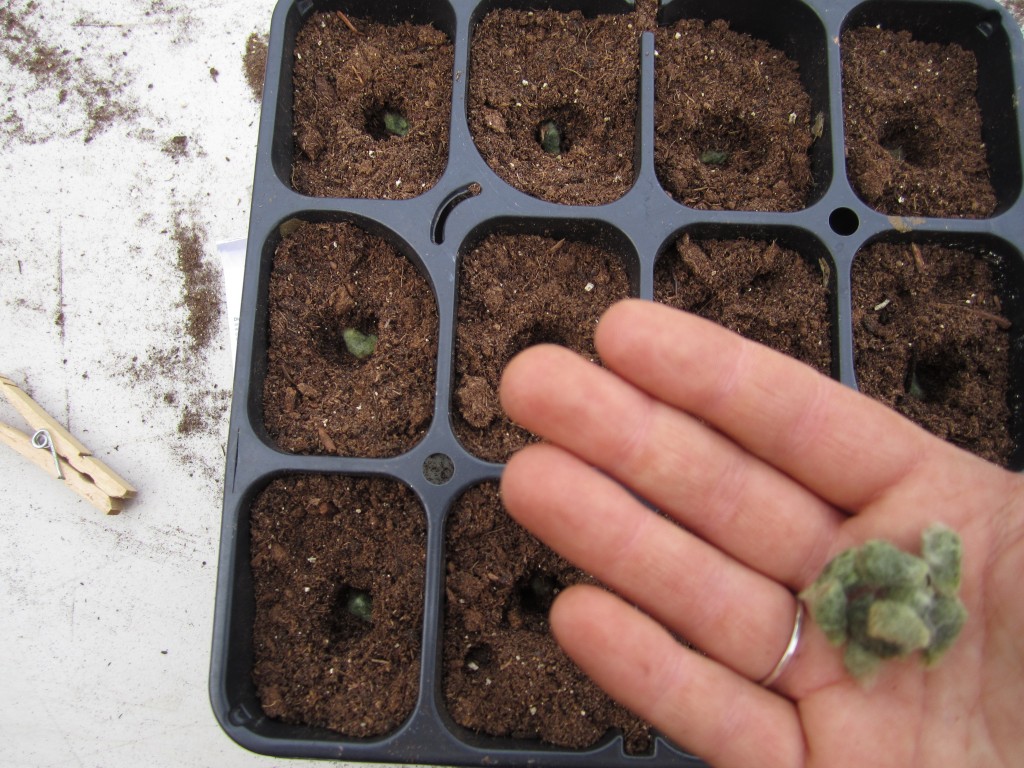
  • cotton (erlene’s green cotton… beautiful and green!)
  • celosia flowers (cockscomb mix)
  • aster flowers (powder puff mix)
cotton

erlene’s green cotton… the seeds are green and the cotton will be too!


10 days

  • black plum tomatoes
  • san marzano tomatoes
  • black cherry tomatoes (i got these seeds from a friend years ago and i don’t actually know the same of the tomato. i call it black cherry because these cherry tomatoes have a purple flesh.)

11 days

  • oregano
  • lemon balm
  • spearmint

13 days

  • genovese basil
  • italian flat leaf parsley
  • jupiter red sweet bell peppers
  • golden california wonder sweet yellow bell peppers
  • tomatillos

no germination so far

  • rocky mountain bee plant (cleome serrulata)
  • sage
  • aji dulce peppers
  • cayenne peppers
  • jalapeño peppers

we’re still waiting to see what the few seeds that haven’t germinated will do in the future. until they germinate, they will be out in the sun, getting water and dodging dodger’s tippity toes!

our planted seed trays, taking in the sun and soaking in the water.

our planted seed trays, taking in the sun and soaking up the water.

.:.

stepping outside in the country: what animals to expect and what to do

jason recently posted about ways that living in the country can be different than living in the city. i have a few more thoughts about that… especially looking at ways that simply stepping outside can be different!

nature is, of course, much more present in the country than in the city. there is the beauty of the land and the nearness and noise of trees, crops, and lovely birds. and there are also creatures which you are much more likely to encounter in the country and for many of these creatures you need to know how to deal with them!

here are just a few of the creatures you can expect to encounter often, if not every day:

ticks

most people find these critters disgusting, and they certainly can be, especially when they swell up with blood. it’s frightening enough to find one on a beloved pet, but it also isn’t fun to find one on yourself (even if it has just attached). but, if you plan to move out into the country and you also plan to do nearly anything outside in the woods, you will definitely get some ticks (how does that country song go… “i want to check you for ticks”…?). expecting that you will get some and knowing how to deal with them is the trick.

sometimes you can feel them crawling on you before they attach, but sometimes you can’t. just know that you can avoid them somewhat if you avoid getting down and dirty and the leaf litter and if you try not to bump small trees or limbs (they can wait on these until they feel movement and then leap off). but for most folks who do a lot of outside work, this is hard.

we always check ourselves for ticks once we come inside and periodically throughout the outdoor work day. once we find one that has attached, our go-to is to dip a q-tip in tea tree oil and dab it on the tick and “mess with it.” most of the time, since the tick has just recently attached, the tick decides that his current location is no fun and he detaches and tries to move on (which means he ends up getting tossed in the toilet). but, sometimes they won’t let go and must be removed with tweezers. i am the primary surgeon (ha, ha!) in the family, and i always make sure to grab a little bit of skin when i pinch down on the tick’s head, to be certain that i do not leave the head still in our skin. so far this technique has not met with technical difficulty. despite this, the tick bites are very itchy for me–much less so for jason. we put a little more tea tree oil on the bite afterwards and watch the area to make sure nothing becomes infection.

ticks can carry different bacteria but it is unlikely that if you are bitten by a tick you will have any issues. but, do keep your eyes peeled and watch yourself; if you have any funny symptoms like a fever, a rash, an infection, or any shakes, go see a doctor!

snakes

we’ve seen a half dozen snakes in the past few days working in the yard; all of them have been harmless and they are always seen trying to get away from us fast. i love to pick up some of the little brown snakes, but we found another snake recently that we were not sure about… the markings on it were copperhead-like. upon further  investigation (we were safe!), we found that it was not a venomous snake. the way we safely checked to see was a multi-step process:

  • we saw that he was cold and sluggish from being found underground where it is still cool and noticed that he did not act angry and was not coiling to strike us. this says nothing about if he was venomous or not, but it did show that we were not in a high-risk situation.
  • because of the above details, we were able to look at his head shape, which was ovular as opposed to being triangular (usually venomous snakes have triangular head shapes, but not always).
  • since he was sluggish, jason was easily able to pin his head down with a tool (without injuring him) while i checked the underside of his belly to see how many scales he had below his anus. one row usually means that he is venomous and two means that he is not. this does not always apply but i know that it applies in our area, where the only venomous snakes are copperheads. i have even created a rhyme to help everyone remember this fact: “two is true for you, one is un-fun when done.” meaning: a snake with two scales below the anus will not poison you, while a snake with one scale below the anus will!

although most snakes that you will encounter are more afraid of you than you are of them (yes, that old cliche…) you still have to watch out for the occasional copperhead, which we luckily have yet to see!

cows

this might sound silly, because you’re thinking of cows behind their fence quietly munching on grass. but what about a cow on the loose? so far, i’ve seen one of our neighbor’s cows out of her fence. this is generally amusing (even though bolt disagrees, and thinks that the cow is an evil bad guy coming to get us any minute!), but the sight also gives me pause. both times i’ve seen her out she has been right across the road, staring at me. it is an unnerving feeling to look up and see anything staring at you, even a cow. it makes me hope that i never see a bull wandering around…

cows are big after all! and what will i do on that fateful day when i look out and see a runaway cow munching on our vegetables? any suggestions, folks?

.:.

more spring flowers… what a lovely time of year!

i’ve decided to write another brief spring flower post, partially because flower pictures can usually speak for themselves and don’t need a lengthy explanation and partially because i have so many things to write about and i just can’t decide where to start. so, i just picked something simple and lovely to start with.

this means you can expect some other posts coming soon about the many things we’ve been doing here on the homestead, like:

  • planting our spring vegetable crops in trays and in open beds
  • planting our 50-ish fruit trees and bushes
  • clearing out some of our wooded area around the corn crib, barn, and yard for planting and to expand our work/activity space
  • cleaning a bunch of trash out of the woods, and finding some useful junk (love me some useful junk!)
  • skunk sightings
  • snake and salamander encounters
  • finding a soft-shelled egg
  • altering a wedding dress

for now, though, i would just like to share more lovely flowers that are coming out for a visit. most of these flowers/trees/bushes started blooming last week or the week before.

our front yard crab apple, which never bloomed last year. we were so excited to see it show its true colors this year.

our front yard crab apple, which never bloomed last year. we were so excited to see it show its true colors this year.

flowers

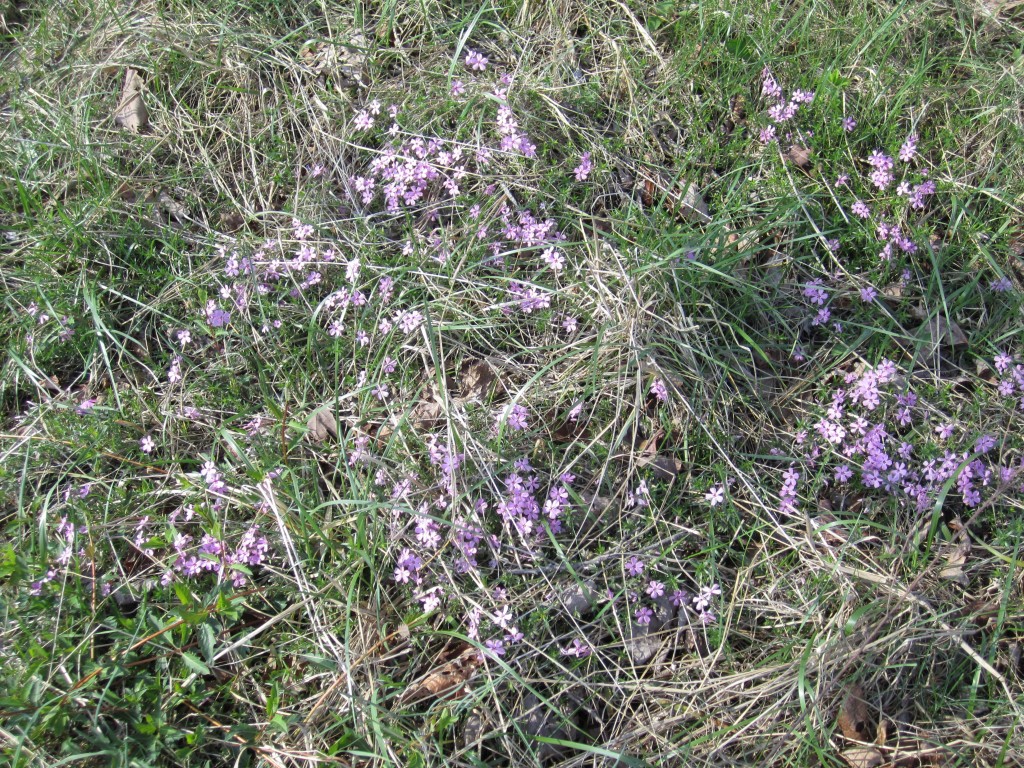
some low-lying, ground flowers blooming under the crab apple. what are they? we don’t know their name!

flowers

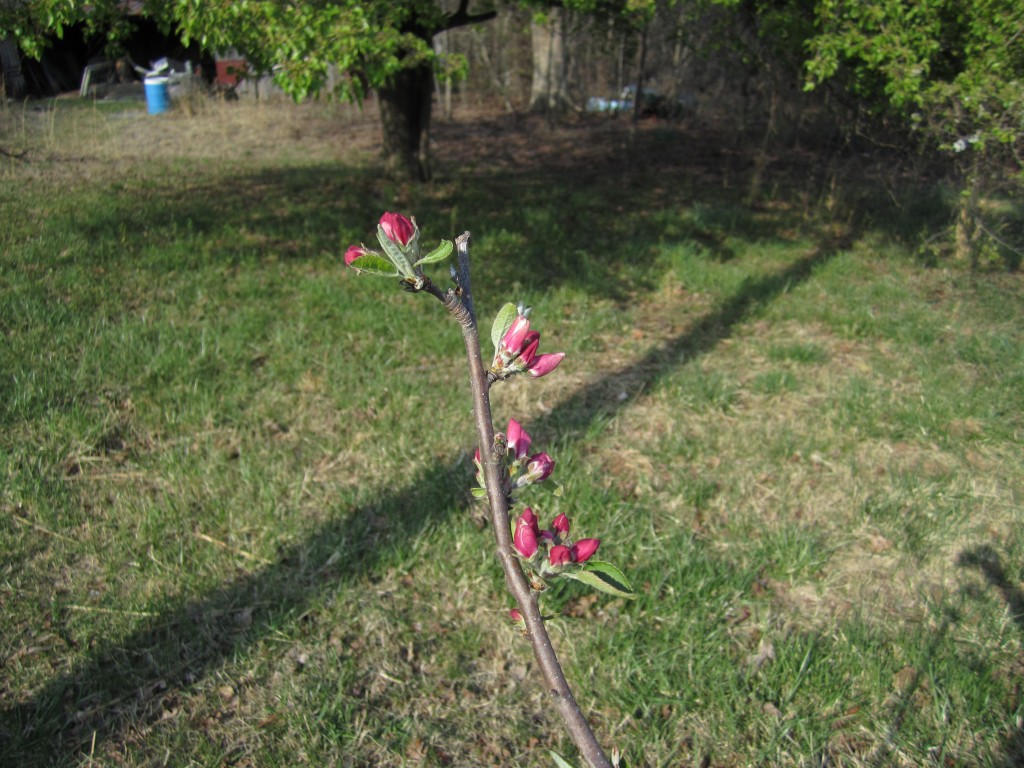
our dwarf apple tree, planted last year, beginning to bloom!

buds

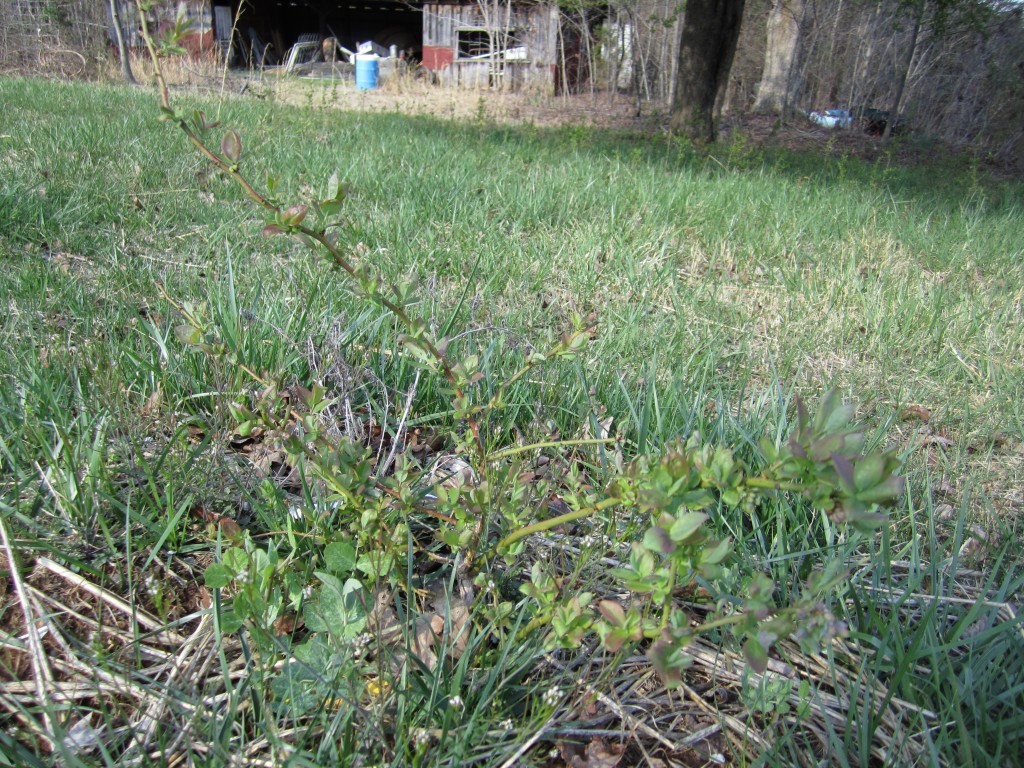
our first blueberry, also planted last year, going green!

tulips

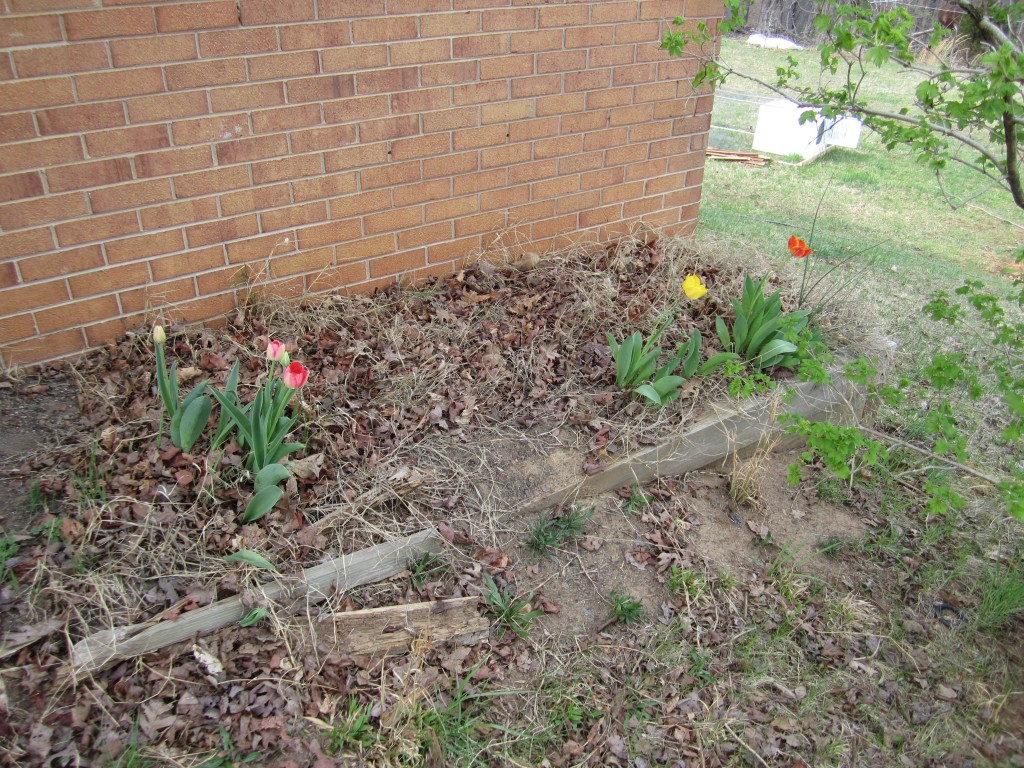
these tulips have been much more plentiful this year than they were last year. they were already in the bed beside our carport when we moved in last year.

lemon

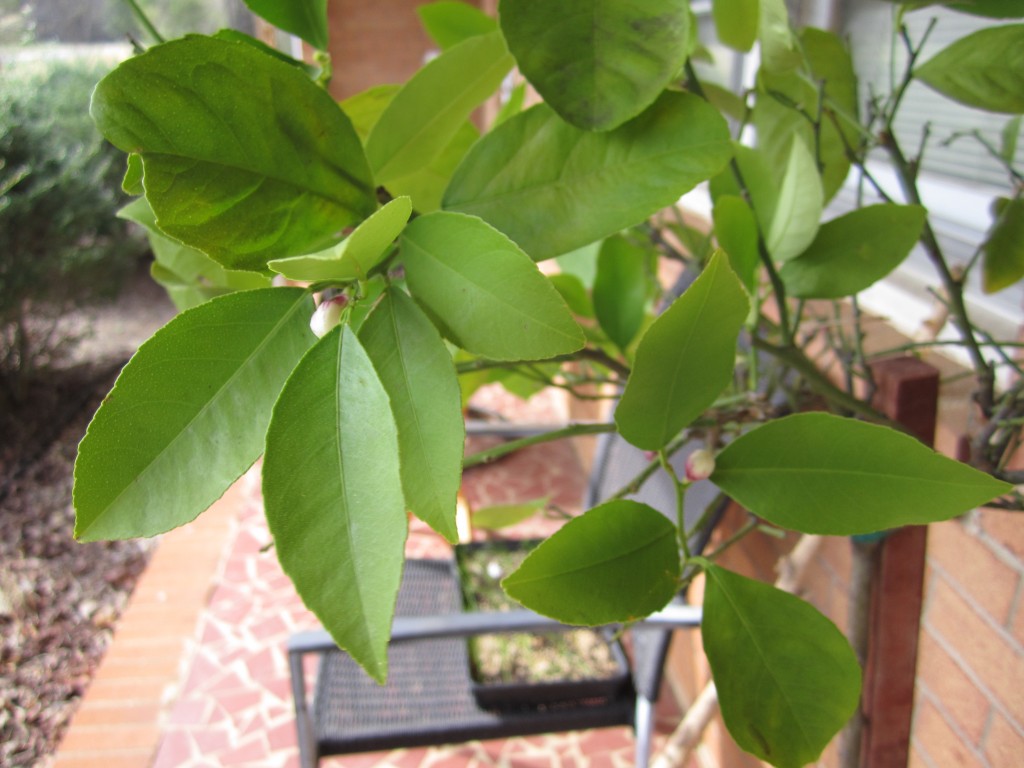
and these are perhaps the sweetest smelling flowers ever! jason got this meyers lemon from his workplace. it is exciting to see it blooming since that means we’ll see some baby lemons arriving soon (fingers crossed!).

.:.

soaking the mushroom logs and giving them a home

after inoculating our shiitake mushroom logs, we had to go about soaking them and figuring out where they would be living!

first of all, the few days after the inoculation were chilly (which wouldn’t matter) but the nights were below freezing (which would matter). so, once we got all of the logs inoculated, i stacked them inside our basement and covered them with damp sheets and a layer of plastic to keep in the moisture. this meant that we were not able to begin soaking them for a few days, which we decided would be alright considering the logs were cut only a few weeks before and still contained some moisture. it is important to keep the logs from freezing (in the beginning, at least) and to make sure that the logs do not totally dry out. it is likely that the logs would have been fine without being brought into the basement or without laying damp sheets over them, but we decided to play it safe.

logs

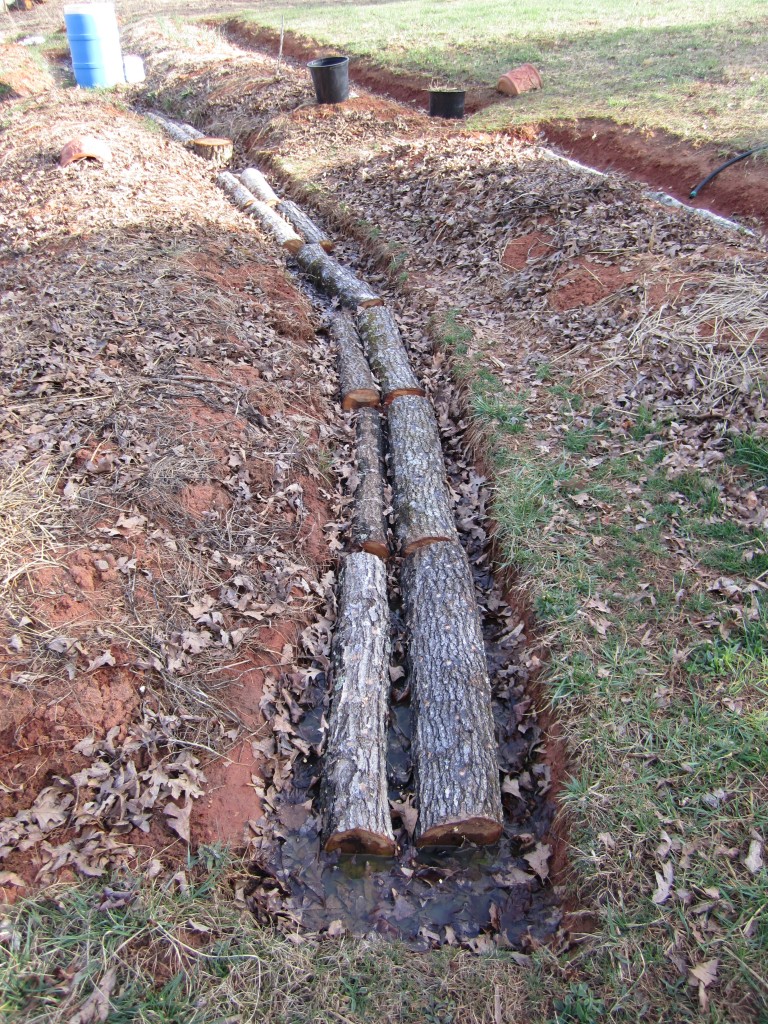
logs soaking in the footpaths of our raised garden beds.


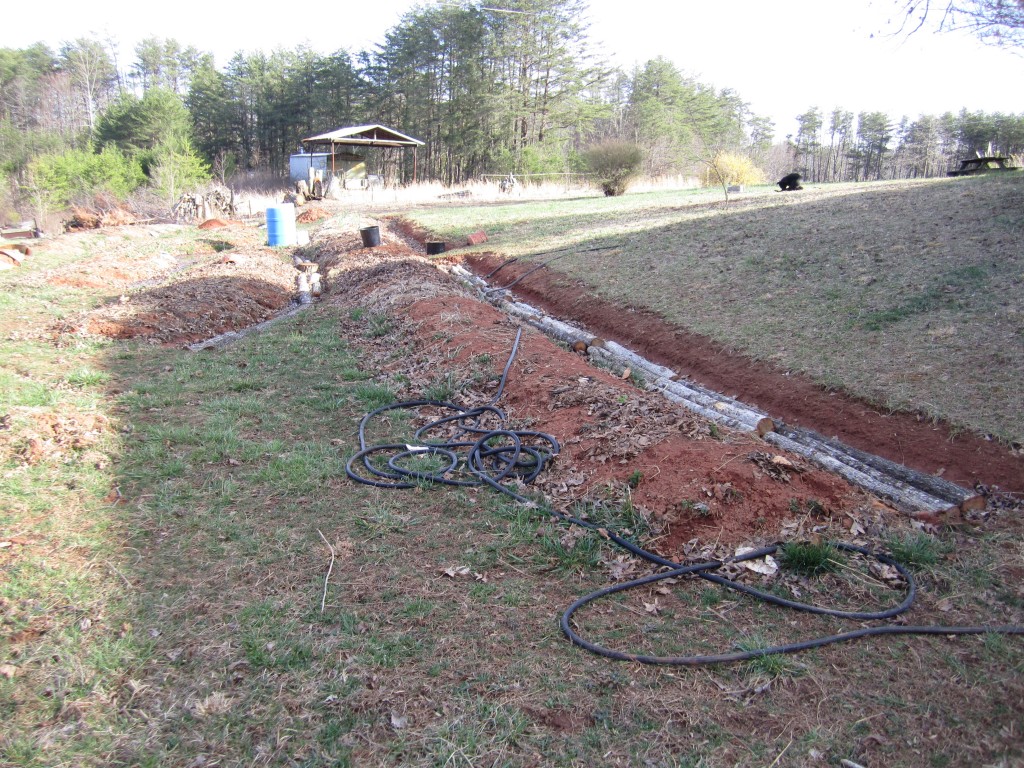
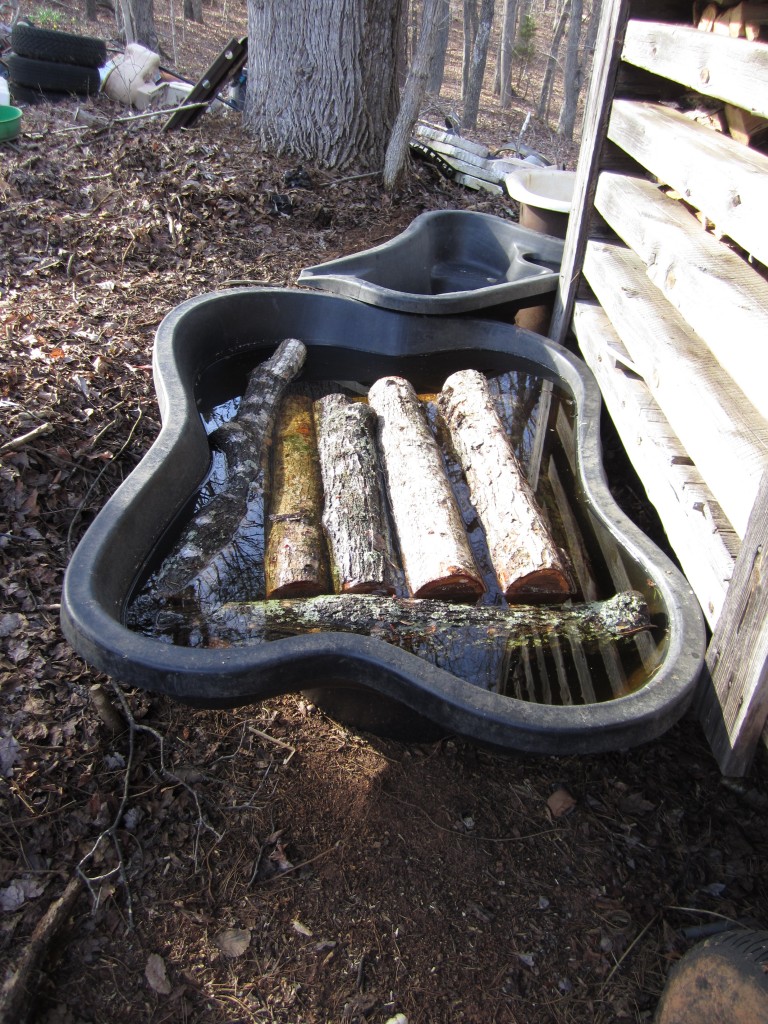
once the weather warmed up a few days later, we filled the deep paths of our garden beds and soaked the logs in there, also using a small pond liner for soaking some of them. the paths slowly drained and we refilled the paths a couple times over the course of a few days to make sure that the logs were super moisturized.

logs

logs soaking in the footpaths of our raised garden beds.

logs

some logs getting a temporary soak in a pond liner.


then i moved the logs (with the help of my wheelbarrow and a good bit of cussing) to their permanent home leaned up against our corn crib structure. my dad and jason had already cleared a space for them, as well as space for 2 old enameled, cast iron bathtubs for use in soaking.

and man, moving the now-wet-and-much-heavier logs was tough. i put between 4 and 6 logs in my wheel barrow for each trip from the paths to the corn crib, and luckily didn’t dump a single load, even though there were a few obstacles along my way! i feel proud. keeping the wheelbarrow from tipping when loading and unloading the logs was the more difficult part, really, since each log weighed between 25 and 70 pounds. luckily, no accidents here either.

logs

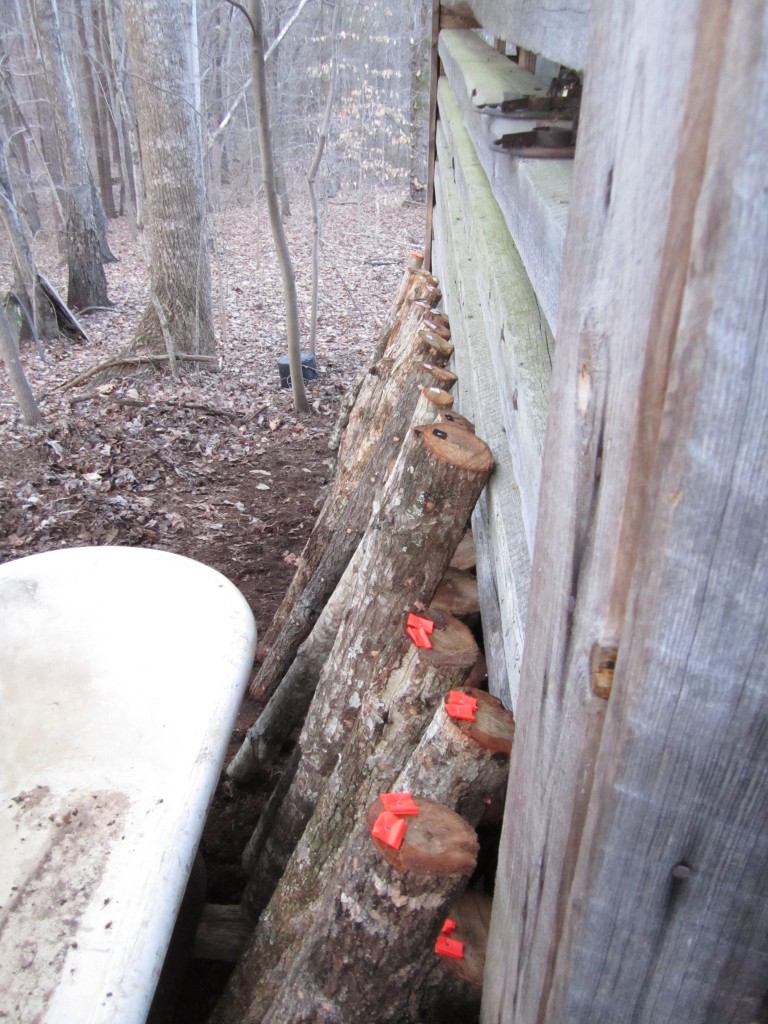
leaned up and labeled logs!

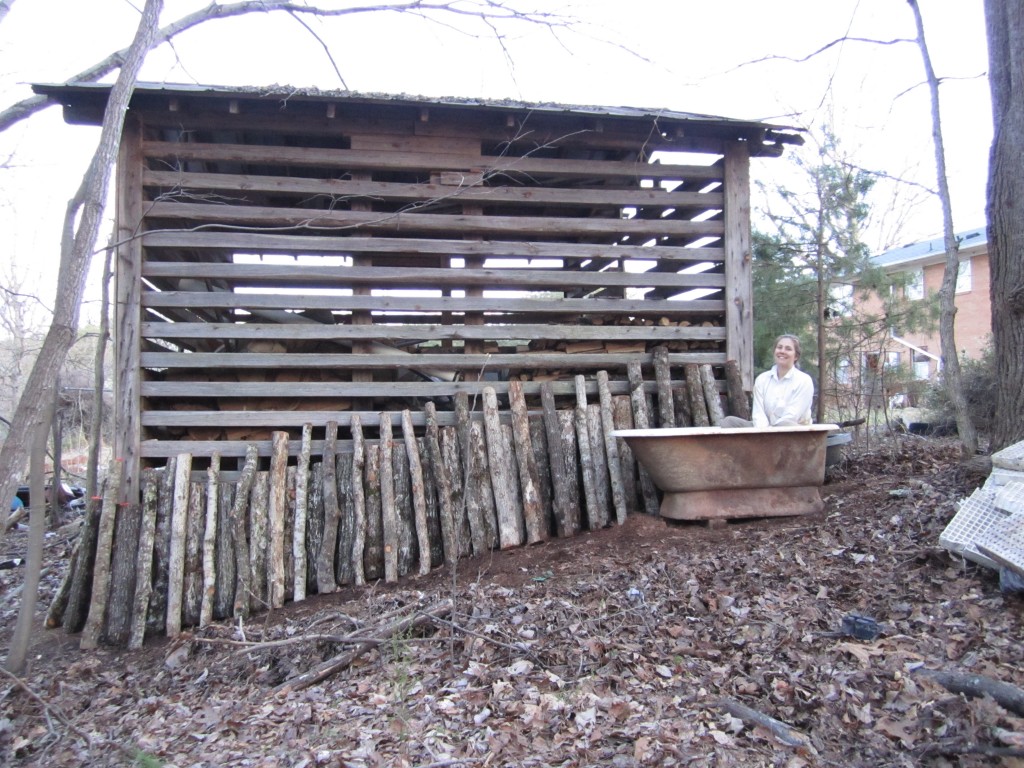
once i leaned all of the logs up against the corn crib, i divided the 50 logs into 4 groups, and labeled these by nailing different colored tape into one end of each log. once we bring the second ceramic tub to the area for log soaking, 1/2 of group 1’s logs will be soaked in one tub overnight, and the other 1/2 will be soaked in the other tub. the logs will be soaked on a rotating schedule so that each of the 4 groups gets a soak every 2 weeks or less often depending on how quickly their bark dries completely out (that’s the sign it’s time to soak them again!).

logs

the final product: the logs leaned up by the corn crib (and me in the tub!).

and so, we begin the watering and waiting process. grow, shiitakes, grow!

.:.

mushroom log inoculation: it’s a family affair

i am finally writing about this, even though we inoculated our mushroom logs a few weekends ago. if you’ve read my other posts about selecting our mushroom varieties and about cutting our mushroom logs, you already have some idea about our plan. since these posts, though, our plans have changed slightly. we are still using 50 mushroom logs this season, but we are only inoculating with shiitake mushroom spore. this is for three reasons:

  1. shiitake mushrooms are the only gourmet grow-it-yourself mushroom and variety that i have tasted and i am confident in their deliciousness!
  2. shiittake saw dust spawn was cheaper to obtain than shiitake plus a few other varieties.
  3. shiitake is a mushroom that my father has experience growing and the other mushroom contenders had different, more difficult traits (i.e. maitake sometimes won’t fruit for years and some people say that reishi tastes not-the-best).

so, we decided to go with the trusty shiitake for our first year’s mushroom experimentation!

we ordered both our spawn and our inoculator tool from fungi perfecti and once we got our bags of spawn in the mail, we promptly stuck them in the fridge.

once the big day arrived, we enlisted the help of my parents. it turned out that jason and my dad did most of the hole drilling, i did most of the inoculating, and my mom did most of the waxing of the holes. even with all this extra help, jason and i still had to continue the process for 2 days after the “family work day.”

here’s how the experience went:

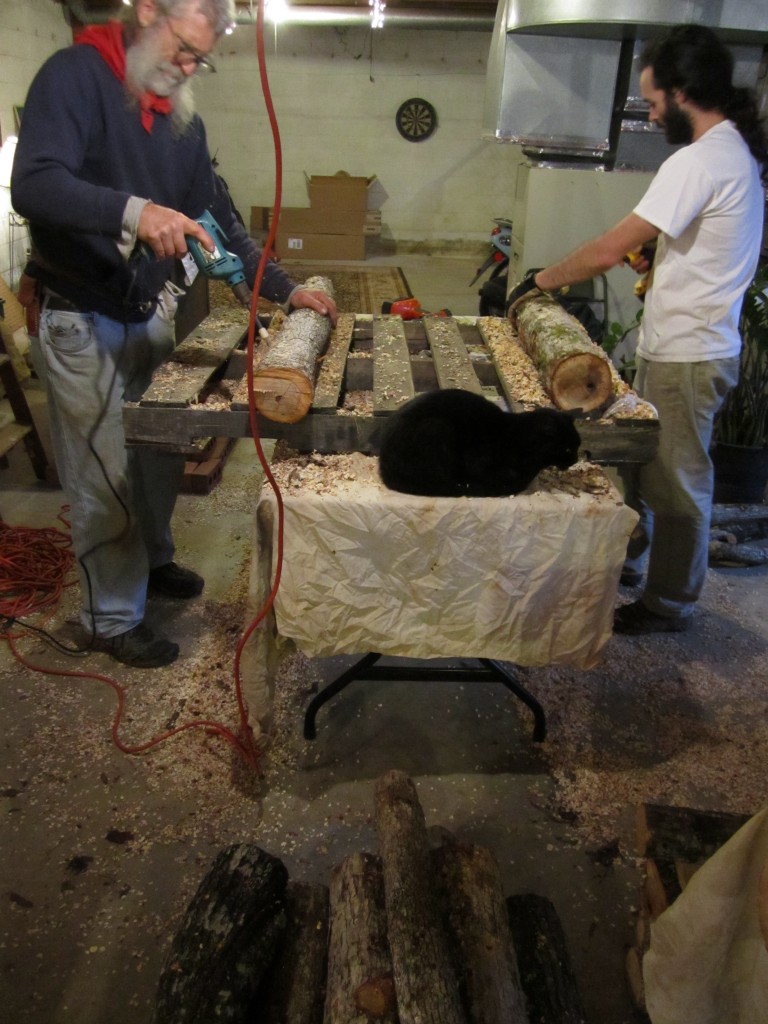
first of all, i set up 3 stations in our basement (one for each of the big steps in the inoculating process). the first station, where the logs were drilled by jason and my dad, is where the each log’s journey began. both of them toted in the logs in batches from where they were stacked outside the back door. they shared a palette that was on a table and used the palette to hold the logs that they were drilling in place. they used 7/16″ drill bits (the standard size for sawdust spawn… plugs are different) and went in 1″ deep (the depth of our inoculation tool). in drilling to a certain depth, we found that marking the drill bit with lots of tape worked better than stoppers (these slipped too often). jason and my dad spaced the holes in a diamond pattern, with 2 1/2″  between holes running perpendicular to the length of the log and 6″ between holes running parallel with the log. each row of holes down the log was staggered so that a diamond-shaped pattern was the result.
 

logs

jason and my dad drilling 1″ holes in the logs. dodger oversees the process.

the second station was my own, where i was set up with the saw dust spawn and the inoculation tool. once i got the hang of it, it was quite simple and fun, really (although my hand did start hurting). in order to make sure that i got enough spawn inside the cavity of the tool each time, i brought it down hard 5 times in the bag of spawn before placing the tool over the hole and rapidly and forcefully hitting (either with open palm or closed side-fist) the handle of the tool 6-7 times. once you do this a few times you’ll be able to feel and hear once the inoculator cavity has been fully emptied into the log, and you’ll be able to judge how many “taps” you need for each hole.
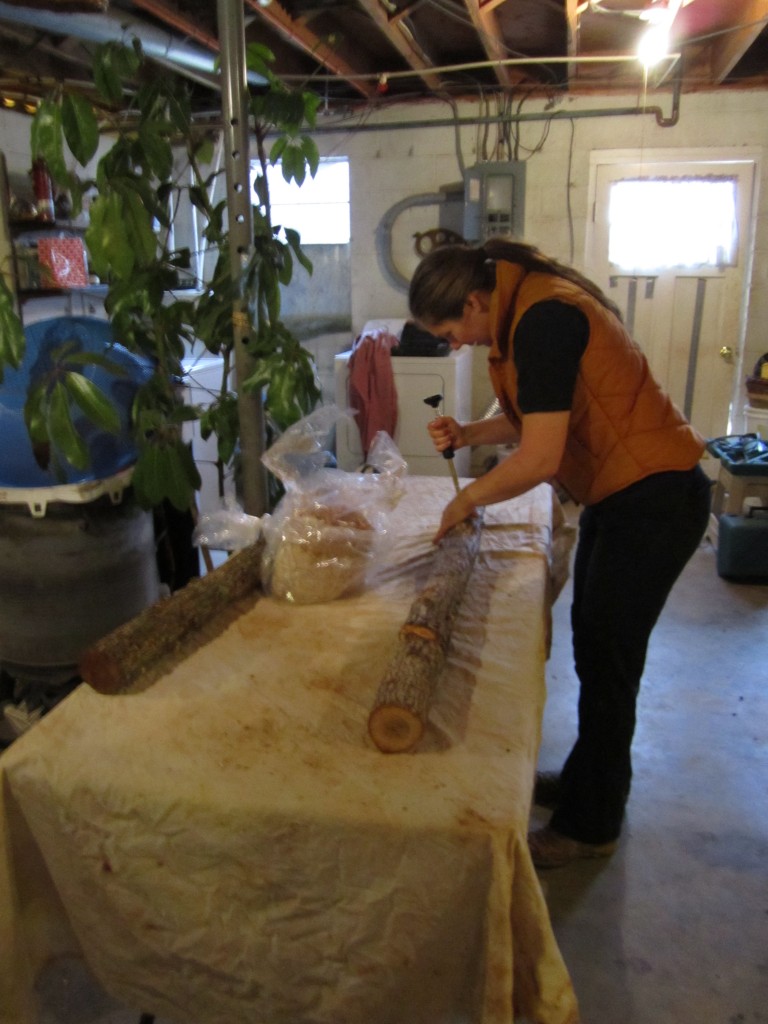
positioning the inoculator tool over a hole.

positioning the inoculator tool over a hole.

later in this process i used cinder blocks to raise the level of the log (it was beginning to hurt my lower back bending over so much) and to hold it in place and keep it from rolling when using the tool. my mom also helped hold some of the more wiggly logs in place. to make sure that you’re doing your job right, check to make sure that the spore is almost as hard as the wood itself. if so, then you know you got it packed in there well enough.
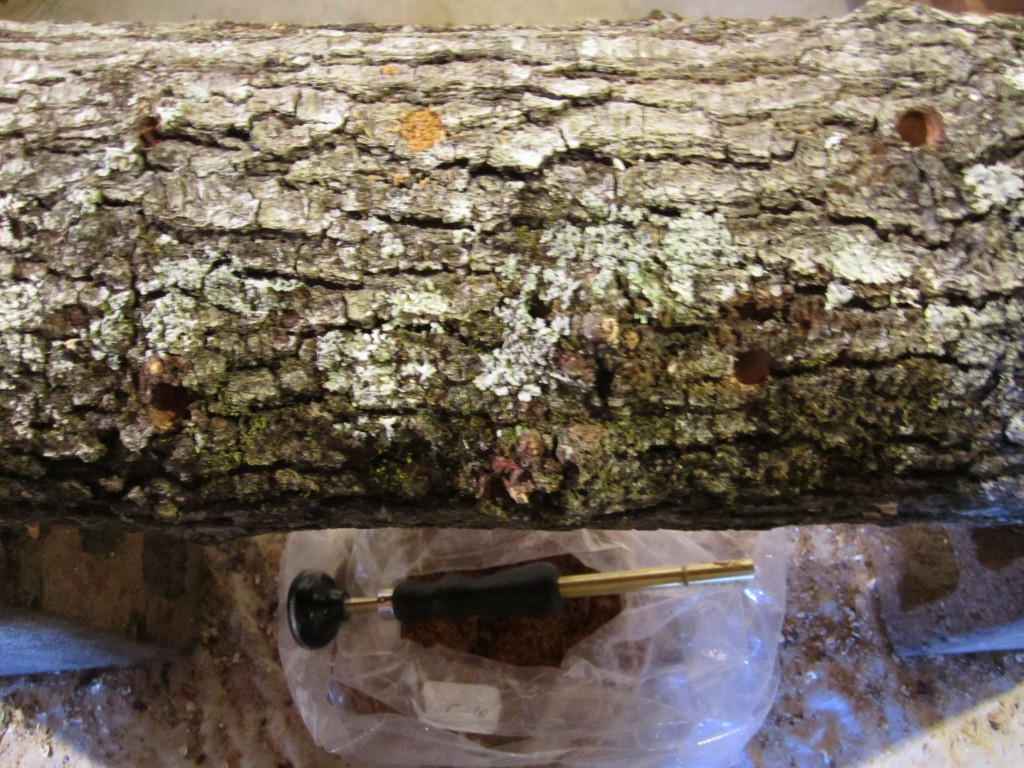
log

the hole near the upper center of the photograph has been filled with spawn, whereas the hole toward the top right has not.

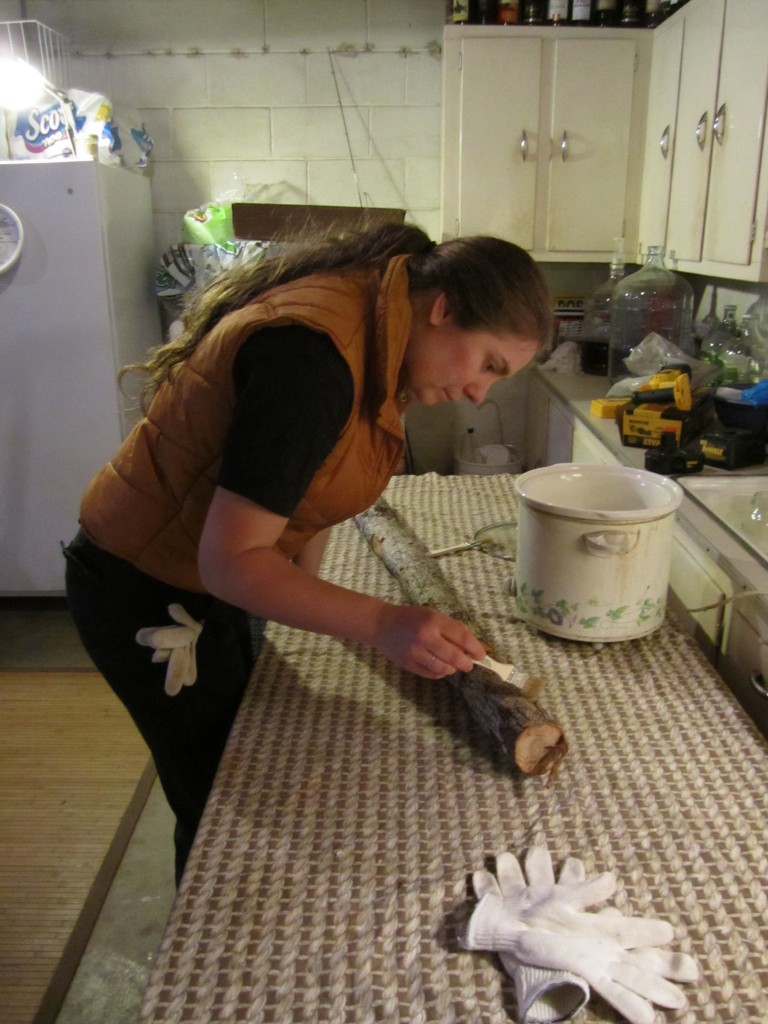
station three was where my mom was camped out, and she “painted” over the holes with wax (we used the cheapest, white wax you can find on the baking/canning aisle of the grocery store). we used an old crock pot specifically for melting the wax, cutting it on “low” to melt the wax and then on “keep warm” once it was all melted (we do not plan to use the crock pot for anything else except wax in the future). the brush we used was a 1″ natural fiber brush, the cheapest that could be found at the hardware store. when my mom waxed each hole, she was heavy-handed to make sure that all sawdust was sealed inside… this is important because you don’t want to give any other fungi the chance to colonize the log through the open hole too.
log waxing

i demonstrate the waxing process.

once the logs had dried a bit, someone who had a break would move the completed logs back outside to be stacked and await their future soaking!

overall, the experience was exciting! i can’t wait to see how everything turns out months from now. for now, all the logs have been soaked and moved to their permanent location, to await fruiting. we’ll talk more about this process in future posts… hopefully coming very soon!

a video explanation and demonstration of these steps will be posted shortly!

.:.
planting fruit trees and a crocheted blanket with eggs!

today i planted more fruit trees after work. so far i’ve planted half of what we’ve already received in the mail: 1 pluot, 4 apples, 1 cherry, 1 peach, and 1 european pear.

and because of that, i must go to bed!!!

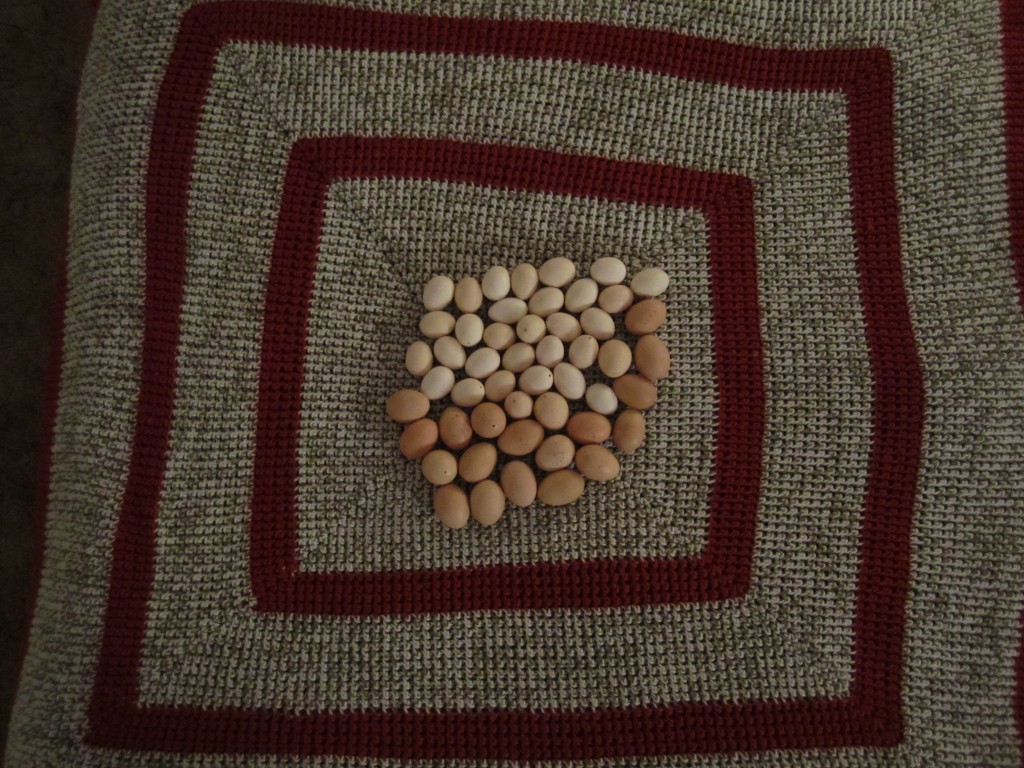
i leave you with a photo of our eggs laying on a beautiful blanket my mom crocheted for us for christmas last year…

my mother's handmade blanket and our eggs, ready for bedtime!

my mother’s handmade blanket and our eggs, ready for bedtime!

for more of my mother’s handmade items, check out her etsy store!

sweet dreams to you!

.:.

moving logs, digging holes, washing eggs, cleaning the house, and sleeping when possible!

this is a partial post… simply to explain why i don’t have the time to write more today. some of the reasons are listed in the title but there are others as well…

we’ve just been so busy!!! which is, of course, a good thing. but also a tiring thing.

we’ve both worked everyday the last two weeks with weekends filled with volunteering at my school’s garden and inoculating shiitake mushroom logs. after work we do our chicken chores and then this past weekend we moved our chicken pen and dug 16 large holes for planting our fruit trees that just came in the mail (yay!). we’ve also been moving and soaking our inoculated mushroom logs and today after work i stacked and labeled the logs to better layout a future soaking schedule. jason planted cabbage and broccoli.

not to mention, i finally got to clean the house on saturday for the first time in like, a month, and we spent last night cooking for the week.

i hope these don’t sound like complaints, because they’re not. but still, what a list!

exciting, though, because when we’re busy doing these tasks, we’re busy doing what we want to do with our lives.

and so, now… happy sleeping to all!!!

oh yeah, but first… what’s on the to-do list for tomorrow?

.:.

farm food friday: oma’s curried deviled eggs recipe

i love deviled eggs!

i know many people who don’t like them, and i suspect that that’s because they’ve only had simple deviled eggs made purely with mayonnaise. my mother’s recipe is far more delicious and when i make them, i eat one after another after another…

i do not have an exact recipe here, since most of the mixture is based on your own personal thoughts about how much curry or relish you enjoy. simply add the ingredients below to your boiled and crushed egg yolks.

a boiled egg thought: my method for boiling our eggs is to salt and boil water, add all of the eggs, cover and continue to boil for 1 minute. after 1 minute, i cut off the heat and let the eggs sit in the hot water for 10-12 minutes. afterwards, i place them in a bowl of cool water so they don’t continue to cook inside their shell.

once the eggs have cooled, i peel them and slice them in half, popping out the boiled yolks into a separate bowl (same way as most folks).

eggs

our orange-yolked aurora eggs. these were just sliced after boiling and ready to be made into deviled eggs!

and then… i add the extra delicious ingredients, adding a little bit of each to start:

eggs

the finished product! i admit, this batch turned out messy and a little bit ugly but i was in a rush and it was still yummy!

  • mayonnaise
  • garlic aioli mustard from trader joe’s. such a delicious, flavorful, and also spicy mustard that we love! if you don’t have a favorite or gourmet mustard, any sort will do!
  • relish
  • pickle juice. we use the juice from our very own greenbean pickles that have been pickled with salt, garlic, jalapeño, and dill. very delicious and great for intestinal health.
  • black pepper
  • cayenne pepper (certainly a little bit until you’re sure spicy is for you)
  • and the big, awesome ingredient: curry powder!

i always add a dab of this and a pinch of that in the beginning so that i can keep my ratios right. then i add more spice or liquid/sauce once i do a taste test.

enjoy! if you make this recipe, let me know how it turns out for you!

Older posts Newer posts

© 2025 KW Homestead

Theme by Anders NorenUp ↑