KW Homestead

Pasture Raised Poultry & Edible Landscaping Plants Since 2013

Author: Emma (page 26 of 36)

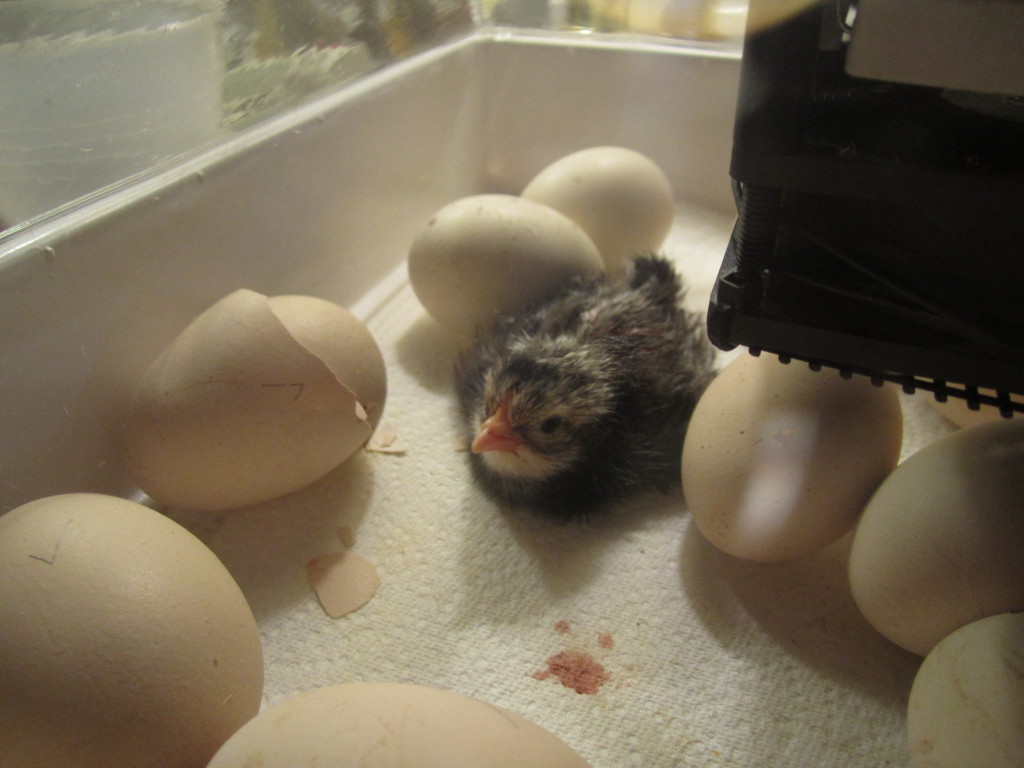
a chick is born: a complete birth video

i debated about what to post about today, and since so much has been happening lately in chicken-ville, i certainly have a lot of experiences i could write about. and then i realized how worn out i am from constantly checking on the chicks (although i know they should be fine without my constant vigilance)!

chick

baby #1, drying and looking fluffier!

i have so many topic ideas for future posts about my experience with the hatching eggs and the new baby chicks, and we are only on day 4 for one of the babies and day 2 or 3 for most of them! some future posts that i will be writing about the great (and tiring) time we’ve had:

for today i’ll leave you with this 10 minute video that shows the best part of the hatching process. this is the video of our first chick being born!

.:.

waiting for chicks: the first pip!

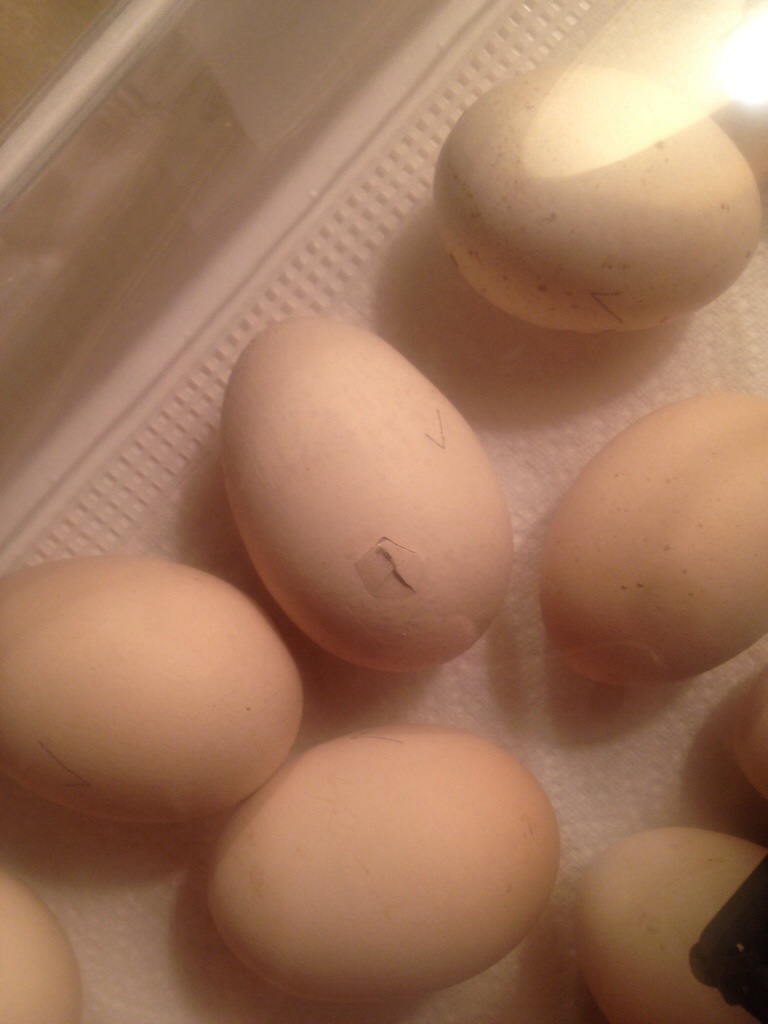
today around 11 am the first egg in the incubator started getting busy! this first chick pipped (poked a hole through) his egg and has begun his emergence into the world… though still, 12 hours later, he hasn’t made any more progress. this is normal so now we just have to wait!i also saw the egg wiggle many times and i even heard him chirping in there once! wow!

pipped egg

the first egg is pipped!

today we finished the final preparations for the chick’s house, and added pine shavings to the floor of the pen and covered that with dog pee pads. this is because the first few days the chicks need a textured material to walk on that isn’t their pine shavings (since they don’t learn what is food and what is bedding until the first few days have passed). we also added their food dish and one of their waterers. it’s all ready to go!

chick house

ready for chicks!

now we just have to wait as patiently as we can (yeah, right!)…

incubator

.:.

countdown to chicks: building their first house

our incubating eggs are almost done and the chick hatch is scheduled for so soon… saturday! i  originally thought it was sunday, but i forgot to count the first day that the eggs started incubating as day 1 (which you are supposed to do if you started the eggs in the incubator before noon of that day).

needless to say, we’re getting really excited around here, even though we haven’t really checked out the eggs since my day 15 incubating chicks update.

today i removed the turning tray from the incubator and cut the turning motor off. i also added more water to the device so that the humidity will be higher when the chicks are hatching in a few days. this keeps them from getting stuck to their shell as they’re busting into the world! now that the eggs are on paper towels and without the turning try, the chicks will have more room to break free when the time comes.

eggs

almost time!

once i moved them back into the incubator after removing the tray, a couple of the eggs started to move, as if to say “hey, i ‘ll see you soon (and quit moving me around!)”

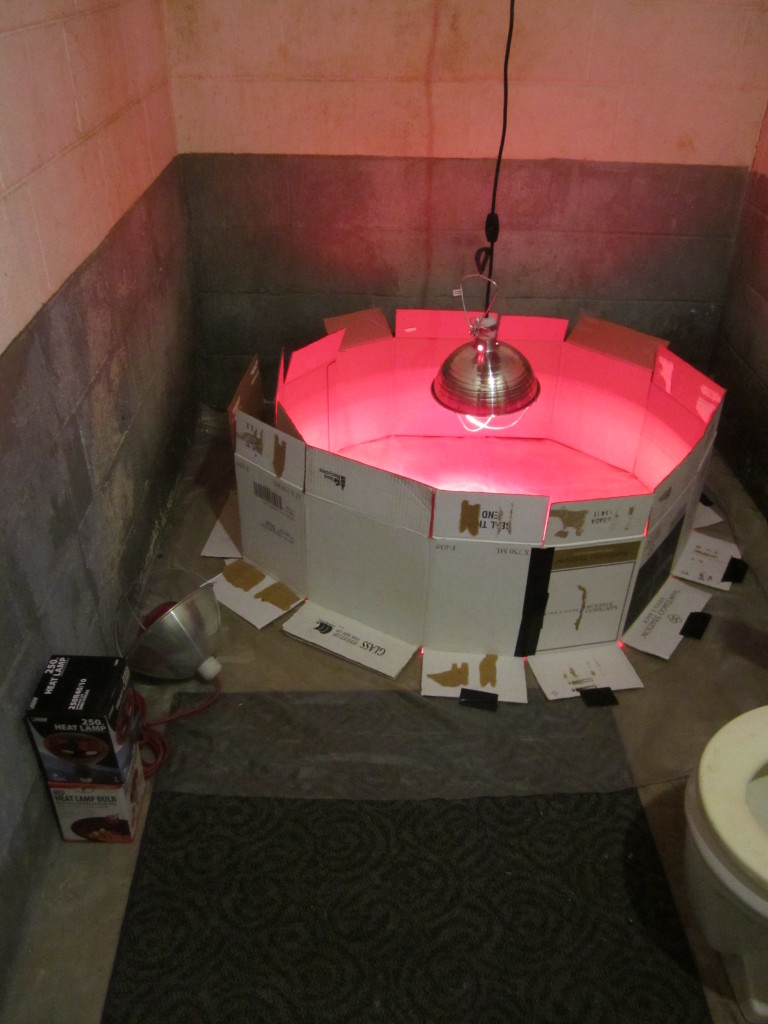
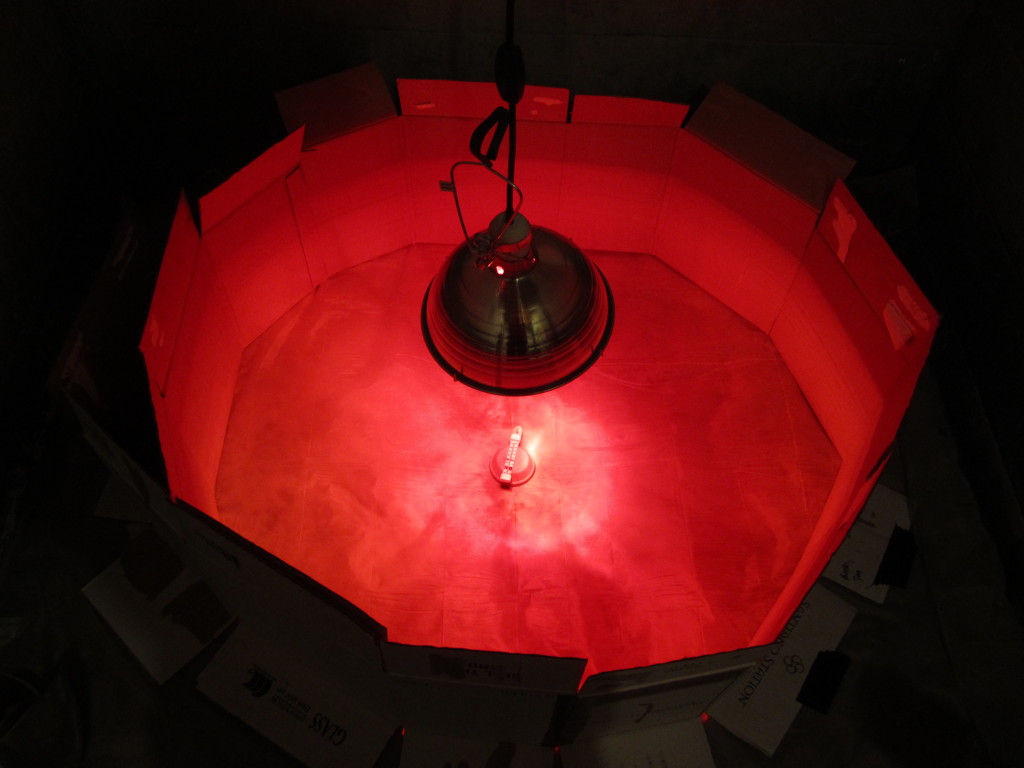
i also set up their first little home that will be theirs for the first weeks of their life. i used opened wine boxes, taped end to end. these were just the right height if i left the flaps on the bottom folded out to help support the rest of the cardboard. i taped more wine boxes together than i needed, which means that when i need to expand their home to give them more space as they grow, i can simply untape one portion of the cardboard circle and make the circle bigger, then retape it into another circular shape. rounded edges are important because chicks can get stuck in corners if other chicks are pressing against them, and they can be smothered and die.

you can see in the pictures below that in addition to folding out the bottom flaps of cardboard, i also taped them to a sheet of plastic underneath (in this case, an old shower curtain) to keep the circle from buckling or becoming malformed. this sheet of plastic should also help with cleanup once the chickens move outside later in the year. in the next day or two, we’ll be adding wood shavings to the floor of the little pen/house to absorb the poop and spilled water and to make the chicks more comfortable.

chick house

our quick and easy chick house!


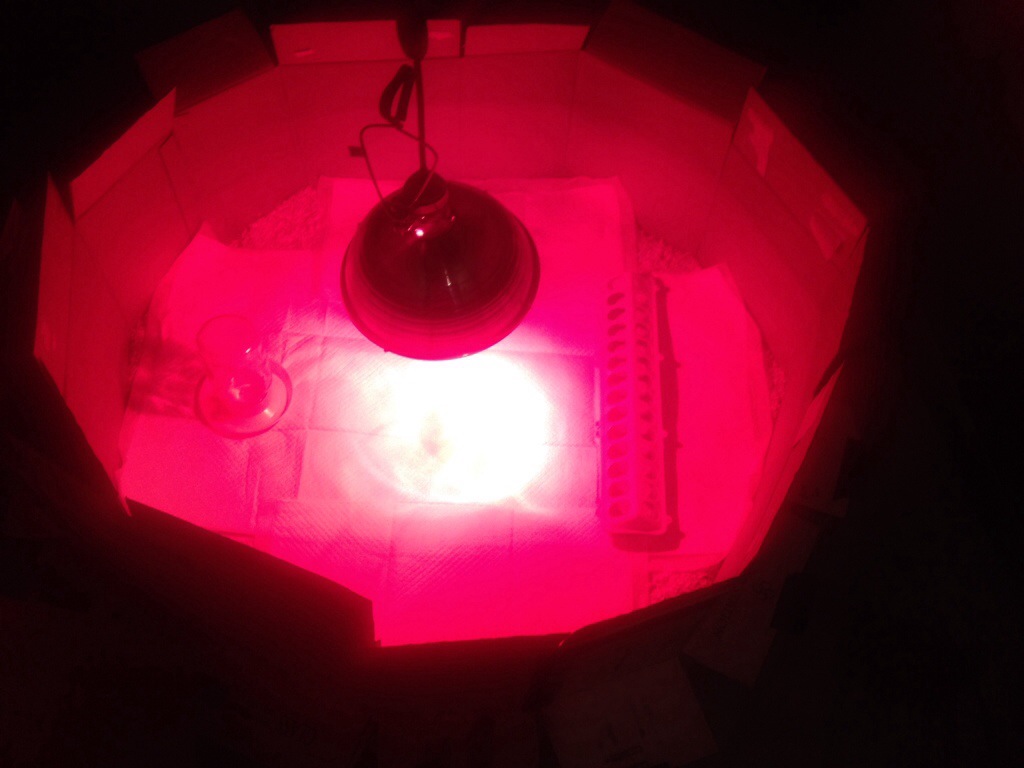
heat lamp

the heat lamp really gets the space nice and toasty. the thermometer reads 96 degrees! perfect for day 1!

the red lamp is a heat lamp, and will keep areas of the house 95 degrees, the ideal starting temperature for little baby chickens. each week we’ll raise the lamp so that the temperature directly below the lamp drops by 5 degrees each week. this allows for the chicks to acclimate to cooler temperatures over time. in the meantime, the light will warm them and the red tint helps them from picking at each other (which can cause open sores and lead to a sick or dead chick).

their water and food dishes will be in the house near the warm, center area and we’ll leave the regular overhead light bulb on in their space so that they thrive and feel safer.

so exciting!  only 3 days to go!

.:.

chicken egg incubation update–day 15

a brief warning for you here… some images in this post are of an unborn chicken embryo, which stopped growing inside its egg after a few days into the incubation period.

.:.

recently i candled the eggs again to double check my candling work from last week and the progress was amazing! during the process this time, you could really see the blood vessels and the larger, wiggling chicken inside a few of the eggs. once again, amazing!

i also decided to check the other 5 eggs that i wasn’t sure were fertilized, still thriving, or alive.

unknown egg #1:  the first one was definitely fertilized and alive, and i was surprised and excited to add another potential chicken to our list for the hatch this sunday. so that puts our count at 23 chicks!

unknown egg #2:  the next egg i checked was definitely no longer growing, and i could see the tell-tale red ring around the inside of the egg that means the egg was at one point fertilized but the embryo died within the first few days. this egg was pretty much transparent except for the red ring, and i removed this one to crack it open later and check out the contents.

unknown egg #3:  this egg was just the same as egg #2 and i removed this one also.

unknown egg #4:  this egg had no visible embryo and even though i turned it on all sides, i couldn’t see anything alive inside. there was a very dark section and a very visible air bubble, but the dark patch was different than the dark patches in the fertile and growing eggs and i couldn’t see any blood vessels or other signs of life. so i decided to take this egg out too so that it wouldn’t bust and contaminate the others as time went on.

unknown egg #5:  i was still unsure about this egg, so i left it in inside the incubator just in case.

as of now, there are 24 eggs in the incubator and i’m sure (or as sure as a beginner can be) that 23 of them are growing nicely.

the other 3 eggs that i removed became a science experiment…

failure to thrive egg #1:  when i cracked this one open i only saw the red ring of small blood vessels around the inside of the egg. there were no other substances inside besides the red ring and the light yellow liquid that was the yolk and white mixed together. that means this one was fertilized too (24 out of 27 points for rex).

failure to thrive egg #2:  this egg had the same red ring as the previous one, but it also had a couple thick spots of dark red that could have been the beginnings of the the embryo. it seemed to me that this egg lived longer before failing to thrive. (25 out of 27 points for rex.)

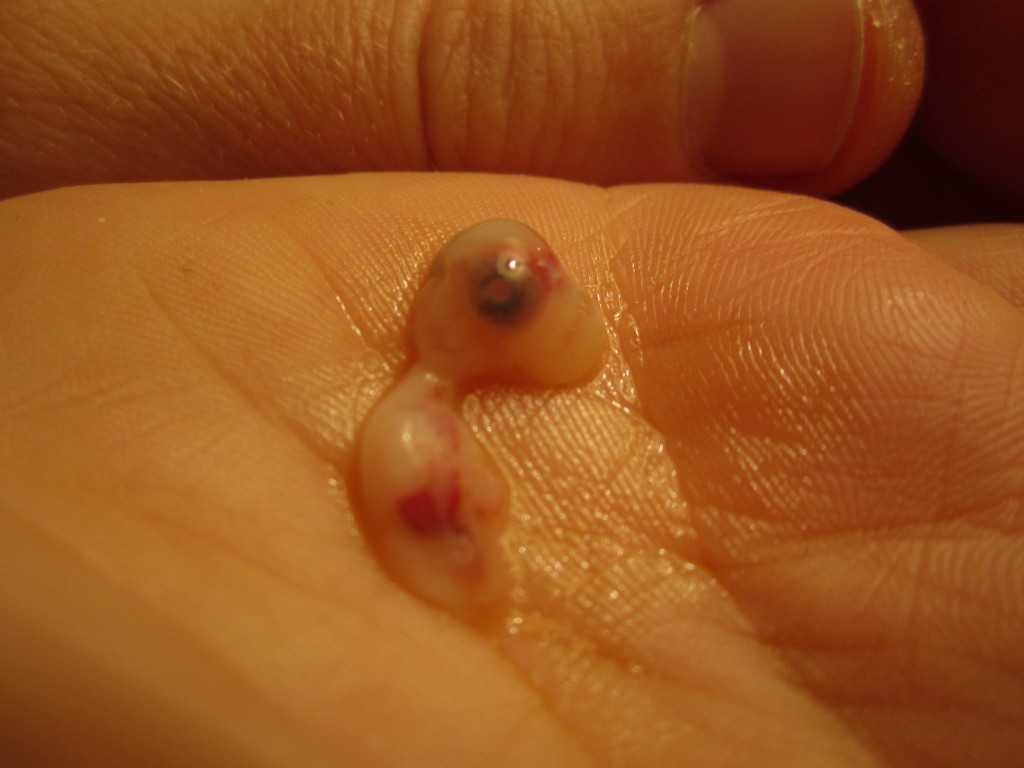
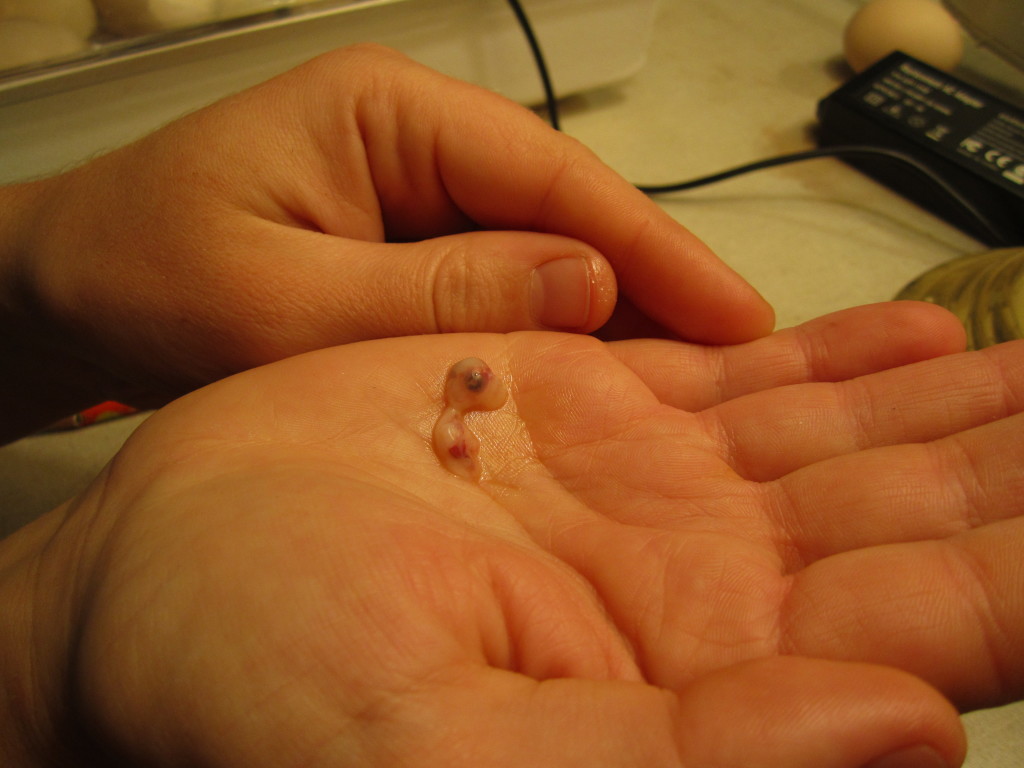
failure to thrive egg #3:  this last egg at first appeared to be the same as the second egg but when i poured the contents out into the bowl with the other yellow liquid, i heard a little plop.  i looked in the bowl and found a tiny, but unmistakable embryo that hadn’t even begun to from its limbs yet,which meant that the egg died sometime around 3 or 4 days into the incubation process. (26 out of 27 points for rex!!!)
egg

tiny chicken embryo


egg

you can see its eyes but it has not yet formed limbs. to me, it looks somewhat like a seahorse!

jason and i have dealt with a chick that was born that died, and chicks that were busted out of their shell by careless hens just a few days before hatching, so this process isn’t new to me… and since the embryo was barely developed i don’t feel sad about the situation, just in awe of it. i am hoping that all of the eggs that are in the incubator now will thrive and hatch well… and i can give thanks for that!!!

i also found a great video on YouTube that shows the growth of the embryo from the beginning until the day i hatches… you can watch the video and think of our embryo-chicks, who are at 15 days today!

.:.
candling eggs and seeing baby chicks grow!

the incubating-chicken-eggs adventure continues… this time with some more hands-on activities!

last weekend we “candled” our eggs, a term which supposedly came from using the light of candles to see through the egg shell and observe the progress of the contents. this process usually shouldn’t be started before the eggs have been incubating for 7 or 8 days, since the growth of the baby chick inside is a lot more fragile during the first week (ish). also, waiting until at least a week into the process ensures that when you finally do candle the eggs, the embryo inside is much more visible.

the really cool thing about this simple and easy way to check on your eggs, is that it’s like a chicken ultrasound! you can actually see the life growing! candling also allows you to make sure that no bad eggs are still in the bunch that might explode later during incubation, affecting the environment of the viable eggs.

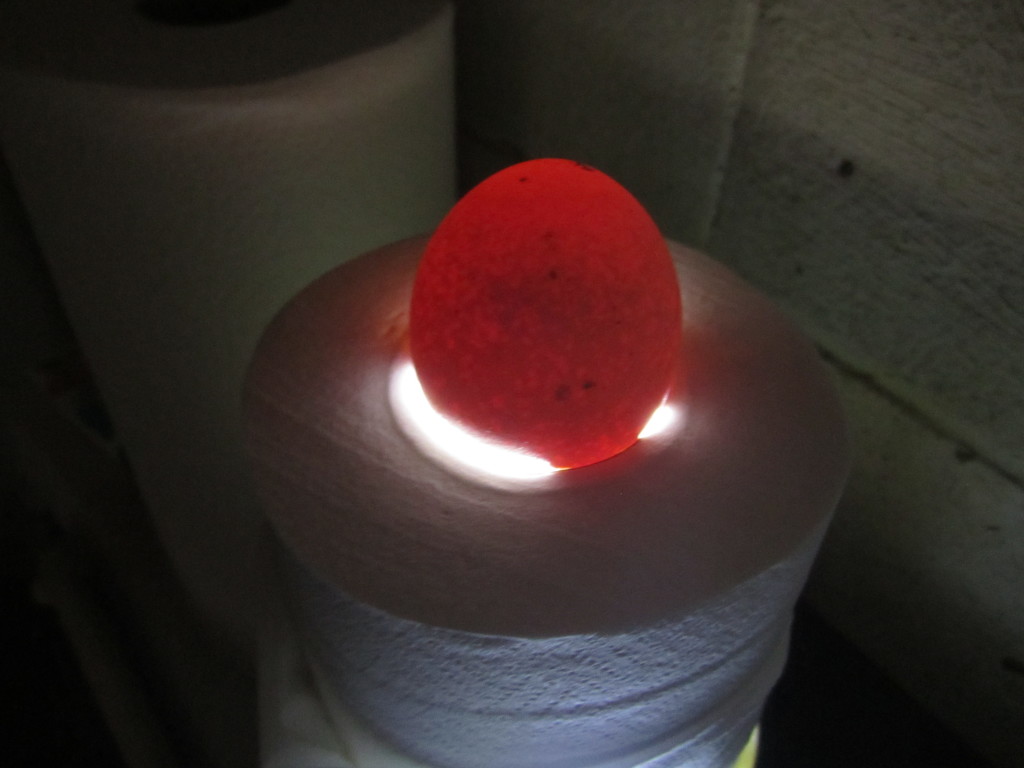
dark-shelled eggs are harder to see into, since the increased pigment in the shell obscures the light and keeps it from penetrating through as easily. jason and i actually has some trouble at first figuring out how to get the bright light to focus on the egg, until he had the idea to put our 1,000,000 candle power flashlight underneath a full toilet paper roll and sit the egg on top of the tube’s opening. this worked perfectly, and also meant that we didn’t have to hold the egg since it rested on the tube just fine on its own. i was able to shift the egg more easily this way, and locate the embryos. the pictures and video that we took really don’t do the experience justice…

egg

let’s see… how do i explain this? the darkest blob that is a little higher than halfway up the egg and a little to the left of center are the eyes of the chick!

the video below shows the dark shape (which is easier to see in the video) moving around in its shell. dancing, really! all the information that i read said that you might see the embryos move inside their shell during candling if you got lucky, and i got lucky over a dozen times! after i finished squealing with delight, i filmed the video!

the coolest thing i learned?

that at least 21 out of our 27 incubating eggs are fertilized and growing magnificently! this is a really high ratio and makes me proud of rex! also, it makes me less inclined to eat him next time he tries to attack me!

after candling all of the eggs, i put a check mark on the eggs that i was sure were fertilized and growing. later tonight, after i’m done writing this, i plan to candle the other eggs and see if they are fertilized, as well as check on a few of the ones i’ve already checked off! talk about an awesome way to spend the evening!

eggs

our incubating eggs, most of them with check marks!

.:.

adding a donkey to the family: why?

so the donkey quest has begun… through research, at least! we just got our great, new donkey book in the mail, donkeys: small-scale donkey keeping by anita gallion.

donkey

this donkey isn’t jack-jack, but he sure looks like him!

i’ve wanted a donkey ever since i volunteered at a horse rehabilitation center, about 5 years ago. the one donkey that they had there was a perfectly healthy, hilarious gelding (castrated male donkey) named jack-jack. he would stand by the fence and bray until i would come over to him and pet him or feed him, and the first few times i interacted with him he made me nervous simply because he was so pushy and snugly. he was a downright attention addict. i wasn’t sure why he was at the farm, but the owner told be that he had been brought to a horse sale, very skinny and obviously malnourished. the first owners couldn’t afford to take care of him anymore, and although the owner of the farm already had many other sick, crippled, or old animals, she decided she had to take him too (she was just that kind of animal-loving person).

after he lived at the rehabilitation farm for a while, he gained his weight back and became a thoroughly healthy, spunky fool. he quickly became the personality of the group, and even became good friends with the giant and very blind percheron draft horse named ophelia. jack-jack often led the other blind or old horses around the field and would sometimes even intervene when the socially bizarre horses were doing something crazy… usually repetitive walking or chewing behavior because of past trauma or of being locked up in a little stall all the time by their first owners.

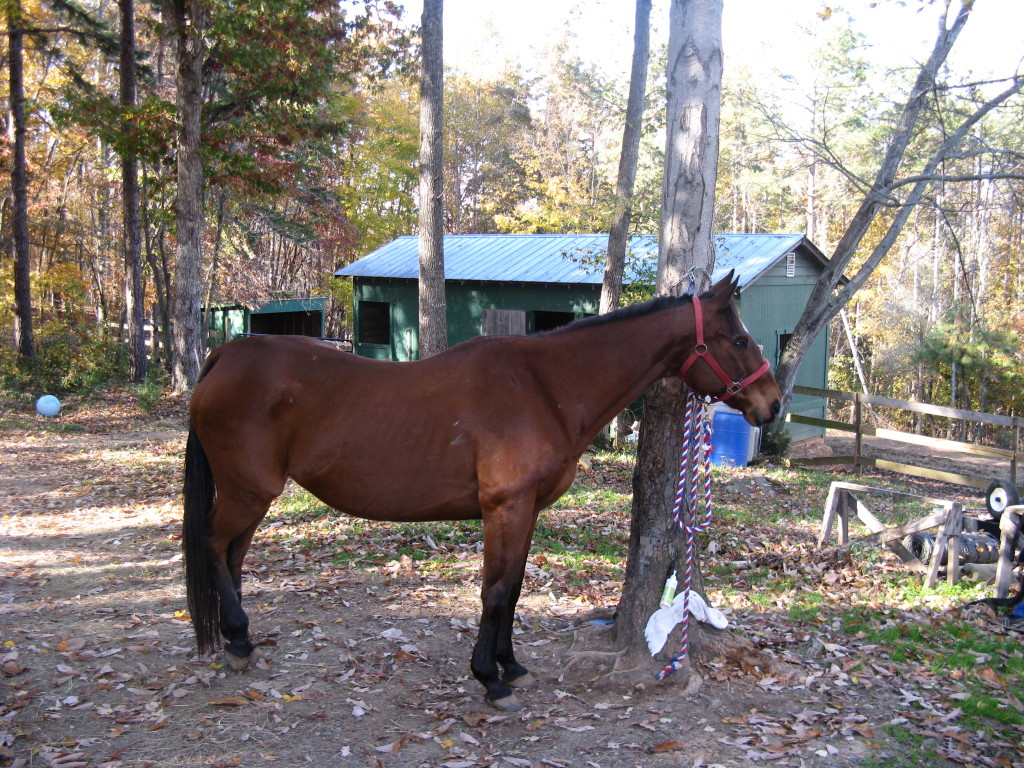
the horse i volunteered with, marigold, an old thoroughbred racehorse, would walk in circles when she first arrived at the rehab farm since where she came from, she was used to always having just a little bit of space. jack-jack would step in when he caught her doing this, and try to get her to socialize and move around to other places.

horse

marigold, my old, blind friend!

i was also impressed by how smart and observant jack-jack was… he would try to untie ropes when he saw them tied up and he was capable of untying his lead rope from a tree or branch! sometimes he would even attempt to unlock the gate lock with his lips… though he was never successful!

he was also so loud! after spending time at the farm i learned that donkeys are fantastic at protecting their herd (including any horses or other animals they’ve adopted) through 2 basic tactics: being so damn loud that predators just want to run for it, and by being almost totally fearless with their sharp-hoofed attacks! i’ve always heard that donkeys are less skiddish than horses and are more willing to charge and kick butt.

so far, in my theory, donkeys are to horses as geese are to chickens: both donkeys and geese can almost totally survive on the grasses or scrubs that grow around them and don’t need as much nutritional supplementation as chickens or horses do, they are great animals for protecting themselves and for seeming threatening to intruders (animal or human), and they are so comical and goofy (well, at least to me)!

jason agrees that a donkey will be a great addition to our homestead, and we’re already thinking of all the new opportunities that can come from having a donkey… having a trusted creature that a kid can ride, that can pull a plow, and can haul logs or other heavy loads. we’re also excited to have a new friend that can let us know when someone comes to visit and can protect our other pets and farm animals from harm. not to mention their valuable manure and just how cute they are.

we can’t wait to get a jenny who can be the mother to other lovely donkeys who will be our friends and our children’s friends for decades to come!

.:.

incubating chicken eggs 101

the time has come for us to have some babies… 21 chicken babies, hopefully!

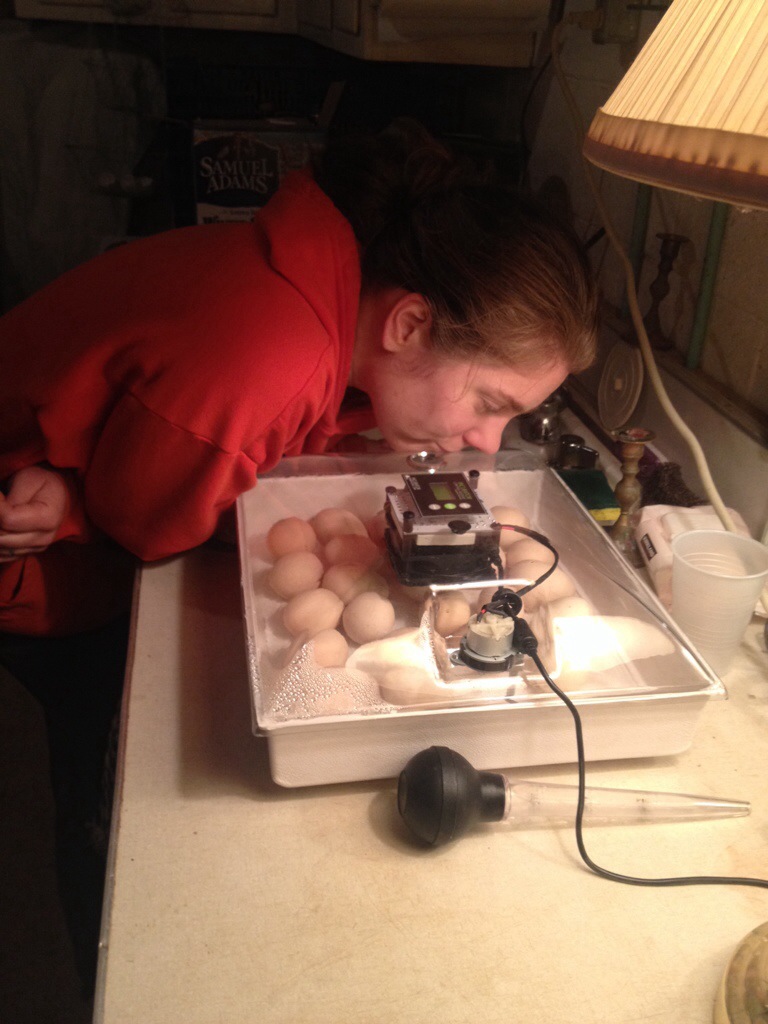
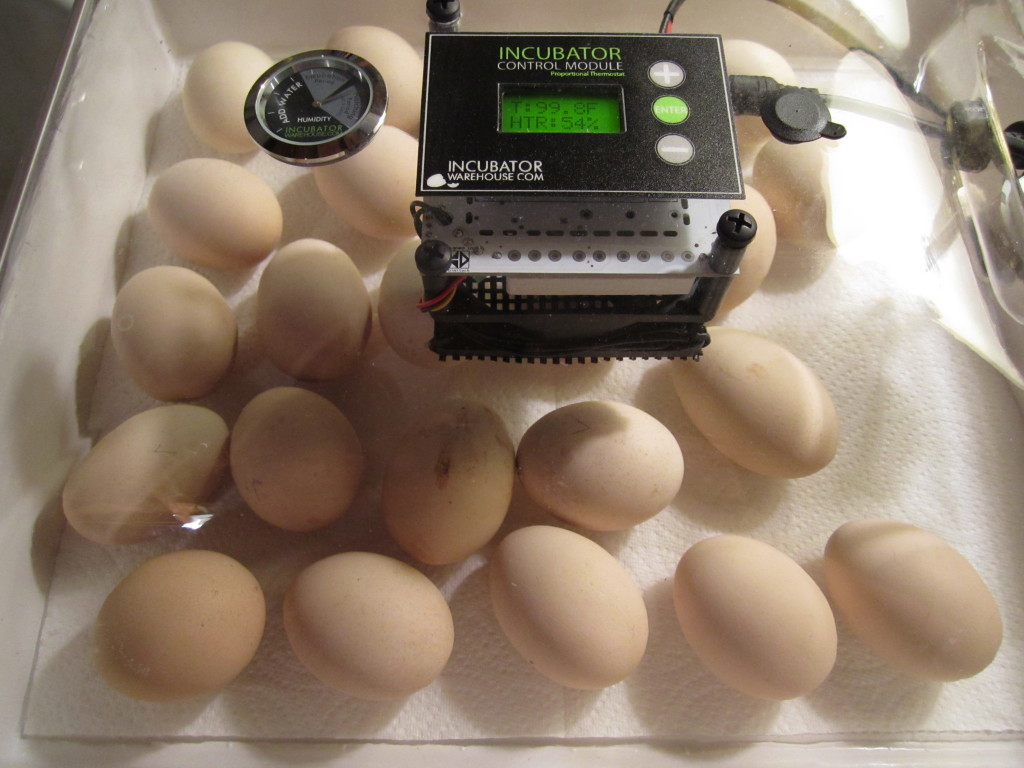
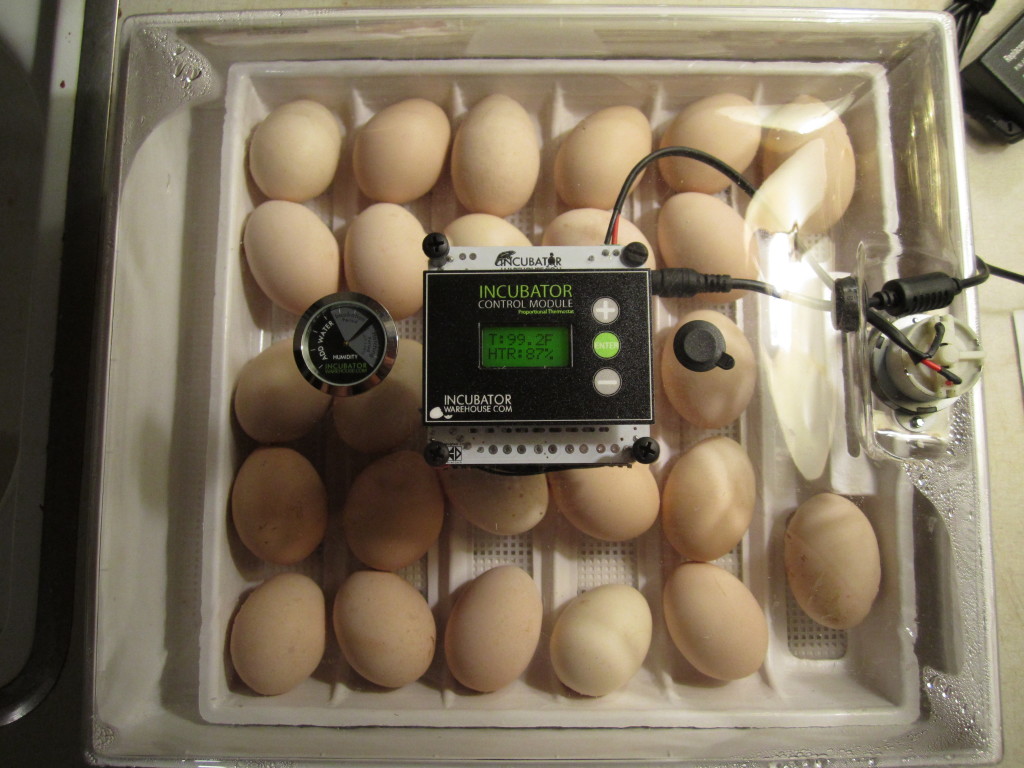
we finally broke out our new incubator, the incuview all-in-one egg incubator, that has the ability to keep eggs moist, turn them every few hours, and keep them warm and toasty just like a mother hens’s butt! another really cool thing about the incuview is that it is capable of incubating reptile eggs and many bird eggs, such as chicken, goose, duck, and turkey.

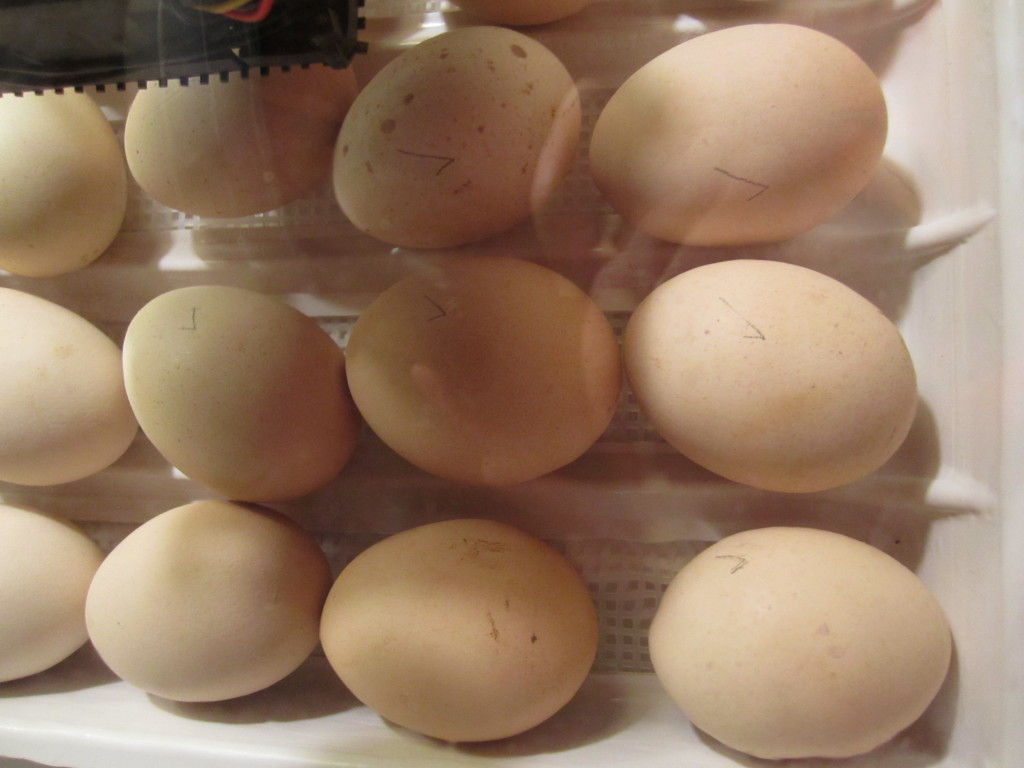
so, this past weekend we decided to incubate 21 chicken eggs (this is the number that will fit in the incubator) so that we can have some new chickens this coming year! we started incubating on sunday and we saved eggs from  last wednesday through saturday to be sure that we would have enough to incubate. these we stored at room temperature, pointy end down. we also made sure to shift them in their tray every day so that nothing inside the egg would begin to stick to the shell or form air bubbles. when sunday came around, we chose the best shaped, cleanest eggs from our collection and placed them end to end in the incubator.

egg incubator

our incubating eggs!

the default temperature fr the incubator is 99.5 degrees, which is ideal for chicken eggs, and the dial measuring humidity is easy to read and understand. i do recommend, however, putting less water in the bottom water tray than you think you need… i poured out a good bit of the water today, and the humidity is still very high inside the device. i’ll be checking the levels again tomorrow and pouring out even more water if the humidity doesn’t drop.

chicken eggs hatch after 21 days of incubation, and the last few days of incubation require a different humidity level in the environment so that as they hatch the chicks don’t get stuck to their shell. our incubator has a setting that allows for this increase in humidity and we can disengage the turning device so that the eggs are not turned during the last few, critical days.

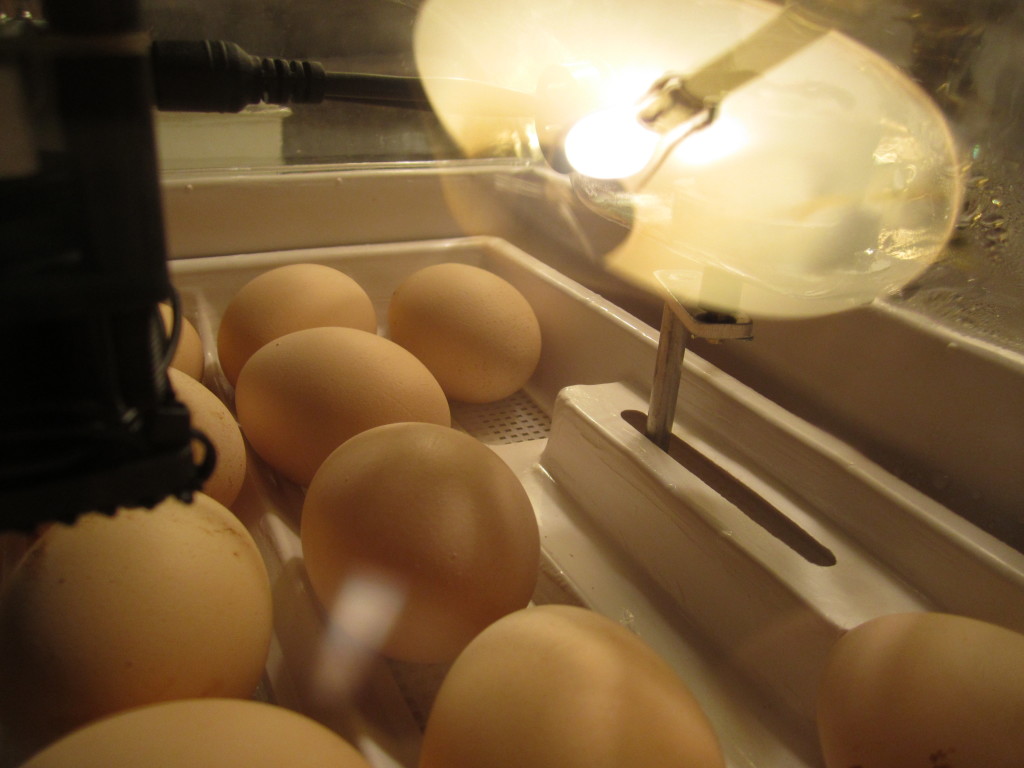
egg incubator

the turning device is the metal rod that you see coming down from the lid of the incubator.

this weekend or sometime next week we will be able to hold the eggs up to a bright light to see which of the eggs are fertilized and which are developing properly. it’s like a chicken ultrasound!

the hardest part of the hatching will be  watching the chicks be born without interfering. it is great that you can see the whole event but since they recommend waiting every few hours to remove hatched and dried off chicks, i’m going to be jumping out of my skin while i wait to hold them!

we’ve decided that once they’re born we’re going to keep them in a pen inside of the basement shower so that they can grow without being molested by bolt and without taking up too much of our basement space. once spring rolls around, we’re going to replace some of our older hens with this new batch, and eat whichever older hens and newer roosters are left.

so, we’re starting off on a new adventure here at kuska wiñasun homestead, an adventure that will hopefully end in many little chicks!

.:.


frosted plants and crunchy leaves

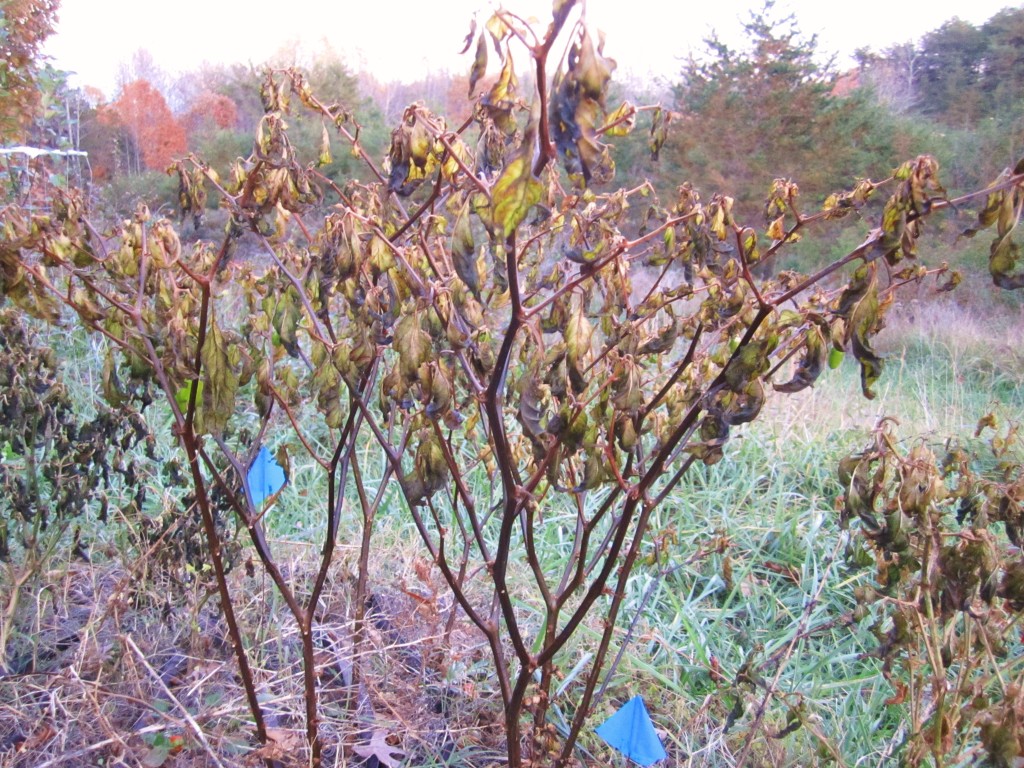
a sure sign that fall is here and winter is coming… frost! we had our first frost of the year on november 1st, which was close in date to first frosts of other years. luckily, we were proactive; we watched the weather and were poised to harvest the crops before the frost came in. among the things that we harvested:

peppers

  • jalapeño peppers
  • aji peppers
  • sweet bell peppers
  • cayenne peppers

sweet potatoes (these we harvested after the frost because jason cut off all of the greenery and covered them up with sheets to protect the tubers for a little while longer)

  • red porto rican
  • yellow porto rican (see jason’s post to learn why their name is spelled this way!)
  • korean purple

chia

herbs

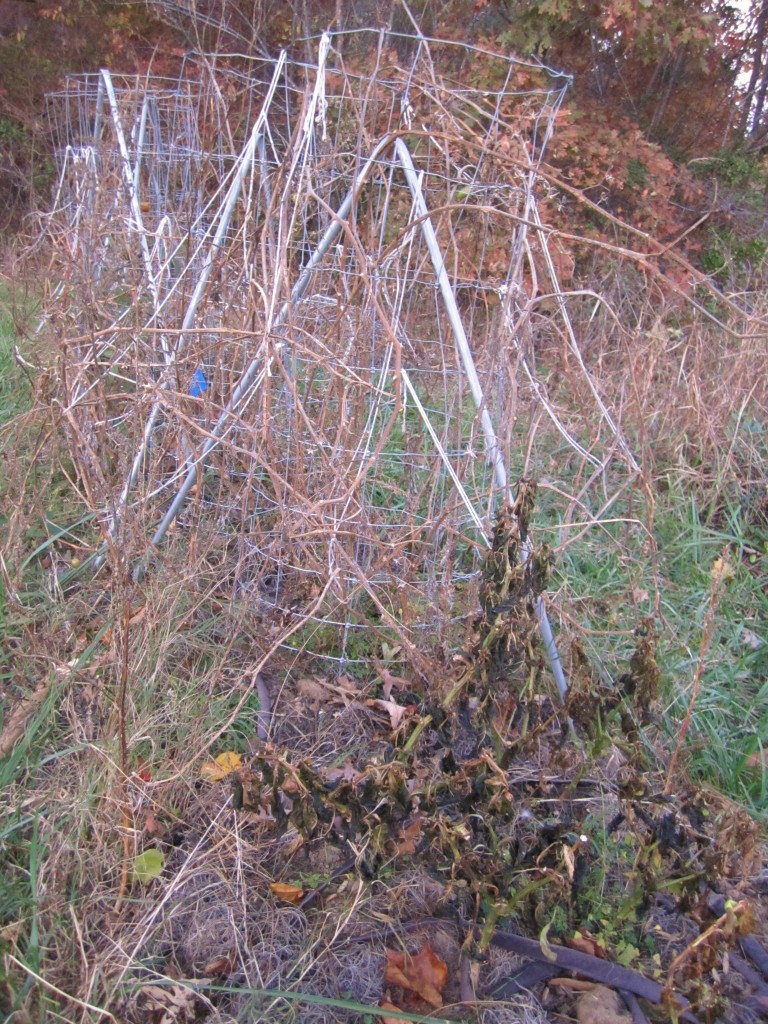
and a good thing  we did, too! check out how frosted (and killed and blackened) the peppers became…

frosted peppers

the aji pepper plants after the frost!


frosted peppers

the bell pepper plants after the frost!

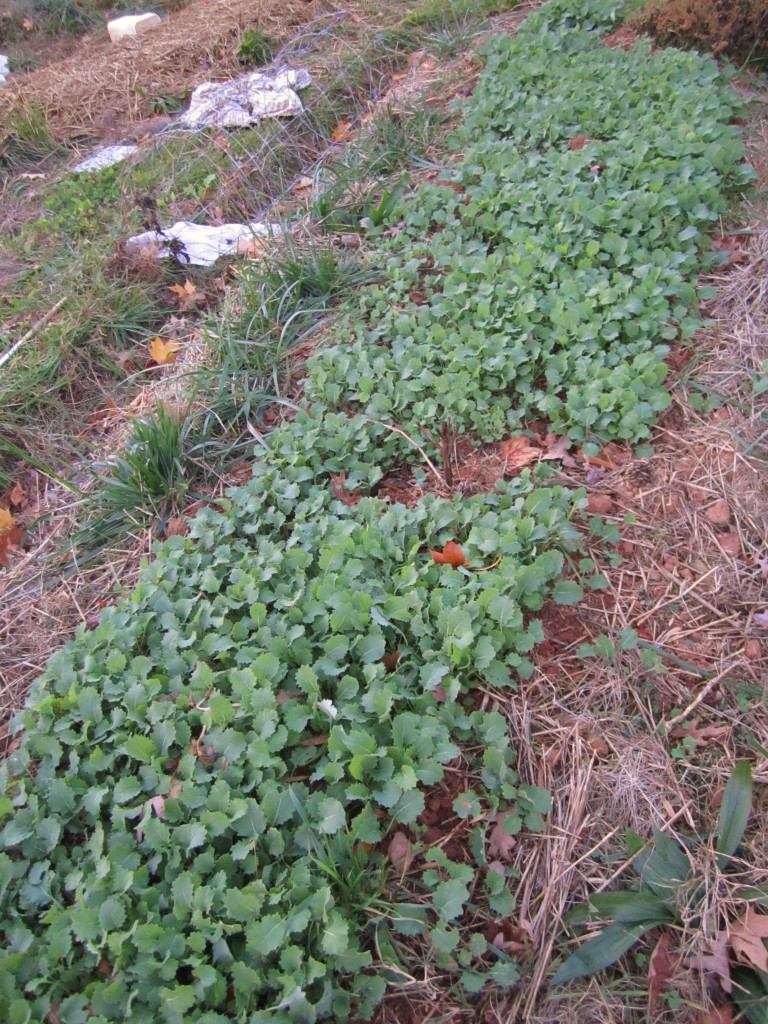
some crops do well with a light frost, though. kale is one of them, and the frost even makes the leaves sweeter. our kale is still going strong and we ca’t wait to eat some!

baby kale

baby kale, oh baby!

jason also just put some garlic in the ground, which withstands even the coldest winters like a champ. our oca tubers are still in the ground, too, and they won’t get harvested until after winter is winding down.

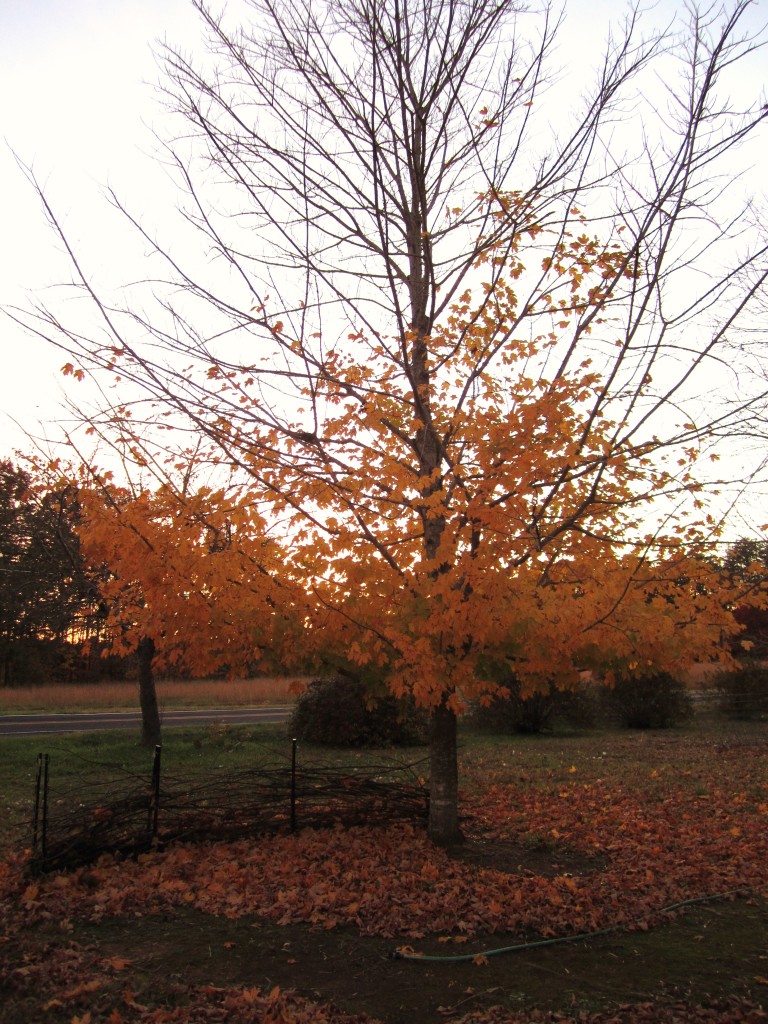
i’ve also noticed the lovely trees and leaves on the ground (and since we don’t rake or leaf-blow them around, i get to enjoy their crunch for a while to come (even though they’ve piled up in the carport too!)!

maple tee losing leaves

topless tree… our front yard maple.


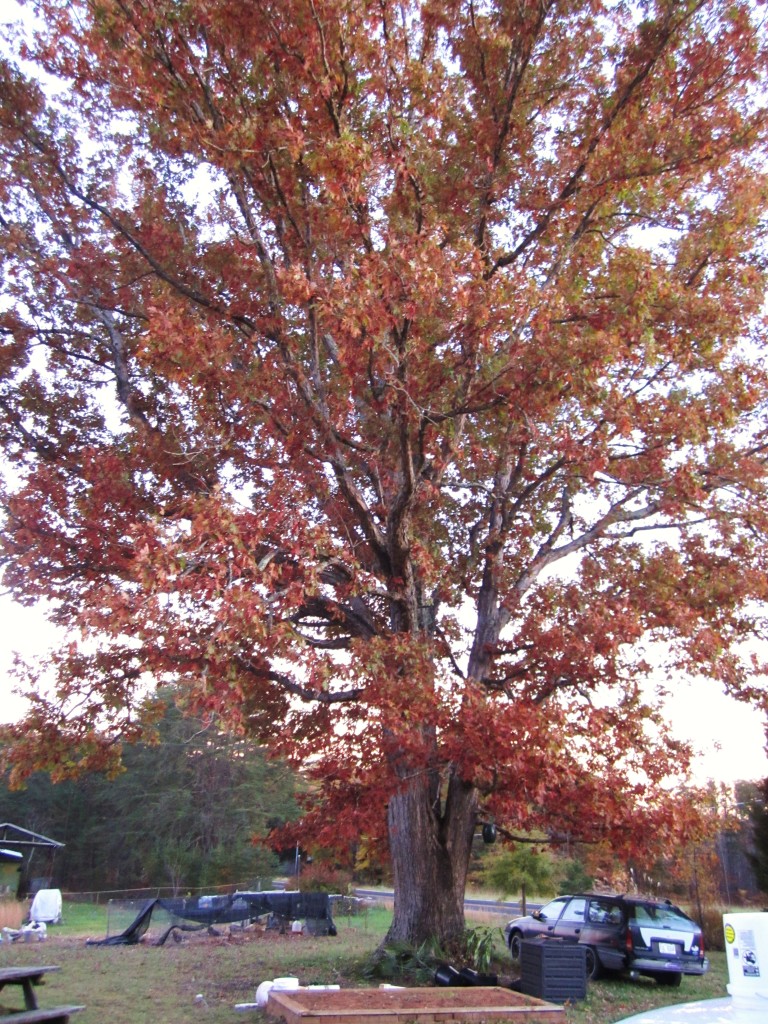
oak tree

our front yard oak

leaves in yard

my pile of leaves!!!

.:.

homestead wedding tips: using straw bales and boards to make wedding seats!

when we got married 5 weeks ago, we really wanted to make the whole ceremony, including what would be under our guests’ butts, as representative of jason and me as possible.

we started brainstorming what wedding “gear” we would need early on in the year, but since we were on the fence about whether we should have our reception at our house or another venue, we didn’t commit to renting any seats and tables. this just didn’t seem quite right to us, for some reason. we really wanted to make even this portion of the ceremony personal and “homemade” in some way and so once we decided to hold our reception elsewhere, we felt more open to other ideas since we no longer needed to rent 100 chairs and tables to seat everyone at the house. we decided that the primary seating would be set up for the ceremony, with other seating around the yard. time to get creative…

we thought about things that were important to us, making the seating:

  • fun and homemade
  • meaningful
  • reusable
  • as inexpensive as possible

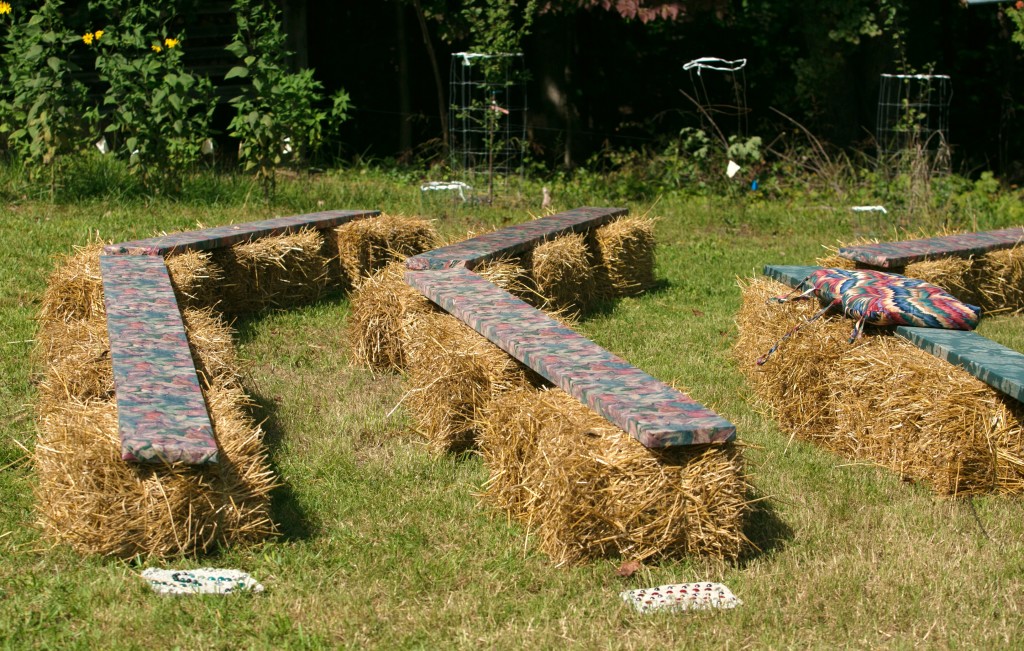
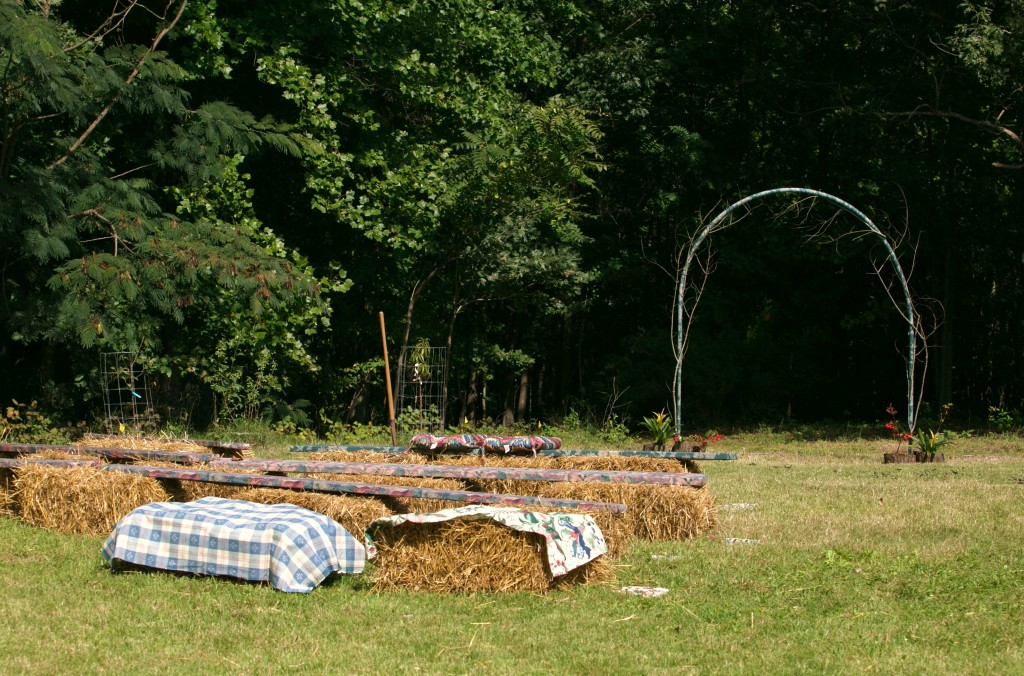
we settled on wrapping boards in fabric and laying them on top of straw bales in a semi-circle pattern. after doing some shopping around it became clear that the boards that were the best deal for the footage and were also sturdy enough to support 6-7 butts, were 10 foot boards that were 8 inches wide. the store clerk that approached my mom and me as we were measuring our butt sizes and averaging them, certainly was a bit confused.

we also did the math on how many straw bales we would need under each board to make the boards sturdier and less movable, determining that 3 under each board was sufficient. jason found a local farmer and he delivered our bales to us a few weeks before the wedding. it was serendipitous when the farmer showed up and told us that our house and land had been owned by his grandparents. the person who sold us our home was his mother!


we were really excited about using the wood and straw as seats because we knew that we would reuse these materials later; the wood for building or repairing structures, and the straw for mulching beds or providing padding for the chickens’ nest boxes. right now actually, some of the straw bales are weighing down sheets that we’ve laid down in the garden to keep the sweet potatoes from freezing before we harvest them all this week.

we were concerned about wedding guests sitting on bare boards (who knows what could stain a light colored dress?), so we decided to wrap them in colorful fabric. since the wedding colors were loosely “fall colors,” my mom dug out some of her old bolts of fabric and we were able to choose some patterns that suited the wedding colors. my mom helped me cut the fabric to length and wrap the boards tightly. i used a hammer stapler to secure the fabric on the bottom side on the board, and after a lot of stapling and one mashed toe (mine) we had the boards done. two of the boards were wrapped in a different pattern than the others, and these were the two boards placed in the front-right-center and front-left-center of the seating arrangement and meant for our parents and grandparents.

i also placed the awesome stepping stones that we made at my bridal shower on each end of all of the rows, placing the ones made by my mom and jason’s mom, right beside where they would be sitting during the ceremony. they noticed this addition, and it made me feel great that the decorations were made by some of my closest loved ones!

the day of the rehearsal dinner, our family used the board/bale seats as places to sit, eat pizza, and get to know one another.

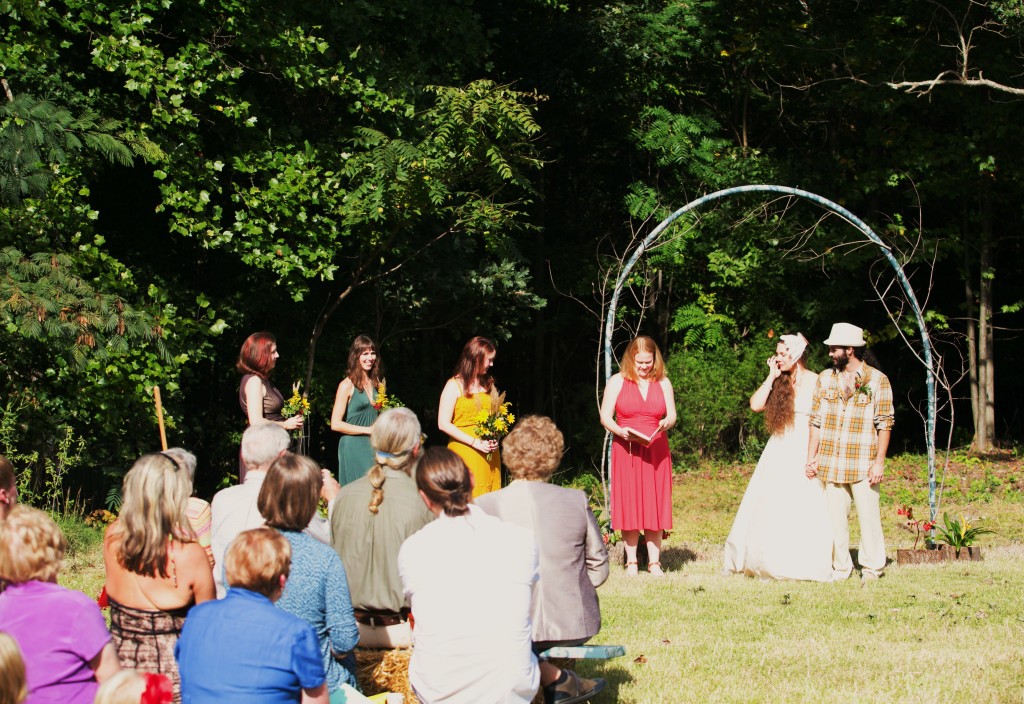
the day of the wedding, our family used the board/bale seats to watch jason and i walk out of the woods and get married and afterwards the benches were once again seats for sitting and chatting with family. other smaller straw bale seats around the yard were used too, and blankets spread out on the grass served as nice places to stretch out and watch the trees and the garden before the ceremony began.

3 cheers for board/straw bale seats: a homemade, cheap, and reusable option for your own wedding!


fall homestead wedding

photo by heidi’s dad

.:.

kuska wiñasun’s official farm bandanas: by 100% gdk!

my amazing friend georgia, who is a fantastic artist and as jason puts it, “an awesome gift giver,” has given us 6 fantastic bandanas!

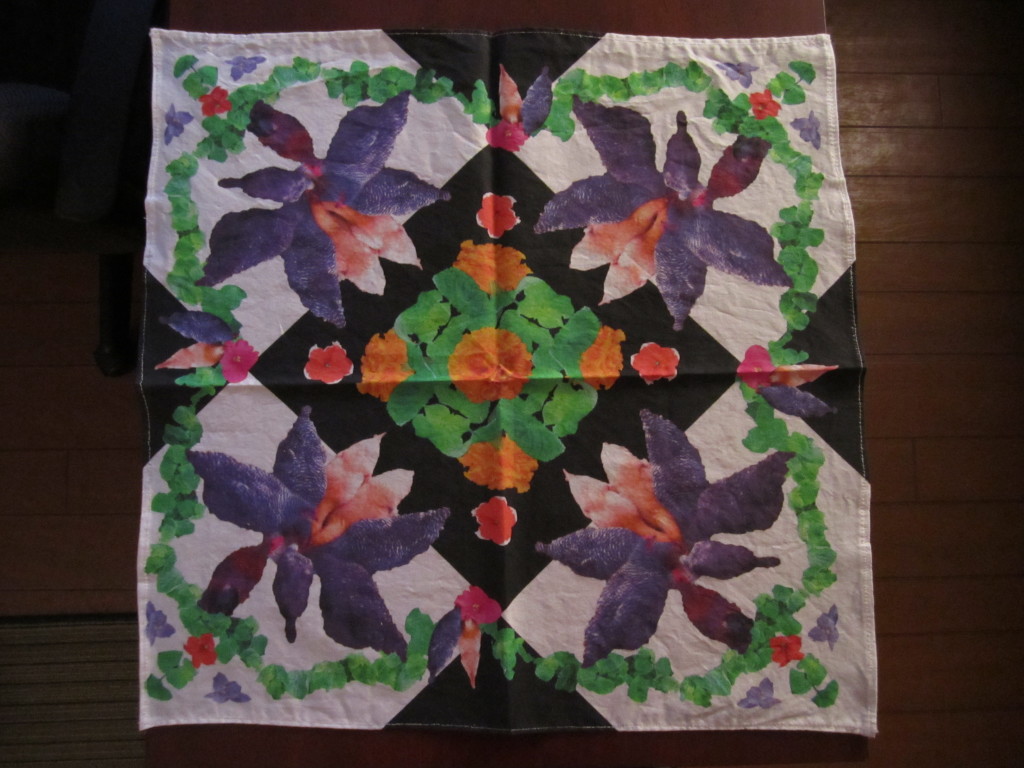
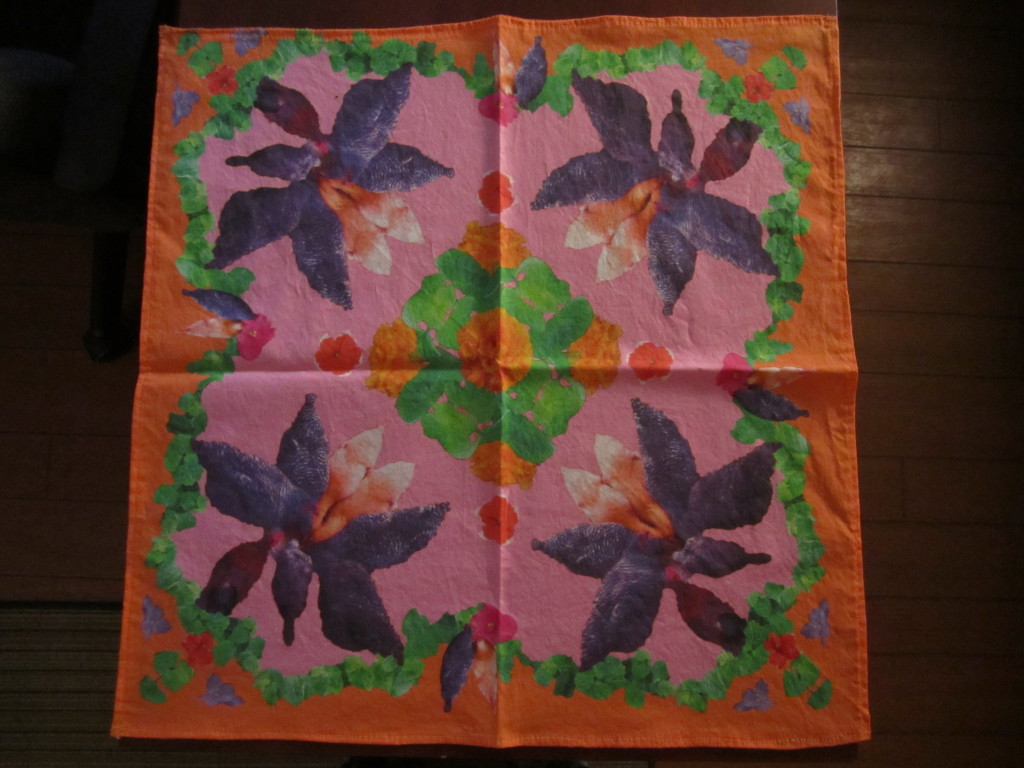
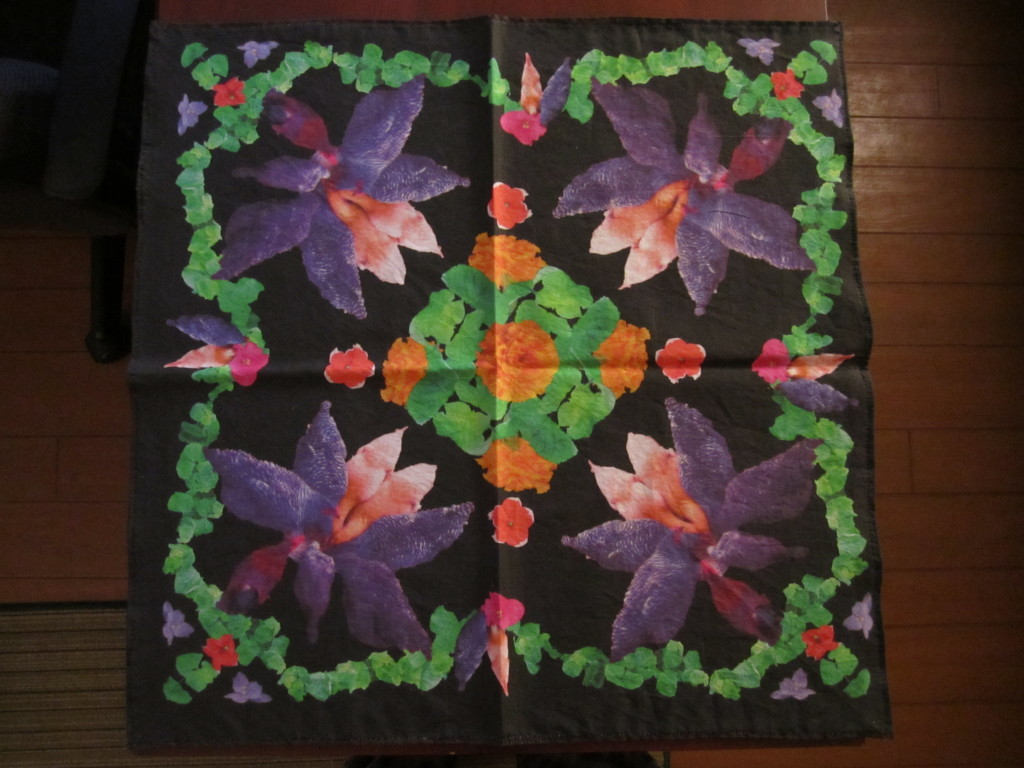
she completely designed these bandanas herself, using photographs she took of our chickens feeding and our chia growing. the images of the chickens make radial blossoms and the chia leaves form bright pathways of green. she also included images of violets, petunias, and marigolds.

they are 100% cotton, machine washable, and she even stitched the seams herself!

as georgia wrote: they are our very first farm-issue work bandanas… for sun and sweat and messes!

amazing!!! be sure to check out her other creations at 100% GDK.

you can see the radial "chicken" blossoms in each of the 4 corners.

you can see the radial “chicken” blossoms in each of the 4 corners.

if you look closely at the chickens, you can recognize roosty, the bantam rooster, eating with the standard sized barred rocks and buff orpington.

if you look closely at the chickens, you can recognize roosty, our bantam rooster, eating with the standard sized barred rocks and buff orpingtons.

this is the third of her three designs. she made two of each!

this is the third of her three designs. she made two of each!

.:.

Older posts Newer posts

© 2025 KW Homestead

Theme by Anders NorenUp ↑